
You have a reroofing job in Somerville, a gut renovation on the North Shore, or a window-replacement project in Worcester. Debris is piling up. Someone on the crew mentions a chute. You have never set one up before — or you have, but only once, and there were a few hiccups. Either way, the question is the same: what actually happens when you install a debris chute, start to finish?
This guide walks through every stage of the process — from site assessment the morning of the job, to hanging the first section, to striking the chute at the end of the day. It is written for Massachusetts contractors, roofers, and junk removal crews working in the range of conditions you will actually encounter here: tight three-deckers in Worcester, saltbox colonials on the South Shore, brownstones in Roxbury, and everything in between.
By the time you finish reading, you will know exactly what to prepare, what will go smoothly, what can catch new users off guard, and how to get the most out of a lightweight fabric trash chute on any Massachusetts job site.
Why Massachusetts Job Sites Demand a Specific Approach
Massachusetts is not a one-size-fits-all construction market. The building stock runs from 1700s colonial framing to 1980s vinyl-clad condos, and the lot lines are some of the tightest in the country. That matters for chute installation because the relationship between your upper anchor point, your dumpster, and your neighbors' property is rarely as simple as it looks on a spec sheet.
A few realities to keep in mind before you even pull the chute out of the box:
- Setbacks and sidewalk clearance: Boston, Cambridge, Somerville, and many Gateway Cities have requirements about how close a dumpster can be to a building face, a hydrant, or a crosswalk. Your chute angle depends on where the dumpster can legally sit.
- Neighboring structures: On densely packed streets, the chute needs to clear a fence, an HVAC condenser, or someone's back porch. Plan your hang point accordingly.
- Wind off the coast and the hills: North Shore and South Shore jobs can see sustained afternoon gusts, especially from October through April. A lightweight chute that is properly tensioned handles this fine; one that is loosely hung can swing and scatter debris.
- Winter conditions: Frozen shingles, icy scaffold rungs, and stiff fabric at 15°F are real. If you are working through a New England winter, check out our winter debris chute maintenance tips for cold-weather handling best practices.
Step One: Site Assessment Before You Unbox the Chute
The ten minutes you spend walking the site before setup will save you thirty minutes of re-rigging. Here is what to check:
Measure the Drop Height
Stand at the edge of the roof or window opening and estimate the vertical distance to the top of the dumpster. EasyChute sections come in 10 ft, 25 ft, and 50 ft lengths, and they connect with a 1.5 ft overlap, so your total working length is predictable. Add roughly 3 ft of clearance between the chute's lower opening and the dumpster rim so debris drops cleanly rather than jamming. Write the number down — you will need it when you decide which section combination to hang.
Identify the Anchor Points
EasyChute hangs from four woven loops using carabiners or quick-connects. Your anchor can be a scaffold rail, a window frame, a roof edge bracket, or any structural member rated for the load. On older Massachusetts triple-deckers, the porch rail framing is often not structural — always test your anchor before you trust it with a full section of debris. If you are unsure about structural integrity on a historic property, tie off to a ridge anchor or a scaffold system instead.
Confirm Dumpster Placement
The dumpster should sit directly below the lower end of the chute, as close to the building as local ordinances allow. Mark the spot with spray paint or chalk before the dumpster is dropped. Moving a full dumpster after the chute is hung is frustrating and time-consuming.
Step Two: Choosing the Right Section Length for the Job
One of the most common first-timer mistakes is under-ordering on chute length. Here is a quick reference for typical Massachusetts building types:
- Single-story roof (10–14 ft eave): One 10 ft heavy-duty section is usually sufficient, with a short drop from the lower opening to the dumpster.
- Two-story roof or second-floor window (18–24 ft): Two 10 ft sections connected, or one 25 ft section trimmed to hang angle. The 25 ft option is cleaner and faster to rig.
- Three-decker roof or third-floor window (28–36 ft): This is the classic Massachusetts scenario. One 25 ft section plus one 10 ft section gets you there, or a single 50 ft section if you plan to run debris from the top unit.
- Four-story commercial or mixed-use building (40–55 ft): One 50 ft section, or a 25 ft plus a 25 ft. For anything taller, stack sections — they connect to any height.
When in doubt, go a section longer. A chute that is slightly too long can be angled; a chute that is too short leaves you re-hanging mid-job. You can read more about section options and configuration in our full debris chute guide.
Step Three: Unpacking and Pre-Inspection
EasyChute sections are shipped in a compact box and fold down to a size that fits in a truck cab or a job site bin. Before you hang a section, do a quick visual inspection:
What to Check on a New Section
- Confirm all four hanging loops are intact and the stitching is tight at the attachment points.
- Unroll the section fully on the ground or the roof deck and check for any shipping creases that might restrict debris flow — these soften quickly in the sun or with a brief flex.
- Verify the carabiners or quick-connects you brought are rated and functional. Gate should snap shut cleanly with no play.
What to Check on a Reused Section
- Look at seam integrity along the full length. Coated poly fabric is durable, but heavy demo debris — especially sharp masonry chunks — can nick a seam over dozens of jobs.
- Check for any residue from prior jobs (old drywall mud, roofing cement) that might restrict the opening or clog a connection point between sections.
- Confirm the loops are not frayed where the carabiner rides.
The reusability of a lightweight fabric chute is one of its biggest economic advantages over single-use cardboard or rigid plastic chutes. That advantage only holds if you inspect and maintain between jobs. For more on what a fabric chute is and how it differs from other chute types, see our fabric trash chute overview.
Step Four: Hanging the First Section
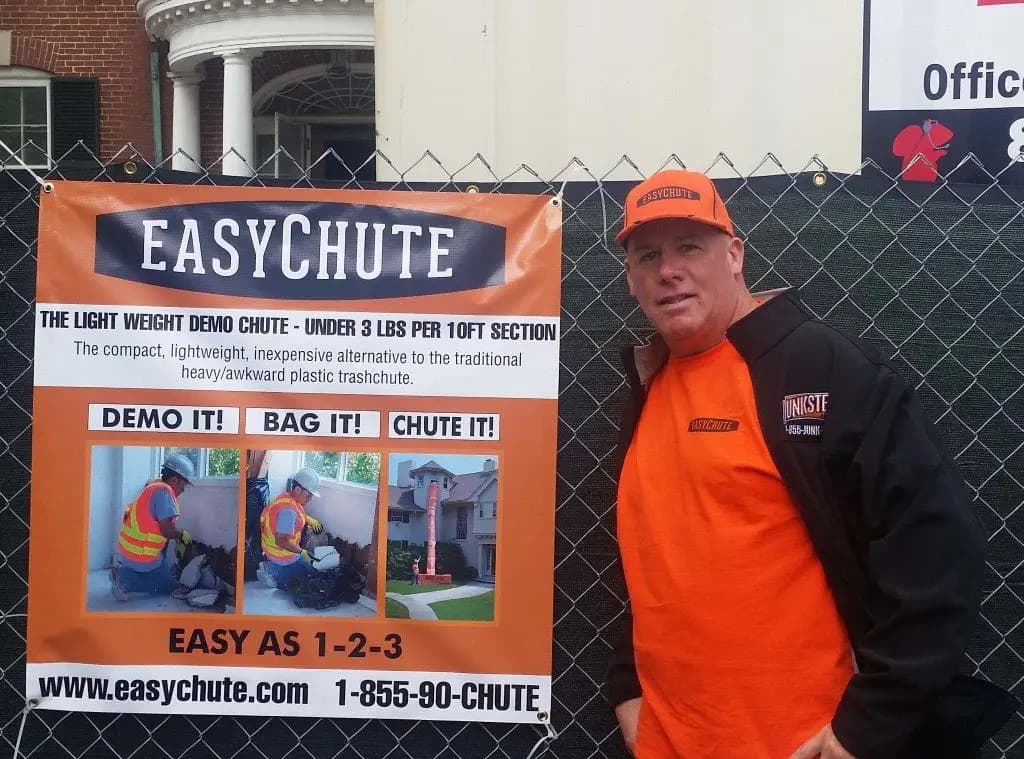
This is the moment most new users are nervous about. The reality: a 10 ft section weighs under 3 lbs, and a single person can carry it up a ladder and hang it in a few minutes. Here is the sequence:
- Position yourself at the anchor point — roof edge, scaffold, or window opening — with the chute coiled or folded over your shoulder or clipped to your belt.
- Attach the top two loops first. Clip the carabiner through the loop and through your anchor in one motion. Do not fully load the section until both top loops are attached.
- Let the section drop. It will unroll under its own weight. Keep your body back from the edge as it falls — debris or tools occasionally get caught in fabric folds.
- Attach the bottom two loops if you are connecting to a second section below, or leave them hanging free if this is your lowest section.
- Tension the chute by adjusting the anchor angle slightly toward vertical. A chute that hangs near-vertical has better flow and less swing in wind.
For a visual walkthrough, the EasyChute installation guide takes you through each step with photos. And if you want to see it happen in real time, the EasyChute video library has job-site footage of the setup process.
Step Five: Connecting Multiple Sections
When your drop is taller than a single section, you connect them with a 1.5 ft overlap — the bottom of the upper section slides inside the top of the lower section. This overlap is what prevents debris from escaping at the joint and keeps the chute's inner diameter consistent through the transition.
Common Connection Mistakes to Avoid
- Reversing the overlap direction: The upper section must feed into the lower section, not the other way around. If you reverse it, debris will catch on the edge of the lower section's opening and jam.
- Skipping the intermediate anchor: On a two-section hang that covers 20 ft or more, attach the lower section's top loops to a mid-height anchor (a scaffold rail, a window frame below the top floor). This distributes load and prevents the chute from pendulming in wind.
- Too much slack between sections: Keep the overlap snug. If the connection is loose, fine debris — drywall dust, shingle granules — can escape at the joint.
Multi-section installs are where the EasyChute design earns its reputation on Massachusetts high-rise and triple-decker jobs. Each section is independent and self-contained, so if one gets damaged you replace that section only, not the whole chute. For a comparison of how this stacks up against scaffold-integrated chute systems, see our debris chute vs scaffolding chute comparison.

Step Six: Safety Protocols During Active Use
Once the chute is hung, the job site safety picture changes. Debris is now moving vertically at speed, and anyone at ground level needs to know it. OSHA's Construction Industry safety standards require that falling-object hazards be controlled — a properly installed debris chute is one of the primary tools for doing that, but the chute itself does not eliminate all risk. Here is what to do:
Ground-Level Controls
- Establish a drop zone around the dumpster: a minimum 6 ft radius should be coned or taped off when debris is actively flowing.
- Post a spotter at ground level if the chute exit is not visible from the top floor. The spotter signals when the dumpster is full or when someone has entered the zone.
- Never leave the chute unattended with the top opening uncovered if there is foot traffic on the roof. A loose shingle or a wayward tool can go down the chute unintentionally.
Upper-Level Controls
- Load debris in controlled amounts — push or shovel into the opening, do not throw bulk loads from a standing position that puts you off-balance at the edge.
- Wear gloves. The edge of the chute opening can be rough when you are guiding debris in repeatedly.
- Keep the chute opening cleared of debris bridges (large flat pieces that span the opening and block flow). Drywall sheets and long boards need to be broken down before entering the chute.
OSHA's ergonomics guidelines at osha.gov/ergonomics note that repetitive lifting and carrying of heavy loads is a leading cause of construction worker injury. A debris chute reduces the number of trips a crew member makes carrying material down ladders or stairs — which is exactly the kind of ergonomic intervention that reduces injury rates on longer jobs.
Step Seven: Managing Debris Flow on a Massachusetts Job Site
The type of debris you are moving affects how you use the chute. Massachusetts renovation and roofing jobs produce a wide variety of material, and not all of it flows the same way:
Roofing Debris (Shingles, Underlayment, Ridge Cap)
Asphalt shingles flow well individually but can bridge if you push in a whole stack. Break bundles apart and feed shingles in at an angle. Granule dust is significant — make sure workers at the bottom are wearing eye protection and that the dumpster lid (if any) is open fully. For more on roofing-specific chute technique, see our roofing trash chute guide.
Interior Demo Debris (Drywall, Plaster, Lath)
Plaster from older Massachusetts homes is heavier than modern drywall and can hit the chute walls with more force. Use a heavy-duty 10 ft section for jobs with significant plaster volume. Break drywall sheets to 4-ft lengths or less before feeding — full 4x8 sheets can get stuck mid-chute, especially if the angle is not steep. Our demolition chute guide covers interior gut work in more detail.
Mixed Construction Debris
When a job produces a mix — framing lumber scraps, insulation batts, old windows, broken tile — sort as you go. Glass fragments and sharp metal should be wrapped before going into the chute. Never send intact window units down the chute; they need to be broken down or hand-carried. The EPA's C&D debris data shows that construction and demolition waste is one of the largest waste streams in the United States — sorting at the source improves recycling rates and can reduce disposal costs on Massachusetts jobs where dumpster fees are weight-based.
Step Eight: Monitoring the Chute During a Long Job Day
An installation check at setup is not enough. On a full-day job, check the chute at least twice — once mid-morning and once after lunch. Here is what to look for:
- Anchor integrity: Has the load shifted the carabiner position? Are the loops still seated properly on the anchor bar or rail?
- Section connections: On a multi-section hang, re-check that the overlaps are still tight. Vibration from debris flow can loosen them slightly over hours of use.
- Dumpster capacity: A chute that is delivering debris efficiently will fill a standard 10-yard dumpster faster than most crews expect. Have a plan for when the dumpster hits 80 percent capacity — continuing to dump into an overfull dumpster creates a hazard at ground level.
- Chute interior: If flow has slowed noticeably, check for a debris bridge mid-section. Clear it from the top by pushing a long board down the chute, never by reaching in from the side.
Step Nine: What Commercial Jobs Require That Residential Jobs Don't
Many Massachusetts contractors use the same chute on a range of job types — residential reroofing on Monday, commercial strip-out on Wednesday. The chute itself handles both, but the job-site protocols differ.
Commercial-Specific Requirements
- Permit documentation: Commercial GCs often require that any hanging equipment be documented as part of the site safety plan. Have the EasyChute product specs (weight rating, section dimensions, material spec) available to share with the site super.
- Fire watch considerations: On occupied commercial buildings in Massachusetts, any work that creates a falling-debris hazard near egress routes requires coordination with the building manager and sometimes with the local fire department. The chute reduces the debris spread area, which helps with this.
- End-of-day chute security: On multi-day commercial jobs, the chute should be removed at the end of each day if the building is occupied or if the site is not fully secured. Do not leave a hanging chute overnight unless the dumpster zone is fully fenced.
For a detailed look at how chute usage differs between commercial and residential projects in Massachusetts, see our commercial vs. residential debris chute comparison.
Step Ten: Striking the Chute at End of Day
Striking a debris chute is faster than hanging one. Here is the standard sequence:
- Clear the chute of any debris — do a final push of anything resting in the section from the top.
- Detach the lowest section first, working upward. This prevents the section above from dropping unexpectedly when you release the connection.
- Fold or roll each section as you go. The coated poly fabric folds cleanly and returns to a compact form without special technique.
- Inspect each section as you fold it — this is the fastest time to spot wear or damage because the section is in your hands and fully extended.
- Pack sections into their shipping box or a job bag. Keep carabiners with the section they are sized for to avoid mix-ups on the next job.
One person can strike a standard two-section hang in under ten minutes. That speed is part of why a lightweight fabric chute pays for itself quickly compared to renting rigid plastic or buying single-use alternatives job after job.
Common Mistakes Massachusetts Contractors Make on the First Install
Even experienced crews make a few of the same first-time errors. Here is the short list of what to watch for:
- Anchoring to a non-structural element: Porch rail balusters, vinyl trim fascia, and decorative corbels are not structural. Always anchor to framing, scaffold, or a rated anchor point.
- Placing the dumpster too far from the building: A chute hung at too shallow an angle has poor flow and tends to oscillate in wind. Keep the dumpster close to the building footprint, within permit limits.
- Not communicating the drop zone to the whole crew: Everyone on site — including subs and deliveries — needs to know not to walk under an active chute. This is a safety briefing item, not a posted-sign-only item.
- Skipping the mid-day check: See Step Eight above. On a busy demo job, the chute can develop a debris bridge or a loose connection point in a few hours of heavy use.
- Forgetting to account for the dumpster lid: Roll-off dumpsters often have a hinged metal lid on one end. The chute needs to clear or align with the open portion. Measure before you anchor.
For a broader breakdown of setup errors specific to the region, see our guide on debris chute setup mistakes — many of the same issues apply to Massachusetts urban job sites, particularly in dense neighborhoods.
Frequently Asked Questions
How long does it take to install a debris chute on a typical Massachusetts job site?
For a single-section hang (one 10 ft or 25 ft section), one person can complete the installation in 5 to 10 minutes once the anchor point and dumpster placement are confirmed. A two-section hang covering 30 to 40 ft typically takes 10 to 20 minutes for one person working from the top down. The setup time drops significantly after a crew has done it once — most repeat users report that the second and third installs go in roughly half the time of the first.
Do I need a permit to hang a debris chute in Massachusetts?
Massachusetts does not have a statewide permit requirement specifically for debris chutes, but local requirements vary. Boston, Cambridge, and Somerville have rules governing the placement of dumpsters and construction equipment in the public right-of-way, and some municipalities require a street-occupancy permit if the dumpster sits in the road. If your chute extends over or near a public sidewalk, check with your local building department or DPW before the job starts. Your GC or general liability carrier may also have documentation requirements.
Can one person hang and strike a debris chute safely on a Massachusetts job site?
Yes. A 10 ft EasyChute section weighs under 3 lbs and can be carried up a ladder and hung by a single worker without assistance. For multi-section installs, it helps to have a second person on the ground to manage the lower section while the first person attaches at the top, but it is not required. The main safety consideration for solo installation is working near a roof edge or open window — standard fall protection protocols apply regardless of how many people are on the crew.
What types of debris should not go through a fabric chute?
Avoid sending intact large glass panes, long un-cut rebar or pipe, full-length 2x4 lumber, or any hazardous material (asbestos-containing materials, lead paint chips in uncontained form) through the chute. Intact glass should be broken down and wrapped before disposal. Long framing members need to be cut to manageable lengths. Hazardous materials in Massachusetts are subject to MassDEP regulations and must be handled and disposed of separately from general C&D debris regardless of the removal method used.
How do I keep the chute from swinging in coastal Massachusetts winds?
The most effective fix is to hang the chute as close to vertical as your anchor and dumpster placement allow. A chute hung at a steep angle has less surface area exposed to lateral wind. For jobs on the North Shore or South Shore where afternoon gusts are common, add a mid-section anchor at a window frame or scaffold mid-rail. This dampens the pendulum effect. On particularly exposed jobs, reduce the chute's natural oscillation by keeping debris moving through it regularly rather than letting it sit empty and swinging between loads.
How many times can a fabric chute section be reused?
EasyChute sections are built from woven, coated poly fabric designed for multi-job reuse. With proper inspection and storage, crews report using individual sections across dozens of jobs without failure. The limiting factors are typically sharp debris abrasion on the seams, UV degradation from extended outdoor storage, and wear at the hanging loops from repeated carabiner loading. Inspect after every job and retire a section when seam integrity or loop stitching shows visible wear. Replacing a single section is far more cost-effective than buying an entirely new chute system.
Where can I get help choosing the right chute length for my Massachusetts project?
Start with the section length guide in this article, which covers the most common Massachusetts building types. For projects with unusual geometry — curved facades, multi-level setbacks, or historic structures with limited anchor options — the EasyChute team is available to help you configure the right setup. Visit our contact page or check the EasyChute FAQ for quick answers to common configuration questions. You can also review the canvas trash chute guide if you are comparing material types before ordering.
Ready to Set Up Your First Debris Chute on a Massachusetts Job Site?
The process is simpler than it looks from the outside, and faster than any alternative for getting debris off an upper floor safely and without killing your crew's momentum. EasyChute sections ship free to job sites across Massachusetts — from the South Shore to the Merrimack Valley, from Worcester to the Berkshires.
Start with the right section length for your building type, confirm your anchor and dumpster placement before you hang a single loop, and you will have a working chute in under fifteen minutes. That is time you get back on every subsequent job too, because these sections fold down and reuse across your whole season.
The step-by-step installation guide and the EasyChute video library are both free resources if you want to preview the process before your first job. And if you are comparing this approach to a scaffold-integrated chute system or a rented rigid chute, the chute comparison guide will give you a straight answer on when each option makes sense.
Questions about your specific job? Reach out to EasyChute — the team behind this product is made up of Massachusetts contractors who have run these chutes on the same kinds of jobs you are working. They will give you a straight answer, not a sales pitch. Learn more about how EasyChute got started on the About EasyChute page.