
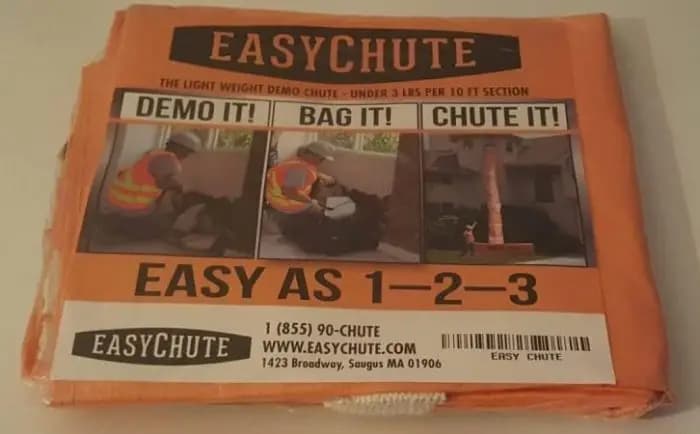
Connecticut winters are not gentle on job-site equipment. Between the freeze-thaw cycles rolling through the Farmington Valley, the salt spray that clings to coastal New Haven and Bridgeport sites, and the wet, heavy snow that loads up unguarded gear left on scaffolding overnight, your debris chute can take a serious beating before spring. The good news is that a fabric chute — when stored, inspected, and deployed correctly — is one of the most winter-resilient pieces of equipment on your truck. This checklist is designed to walk Connecticut contractors through every step, from pre-season inspection to mid-winter field care to end-of-winter storage, so your chute earns its keep on every cold-weather job.
Whether you're tearing off ice-dam-damaged shingles in Glastonbury, gutting a water-damaged interior in Waterbury, or handling a full gut renovation in New Haven's three-decker neighborhoods, the principles below apply. Let's get into it.
Why Winter Is the Hardest Season for Debris Chutes
Most contractors think about debris chute maintenance the way they think about their garden hose — when it freezes and cracks, they deal with it. That's a reactive approach that costs money and time. Winter creates a specific set of failure conditions that are worth understanding before you pull the chute out of the truck.
Freeze-Thaw Fabric Stress
Woven poly fabric expands and contracts with temperature swings. Connecticut routinely sees daytime highs in the 40s and overnight lows well below freezing between November and March. Every freeze-thaw cycle stresses stitched seams and the loops used for hanging. Over a season, unmanaged stress accumulates. Seam separations rarely happen all at once — they work their way open, stitch by stitch.
Ice Buildup in the Chute Barrel
Wet debris — saturated roofing felt, snow-laden shingles, soaked drywall — can partially freeze inside the chute barrel when temperatures drop sharply mid-job. A frozen blockage mid-section puts lateral stress on the overlap connections and can tear the attachment loops if the crew tries to shake the chute loose without warming it first.
Salt and Road Spray Contamination
Fabric chutes stored in open truck beds or trailers pick up road-salt aerosol throughout the winter. Salt is hygroscopic — it holds moisture against the fabric long after the spray dries, accelerating degradation of the coating and any metal hardware like carabiners and quick-connects.
The Pre-Season Inspection: Before the First Winter Job
Do this inspection in October or early November, before the ground freezes and before you're committed to a job timeline that doesn't allow for equipment issues. A well-lit garage floor or a covered bay at your shop is ideal.
Fabric and Seam Check
- Unroll each section fully on a flat surface. Look for fraying along every hemmed edge.
- Hold the fabric up to a strong work light. Pinholes and micro-tears catch light; find them now, not mid-job.
- Run your fingers along every stitched seam. A seam that feels loose or gritty (salt residue from last season) needs re-stitching or replacement before deployment.
- Check the reinforced patches around the hanging loops. These take the most stress and are where failures begin.
Loop and Hardware Inspection
- Tug each woven loop firmly in the direction it hangs. You're looking for any give at the attachment point where the loop stitches into the chute fabric.
- Open and close every carabiner or quick-connect. Cold aluminum can seize. If a gate doesn't snap cleanly, replace the hardware — a carabiner that won't close in 28-degree weather is a dropped-load hazard.
- Check for corrosion on any steel hardware. Surface rust on steel carabiners means the zinc coating is compromised. Swap for anodized aluminum or stainless.
Connection Overlap Test
For contractors running multiple sections — say a 25 ft and a 10 ft connected for a three-story colonial gut — verify the overlap fit before the season starts. Fabric that has been stored compressed can develop a crease memory that prevents a clean 1.5-foot overlap seal. Shake out each section and test the connection on a warm day when the fabric is pliable.
For a detailed visual walkthrough of the connection and hang process, see the step-by-step EasyChute installation guide — it covers carabiner placement and overlap technique that applies year-round.
Cold-Weather Deployment: Setting Up the Chute on a Winter Job Site
Hanging a debris chute in January is different from hanging one in July. The fabric is stiffer, the hardware is colder, and your crew is working in gloves. Building cold-weather deployment habits into your crew's SOP prevents the small fumbles that lead to bigger problems.
Warm the Fabric Before Unrolling
If your chute has been stored in a vehicle overnight in sub-freezing temperatures, bring it inside — even a heated cab for 20-30 minutes — before unrolling. Cold-stiffened fabric fights you on every fold and makes it harder to verify the overlap is seated correctly. A brief warm-up costs almost nothing and makes the hang faster.
Glove-Compatible Hardware Setup
- Use carabiners with oversized gates that can be operated with work gloves on. Screw-lock carabiners with knurled barrels are difficult in heavy gloves — switch to twist-lock or auto-lock models with larger handles.
- Pre-rig the loops with carabiners before climbing. Clip each carabiner to its loop at ground level, then clip to the anchor point at height. One-handed clipping at the top of a ladder in gloves is how hardware gets dropped.
- Inspect anchor points (window frames, scaffold rails, roof edge brackets) for ice accumulation before trusting them. Ice on a scaffold rail changes the load contact point and can let a chute shift laterally under debris load.
Wind Management in Winter
Connecticut coastal jobs — Milford, Old Saybrook, Groton — see sustained winter winds that can swing a suspended chute and deposit debris outside the dumpster. On high-wind days, run a light guide rope or bungee tether mid-chute to control swing. This is especially important on roofing tear-offs where shingle debris catches air. The complete guide to roofing trash chutes covers anchor and guide-rope technique in more detail.
Mid-Job Winter Maintenance: What to Watch During Active Use
Once the chute is hung and debris is moving, your crew's job isn't done. Winter creates on-the-fly maintenance needs that don't show up in warmer months.
Monitor for Ice Buildup Mid-Section
Wet debris in freezing conditions can bridge across the chute interior, especially at connection overlaps where the inner diameter narrows slightly. Signs of a partial ice blockage include: debris slowing at a specific section, unusual lateral sway, and a dull thud rather than a clean rushing sound. If you suspect a blockage:
- Stop feeding debris immediately.
- Tap the exterior of the chute section with a gloved hand to break surface ice.
- If the blockage persists, disconnect and lower that section to ground level before attempting to clear.
- Never shake a connected chute from above — the downward jerk load on the hanging loops is severe.
Check Connections at Every Break
Thermal contraction in sub-freezing temperatures can cause the fabric at connection overlaps to stiffen and subtly pull apart — especially on longer runs with three or more connected sections. During every significant work break, have one crew member do a visual check at each connection point from ground level. A shifted overlap means debris is bypassing the lower section, which is a mess and a safety event.
Debris Load Discipline in Cold Weather
Heavy, wet debris — saturated insulation, ice-backed shingles, frozen soil — weighs significantly more than dry material of the same volume. Train your crew to feed smaller loads in winter and never dump full wheelbarrow loads into a chute in a single motion. Consistent, moderated feeding prevents shock loading on the anchor loops. OSHA's construction industry safety standards address proper load management at height — debris chute discipline is part of that picture.
Post-Job Breakdown: Striking the Chute in Cold Weather
Striking the chute after a winter job has a few extra steps compared to a summer teardown. Taking five extra minutes at breakdown protects the equipment for the next job.
Clear Debris from the Chute Interior Before Lowering
Loose debris — grit, shingle granules, blown-in snow — that sits in the lower section can freeze solid overnight if the chute is stored without being cleaned. Shake each section as you lower and disconnect it. A quick tap against the side of the dumpster (holding it by the loop, not swinging it overhead) clears most residual material.
Dry Before Rolling
This is the step most crews skip, and it's the one that causes the most off-season damage. Rolling a wet fabric section tight traps moisture against the coated interior, which, over several freeze-thaw cycles, degrades the coating and can create mildew that weakens the weave. On a cold day, lay each section flat against a heated wall or truck bed liner for 10-15 minutes before rolling. Dry storage is non-negotiable.
Rinse Salt Contamination Weekly
If your job sites are on salted roads or near coastal areas, rinse each section with clean water before storage at least once per week during the winter season. Salt left to sit draws moisture and attacks both the fabric coating and any metal hardware stored with the sections.
Connecticut-Specific Job-Site Conditions to Plan For
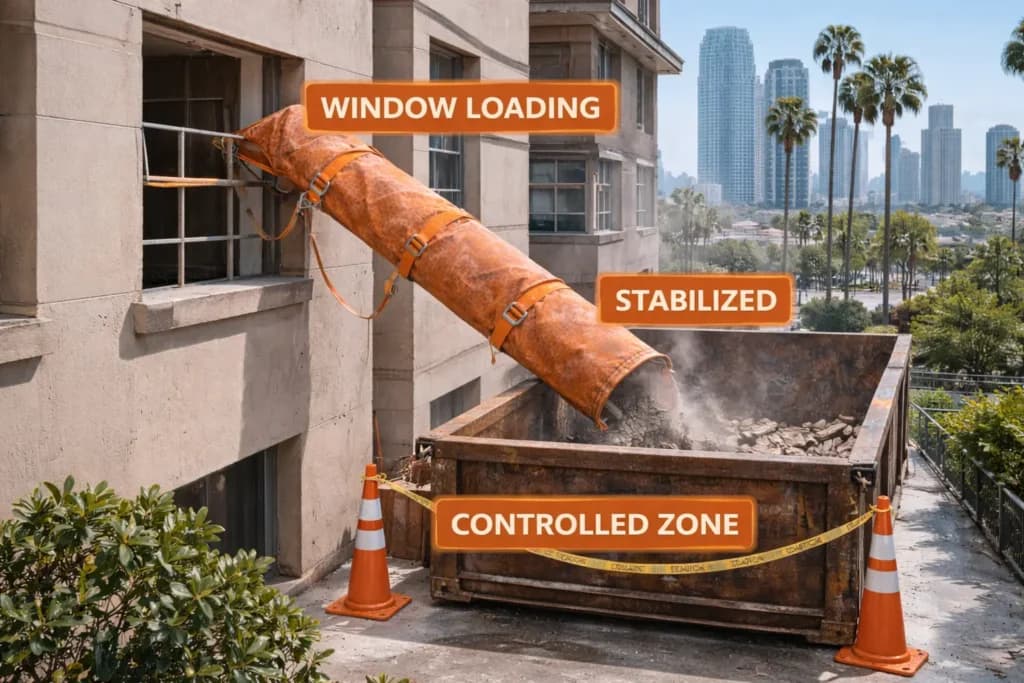
Connecticut's geography creates micro-climates that affect job-site conditions significantly. What works in Litchfield County doesn't automatically work in New London County. Understanding your local conditions helps you prepare the right setup.
Hartford and Central Connecticut: Heavy Snow Load
Central Connecticut averages 40-plus inches of snow per season, and wet, heavy nor'easter snow can accumulate on an exposed chute between debris loads. If your chute is hanging overnight between job days, cover the top entry point with a secured tarp or construction bag to prevent snow accumulation inside the barrel. Snow packed into the upper section adds dead weight and can overload the anchor loops when debris feeding resumes.
Coastal Connecticut: Salt and Wind
New Haven, Bridgeport, Norwalk, and New London job sites face salt-laden wind year-round, but winter is the worst. Hardware rinse intervals should be shortened to every two or three jobs at coastal sites. Anodized aluminum carabiners outperform galvanized steel in salt environments. For multi-story coastal jobs, the guide-rope technique mentioned above is almost always warranted.
Northwest Hills: Extreme Cold
Litchfield County and the Berkshire foothills regularly see overnight lows in the single digits. In these conditions, never store your chute in an unheated outbuilding between job days. A fabric section that has been frozen stiff and then unrolled without warming can crack coating at fold points. A heated storage space — even a cargo van with a small cab heater — is worth the investment.
For contractors working across state lines, the core techniques here are identical to what we cover in the New Britain, CT debris chute setup guide — same climate, same discipline requirements.
Storage Between Winter Jobs: The Weekly Reset
Between winter jobs, storage discipline determines how long your chute lasts and how quickly your crew can mobilize on the next call. A well-organized storage routine takes under ten minutes and prevents the most common winter equipment failures.
The Weekly Storage Checklist
- Unroll and air each section for at least 15 minutes in a warmed space before re-rolling for storage.
- Inspect loops and seams under good lighting every week during active winter season use.
- Rinse and dry all hardware — carabiners, quick-connects, any guide-rope clips — before storing with the fabric sections.
- Store flat or loosely rolled, never compressed under other equipment. Compression creases the coating and creates weak fold lines.
- Keep above freezing. A heated cargo van, a conditioned storage room at your shop, or a climate-controlled unit is the right home for your chute between jobs.
- Log any damage found during inspection in a simple notebook or phone note so you can address it before the next job, not at job startup.
The EasyChute FAQ covers common storage questions, including how to handle sections of different lengths in the same storage space.
Hardware Maintenance: Carabiners and Quick-Connects in Winter
Your chute is only as reliable as the hardware holding it up. Carabiners and quick-connects are inexpensive individually, but a hardware failure mid-job can result in a dropped load — and that's a worker safety event, not just a mess. OSHA ergonomics guidelines highlight that improper handling of heavy or falling loads is a leading source of construction-site injuries — secure hardware is part of that picture.
Carabiner Winter Care Protocol
- Inspect the gate spring tension before every winter job. Cold weather stiffens springs; a gate that doesn't snap closed automatically should be replaced.
- Dry carabiners completely after any wet or snowy deployment. Moisture trapped inside the gate mechanism freezes and prevents the gate from seating.
- Apply a light coat of silicone-based lubricant (not petroleum-based, which degrades rubber gaskets) to the gate hinge once per month during winter use.
- Replace any carabiner showing gate-body play — a loose gate means the locking mechanism is worn and load capacity is compromised.
Quick-Connect Maintenance
Quick-connect buckles on fabric chute loops are convenient for fast deployment, but the plastic components in most quick-connects become brittle in sustained sub-freezing temperatures. For work in temperatures below 20°F, replace plastic quick-connects with aluminum carabiners for that job. The extra clip time at setup is worth the reliability.
When to Retire a Chute Section: Decision Framework
No chute lasts forever. A lightweight, reusable fabric chute is designed for many seasons of use, but repeated winter stress cycles will eventually push a section to the end of its safe service life. Here's how to make the retirement call without guessing.
Retire a Section Immediately If You Find:
- A loop attachment that has pulled more than 25% away from the fabric body (stitching visible, seam gap opening).
- A tear longer than 3 inches anywhere on the barrel, regardless of whether it appears to affect function.
- Coating delamination over more than 20% of the interior surface area — delaminated coating means reduced flow and debris catch points that can trigger blockages.
- A carabiner that has been shock-loaded (dropped while clipped to the chute under load). Shock-loaded hardware may appear undamaged but has reduced rated strength.
Schedule for Replacement If You Find:
- Minor fraying along hems (less than 1 inch deep) that is spreading season over season.
- Seam stitching that shows gapping but is still holding — repair or replace before next season.
- A section that consistently stiffens in cold weather even after warming, suggesting coating degradation at the fold lines.
See the modular trash chute kit cost breakdown to understand the economics of replacing individual sections versus full kit replacement — in most cases, replacing one or two sections mid-life is far more cost-effective than full replacement.
Safety Considerations for Winter Chute Use Under Connecticut Conditions
Winter debris chute use introduces fall and drop hazards that are less common in summer. A solid pre-job safety briefing should cover the specific risks of cold-weather deployment.
Ice on Anchor Points and Work Surfaces
Black ice on scaffold planks, iced-over roof edges, and frost on window sills where the chute hangs are all elevated hazards in Connecticut winters. Require crew to chip or salt anchor-point surfaces before rigging. No one should be working at height on an iced surface — this is non-negotiable regardless of job pressure.
Layered Clothing and Tool Handling
Heavy winter layering reduces dexterity. Carabiner clips, loop adjustments, and debris load moderation all require fine motor control. Test your hardware setup with the gloves your crew will actually wear on the job — if it can't be done cleanly in those gloves, adjust the hardware selection before the job starts.
Dumpster Zone Management
In winter, bystanders and crew members are less likely to notice overhead hazards because heads are down against cold and wind. Expand the dumpster exclusion zone by 20-30% in winter and use brighter barrier tape — snow cover makes standard orange tape harder to see from a distance. The contractor safety guide for job sites with bystanders present covers exclusion zone setup that applies directly to Connecticut winter conditions as well.
The EPA's construction and demolition debris data makes clear that C&D waste volumes remain high year-round — winter jobs are not smaller jobs, and the debris management discipline needs to match.
Chute Selection for Connecticut Winter Jobs: Which Section Length Is Right?
The right chute configuration for a winter job depends on building height, debris type, and crew size. Connecticut's housing stock — heavily colonial, cape, and three-decker — has its own sizing patterns.
Single-Story Additions and Rooflines: 10 ft Section
A single 10 ft section handles most single-story roof tear-offs and garage additions. At under 3 lbs, one person can hang and strike it solo, which matters when your crew is short-staffed or working under time pressure on a cold day. The lite-duty 10 ft is fine for light roofing debris; move to heavy-duty if you're dropping plaster, masonry, or heavy tile.
Two- and Three-Story Colonials: 25 ft Section or 10+10
Connecticut's colonial and cape stock typically puts the roof deck at 20-28 feet above grade. A 25 ft section reaches most of these cleanly, with some slack for angle adjustment. Two connected 10 ft sections work just as well and offer more flexibility if you're splitting the chute between two jobs simultaneously.
Three-Deckers, Four-Stories, and Commercial: 50 ft or Mixed
Bridgeport and New Haven have significant three-decker and four-story commercial stock. A 50 ft section, or a mixed 25+25 or 50+10 run, handles these jobs. In winter, longer runs mean more connection points to monitor for ice buildup — plan for a mid-job connection check on any run over 30 feet.
The complete debris chute guide has a full height-to-section-length reference table that helps you spec the right configuration before the job starts.
Comparing Fabric Chutes to Hard-Shell Alternatives in Connecticut Winters
Some contractors in Connecticut still rent rigid plastic or fiberglass sectional chutes, especially for larger commercial demo jobs. Understanding the tradeoffs helps you make the right call for each job type.
- Weight in winter: Hard-shell sections run 20-40 lbs each. Hauling rigid sections up an icy ladder or scaffold is a real fall risk. A fabric section under 3 lbs changes the physics of that task entirely.
- Storage: Rigid sections require a trailer or dedicated rack space. Fabric sections fold into a box that fits behind the truck seat — no overnight trailer exposure to Connecticut cold.
- Cold-weather performance: Rigid plastic becomes brittle at sustained low temperatures and can crack under debris impact load. Woven poly fabric flexes with temperature change rather than fracturing.
- Cost: Rental fees for rigid chutes add up over a winter season. A purchased fabric chute set amortizes across every job. See the 2026 contractor comparison of debris chutes vs. poly chutes for a full side-by-side breakdown.
For more on material and construction differences, the fabric trash chute explainer and the canvas trash chute guide cover how woven materials behave under different job-site conditions.
End-of-Winter Deep Clean: The March Reset
When the Connecticut construction season transitions out of winter — typically late March to early April — do a thorough end-of-winter reset on every section you ran through the cold months. This sets you up for a productive spring season and catches any cumulative damage before it becomes a mid-job failure.
End-of-Winter Cleaning Protocol
- Rinse every section with a garden hose or pressure washer on low setting. Focus on seams, loops, and the first 2 feet of each barrel end where debris accumulates.
- Wash with a mild detergent (dish soap is fine). Avoid bleach — it degrades poly coatings over time.
- Hang sections vertically to dry fully — 24 hours minimum in mild weather. Never machine dry.
- Inspect all hardware once dry. Replace anything showing corrosion, fatigue, or spring weakness.
- Log total job count for each section since purchase. Heavy-use sections (20-plus winter jobs) warrant closer structural scrutiny before spring roofing season.
- Roll loosely and store in a cool, dry location — a shelf in a climate-controlled shop is ideal.
EasyChute sections are designed for repeated reuse across multiple seasons. Treating the end-of-winter reset as a standard operating procedure — not an optional task — is what separates contractors who get five or more seasons out of a section from those who replace equipment annually.
Frequently Asked Questions
Can I leave my fabric debris chute hanging on a Connecticut job site overnight in winter?
In general, yes — but with preparation. Cover the top entry with a secured tarp or contractor bag to prevent snow and ice accumulation inside the barrel. If temperatures will drop below 20°F overnight, remove the chute and store it in a heated space. The main risk of overnight exposure is not fabric damage but ice accumulation that adds unexpected load to the anchor loops when work resumes in the morning. A two-minute cover-up at end of day prevents that problem entirely.
How does cold weather affect the carabiners and quick-connects on a debris chute?
Cold temperatures stiffen carabiner gate springs and can make plastic quick-connect buckles brittle. Below 20°F, plastic buckles should be swapped for aluminum carabiners. Gate springs on aluminum carabiners should be tested before every winter job — a gate that doesn't snap fully closed in the cold is a load-security risk. A monthly application of silicone lubricant to the gate hinge keeps springs functioning through Connecticut winters.
What is the safest way to clear a debris blockage in a frozen chute section?
Stop feeding debris immediately. Tap the outside of the affected section with a gloved hand to break surface ice. If the blockage doesn't clear, disconnect the section at both overlaps and lower it to ground level before attempting to clear the interior — never shake a connected chute from above under load. Once at ground level, allow the section to warm slightly before clearing debris by hand. Forcing a frozen blockage from above risks tearing the attachment loops away from the fabric.
How often should I inspect my debris chute during a Connecticut winter season?
Inspect each section before every job and do a quick visual mid-job on any run over 30 feet. Do a more thorough inspection — fabric, seams, loops, and hardware — once per week during active winter use. At the end of the season, complete the full deep-clean and structural inspection protocol before storing for spring. A five-minute pre-job inspection catches the small issues before they become mid-job failures.
Do I need a longer chute section for winter jobs because of snow buildup?
Not necessarily, but snow on the ground can raise the effective grade at the base of your chute and reduce the clearance between the chute exit and the dumpster opening. Check this measurement at job setup after any significant snowfall. If snow has built up around the dumpster, clear it before hanging the chute. Your section length selection should be based on building height — just verify the exit clearance is sufficient before the first debris load goes in.
What Connecticut job types see the most winter debris chute use?
Ice-dam remediation and shingle tear-offs drive the most winter chute jobs in Connecticut, particularly in Hartford County and the Litchfield Hills where snow loads are heaviest. Interior gut renovations on three-deckers in Bridgeport and New Haven also run year-round. Roofing contractors handling winter insurance claims find a fabric chute essential because they need fast, one-person setup without waiting for rental delivery.
Is the EasyChute fabric rated for winter use in sub-freezing temperatures?
Yes. The woven, coated poly fabric used in EasyChute sections remains flexible in cold weather and does not become brittle the way rigid plastic chutes can. The key maintenance requirement in sub-freezing conditions is warming the fabric before unrolling after overnight cold storage, which prevents coating stress at fold points. With proper storage and handling, the fabric performs reliably through Connecticut winter conditions. The fabric trash chute guide covers material specifications in detail.
Get Your Chute Winter-Ready Before the Next Connecticut Job
A debris chute that fails mid-job in January costs you far more than the inspection time it would have taken to prevent it. Whether you're working through Hartford's colonial neighborhoods, coastal New Haven, or the Litchfield Hills, the checklist above gives you a repeatable system to protect your equipment, protect your crew, and keep debris moving safely from any height to the dumpster below.
EasyChute sections ship free to job sites across Connecticut. If you're speccing a winter job right now or replacing a section that didn't survive last season, reach out through the contact page — or review the full product range on the EasyChute services page to find the section length and duty rating that fits your next job.
Demo it. Bag it. Chute it.