
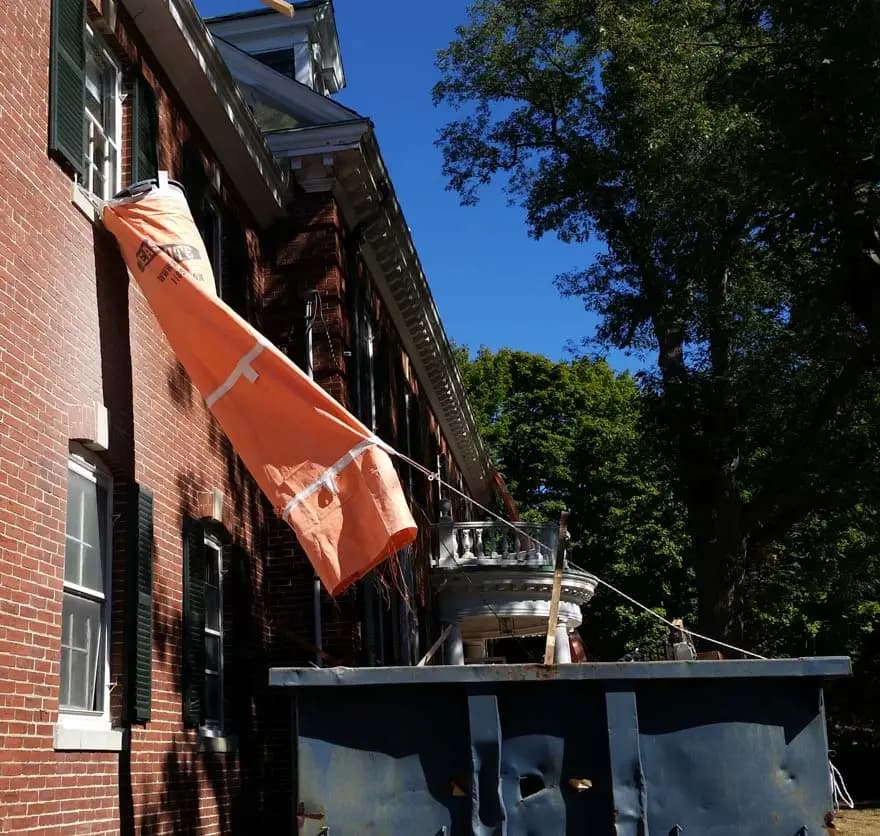
New Britain contractors, roofers, and junk removal crews deal with a very specific kind of job-site reality: multi-story triple-deckers, tight urban lots, busy neighborhood streets, and a city that moves fast. Whether you're tearing off a roof on Myrtle Street, gutting a colonial near Walnut Hill Park, or doing a full interior demo in the South End, moving debris by hand down stairways is slow, dangerous, and expensive.
That's exactly where a fabric debris chute changes the game. But if you've never set one up on a real job site, you probably have questions: How long does it take? What hardware do I actually need? What can go wrong? This guide walks you through the entire process — from pulling the chute out of the box to dropping the last load into the dumpster — so you show up on your New Britain job site ready to work.
Why New Britain Job Sites Specifically Benefit from Debris Chutes
New Britain is a dense, working-class city with a lot of older housing stock. Two- and three-story wood-frame homes built in the early 1900s line the neighborhoods north and south of downtown. That means renovation contractors are regularly working at the second- or third-floor level, sometimes with no elevator access, often with neighbors close on both sides.
Without a chute, the typical workflow is: bag debris, carry it down one or two flights of stairs, walk it through the house or building, and load it into a dumpster out front. Multiply that by 40 or 50 trips on a gut-renovation day, and you've burned hours of labor, created a slip-and-fall liability through the stairwell, and beat up the floors and walls you're trying to protect.
A debris chute solves all three problems at once — it gets material from the upper floor to the dumpster in seconds, keeps your staircase clear, and costs a fraction of the labor you save.
The New Britain Permit Landscape
You don't typically need a separate permit just to hang a fabric chute from a window or roof edge for a private residential renovation in New Britain. Your existing building or demolition permit usually covers it. That said, if your dumpster is on a city street and the chute extends over a public sidewalk, check with the City of New Britain public works department about whether a sidewalk closure or encroachment permit applies. When in doubt, call before you hang.
Understanding Your Chute Options Before You Order
EasyChute sections come in three lengths: 10 ft, 25 ft, and 50 ft. Sections connect with a 1.5 ft overlap, and you can chain as many together as your building height requires. Understanding which combination fits a New Britain job site takes about two minutes of planning.
Measuring Drop Height the Right Way
Stand at the window or roof edge where the chute will hang. Measure straight down to the top of the open dumpster — not to the ground. Add 2 to 3 feet of buffer so the bottom of the chute sits just inside the dumpster lip. That's your target chute length.
- 10 ft section: Ideal for a first-floor window directly above a ground-level dumpster, or as a top-section extension when your primary chute runs a little short.
- 25 ft section: The workhorse for most New Britain two- and three-story homes. A single 25 ft section reaches from a third-floor window down to a dumpster on the street.
- 50 ft section: Best for four- and five-story buildings, commercial structures, or stacked scaffolding setups. Can be paired with a 10 ft or 25 ft section for taller drops.
Read the full breakdown in the contractor guide to choosing chute length — the math applies regardless of your city.
Tools and Hardware You Need On-Site
One of the reasons EasyChute is popular with New Britain crews is that the setup requires almost nothing beyond what's already on the truck. Each section hangs from four woven loops at the top. You'll need something to attach those loops to the building — and that's about it.
The Short Hardware List
- Carabiners or quick-connects: Clip into the four woven loops and around a structural anchor. Screw-gate carabiners from any hardware store work fine.
- Anchor points: A window frame bracket, a roof edge hook, a scaffold railing, or a temporary horizontal board lag-screwed across a window opening. On most New Britain frame homes, a 2x4 or 2x6 wedged across the window opening and secured with framing screws is the fastest approach.
- Work gloves: The poly fabric is durable, but debris edges can be sharp.
- A partner for first-time setups: One person manages the top loops; one person in the dumpster or at ground level guides the bottom section into position. After your first setup, a solo hang is straightforward.
No specialized scaffolding, no welded brackets, no licensed rigging — that's a meaningful advantage on fast-moving residential jobs.
Step-by-Step: The Actual Setup Process
Here's what the setup actually looks like on a New Britain job site, from the moment the chute comes out of the box to the moment the first load drops. You can also watch this in real time at the EasyChute video page.
Step 1 — Position the Dumpster
Before anything goes up, your dumpster needs to be directly below the chute exit point. Pull it as close to the building foundation as the truck can deliver it. The tighter the horizontal distance, the less the chute needs to angle away from the building face. On tight New Britain lots, sometimes the dumpster sits in a driveway; if it does, confirm there's clearance below the chute path before you hang.
Step 2 — Set Your Anchor
Choose the window or roof edge closest to your drop zone. For window hangs on a wood-frame home, wedge a 2x4 horizontally across the inside of the rough opening and secure it to the jack studs with screws or structural strapping. The four carabiners attach to this board. For roof-edge hangs, hook over the fascia board or use a purpose-built roof bracket. The anchor only needs to handle the weight of the chute plus the brief impact load of debris passing through — fabric chutes are light enough that a well-secured 2x4 handles this easily.
Step 3 — Attach the Top Section
Unfold the top chute section. Clip the four loop carabiners to the anchor. Let the fabric hang freely. At this point the chute is already doing most of the work — the fabric's own weight keeps it taut and centered. See the full illustrated walkthrough in the EasyChute installation guide.
Step 4 — Connect Additional Sections
If your drop requires multiple sections, slide the top of the next section up inside the bottom of the first section to create the 1.5 ft overlap. You don't need clamps or fasteners — the overlap and gravity hold the connection. Debris traveling through the chute presses the sections together rather than apart. Connect as many sections as your height requires, letting each section drop as you work down.
Step 5 — Position the Bottom End Over the Dumpster
The bottom of the lowest section should hang approximately 6 to 12 inches above the dumpster floor or just inside the dumpster lip. If the chute bottom swings freely, you can tie a simple guide line from the bottom loop to a dumpster handle to keep it aimed correctly in the wind.
Step 6 — Load Debris In
Debris goes in the top. Chunks of drywall, roofing shingles, lumber scraps, and bagged material all move through cleanly. The coated poly interior is slick enough that most material flows without clogging. Break down oversized pieces before loading — nothing wider than the 22-inch diameter should enter the chute top.
What the Workflow Looks Like Mid-Job
Once the chute is up, it just runs. Your crew works normally — demoing, roofing, or hauling — and every load goes straight to the chute instead of down the staircase. The time savings compound across a full workday.
Maintaining Flow: What to Watch For
- Oversized material: Break drywall sheets into halves before chuting. Long boards go in at an angle — end first — and usually travel without binding.
- Heavy loads: Concrete chunks, tile, and brick should be chuted in smaller batches, not dumped all at once. Spreading out heavy material protects the dumpster bottom and avoids impact stress on the connections.
- Wet material: Waterlogged insulation or wet drywall can slow flow. Use gloves and push wet material through in manageable amounts.
- Wind: On exposed roof setups, check that the upper anchor is secure and consider a guide rope at the bottom if the chute is swinging more than a few inches off-center.
Keeping Bystanders Clear
On a public-facing New Britain lot, it's good practice — and a basic OSHA construction safety principle — to keep the zone directly below the chute exit clear of pedestrian traffic while loading is active. If your dumpster is beside a sidewalk, designate a crew member to watch the perimeter or use cones and safety tape to mark the area during active chuting periods.
Common Setup Mistakes and How to Avoid Them
Even experienced crews make a few recurring mistakes when setting up a debris chute for the first time. Knowing these ahead of time means your New Britain setup goes smoothly from the jump.
- Anchoring to a non-structural surface: Hooking carabiners to vinyl trim, a rotten fascia board, or a loose gutter mount is a setup failure waiting to happen. Always anchor to framing or a purpose-built bracket.
- Underestimating the drop: Measure twice. If your chute runs 3 feet short, the bottom sits above the dumpster and debris kicks out sideways at the bottom. Order an extra 10 ft section when in doubt — it's better to have excess than a short rig.
- No dumpster alignment: A chute that dumps to the side of the dumpster wastes time and creates a mess. Get the dumpster positioned before you hang, not after.
- Skipping the guide rope in wind: New Britain in the fall and winter gets real wind. A swinging chute bottom can miss the dumpster entirely. A 10-second guide-rope fix prevents this completely.
- Not briefing the whole crew: If the crew inside doesn't know the chute is hung below the window, someone can accidentally drop debris outside the chute opening. A 30-second toolbox talk before loading starts is all it takes.
How Long Does Setup Actually Take?
On the first setup of a new chute, plan for 15 to 20 minutes. That includes unboxing, measuring, rigging the anchor, and connecting sections. By the second or third job, most crews have this down to 8 to 12 minutes. Striking the chute — disconnecting and folding it for storage — takes 5 to 8 minutes. The time investment is genuinely minimal compared to the hours of stair-hauling it replaces.
One-Person Setup: Is It Realistic?
For most single-section setups (one 10 ft or 25 ft section), yes — one person can hang and strike the chute solo. For multi-section setups above 35 ft, a second pair of hands makes it significantly easier, especially when lowering the bottom sections into dumpster alignment. For roofing applications, review the detailed single- and multi-person setup options in the roofing trash chute guide.
Roofing Tear-Offs in New Britain: A Specific Use Case
Shingle tear-offs are one of the highest-volume debris scenarios on any job site. A full roof tear-off on a standard New Britain colonial generates a lot of material in a short window. Without a chute, shingles go off the roof edge and scatter — creating a mess, a safety hazard on the ground, and extra cleanup time. With a chute, they drop directly into the dumpster in a controlled stream.
For roofing applications, the chute typically hangs from a roof-edge hook or a ladder standoff bracket. The 25 ft section handles most two-story colonial drops; the 50 ft section covers taller structures or steep-lot setups where the dumpster sits lower than the foundation grade. Learn more about roofing-specific configurations in the roofing trash chute complete guide.
Shingle Weight and Chute Performance
Standard 3-tab and architectural shingles move through the EasyChute fabric without issue. Layered tear-offs — where there are two or three shingle layers — should be broken apart before loading to prevent bunching at the top of the chute. The coated poly interior handles the abrasion of asphalt shingles well, which is one reason roofers reuse the same chute across dozens of jobs.
Interior Demo Setups: Working Through a Window
For gut renovations and interior demo work — the kind common in New Britain's older triple-deckers and commercial buildings — the chute typically exits through a window opening. The window frame itself provides a natural funnel, and the 22-inch diameter of the chute fits cleanly through a standard window rough opening.
If you're working in a building where you can't remove the window sash, prop it fully open and guide the chute over the sill. Use a folded piece of cardboard or plywood to protect the sill from abrasion as debris passes. For full gut-renovation work, this is also where having a second person inside to manage the flow rate makes a real difference in throughput.
For a deeper look at this type of workflow, the demolition chute guide for interior gut work covers the full range of configurations for selective and full-demo projects.
Reusability: What You Get After the Job
Unlike single-use poly sheeting or rented steel chute systems, the EasyChute fabric sections are designed to be reused job after job. After striking, fold each section loosely — tight rolling can crease the coated fabric over time — and store it in the original box or a contractor bag. A 10 ft section weighs under 3 lbs and folds small enough to fit in a tool bag. Even a full 50 ft section ships in a compact box.
On the cost side, this matters. Renting a debris chute for a single job can run $150 to $300 or more depending on the rental company and duration. Owning a set of EasyChute sections means that cost amortizes across every job you run — and the chute is ready when you show up, not dependent on a rental company's schedule. Compare the economics in the debris chute rental vs. EasyChute breakdown.
Debris Management and Environmental Responsibility
Getting debris from the upper floor to the dumpster faster doesn't just save time — it also improves how well you can sort and manage materials. When debris piles up in hallways or stairwells because it can't be moved efficiently, sorting becomes an afterthought. With a chute workflow, you can designate specific dumpsters for different material types and keep the flow organized.
According to the EPA's construction and demolition debris data, the construction industry generates hundreds of millions of tons of waste annually — much of which is recyclable. Keeping materials separated at the source (concrete to one dumpster, wood to another, drywall to a third) is easier when your debris handling system is fast and controlled. A chute supports that workflow rather than working against it.
Scaling Up: When You Need More Than One Chute
On large New Britain commercial projects — a school renovation, a multi-unit gut, or a significant retail build-out — you may want to run multiple chutes simultaneously from different floors or different sections of the building. EasyChute sections are sold at fixed prices with free shipping, so ordering two or three sets and deploying them at different windows is a straightforward way to increase throughput on high-volume jobs without adding labor.
Each chute operates independently, so there's no complex rigging coordination between setups. The same anchor approach works at every window. Safe debris handling at scale aligns directly with OSHA ergonomics guidance on reducing cumulative lift-and-carry loads for workers — multiple chutes mean fewer manual carries for the whole crew.
Frequently Asked Questions
How long does it take to set up a debris chute for the first time on a New Britain job site?
Most first-time setups take between 15 and 20 minutes, including anchoring, section connection, and dumpster alignment. After two or three setups, experienced crews get this down to under 12 minutes. Striking the chute at the end of the day typically takes 5 to 8 minutes. The time investment is small relative to the hours of stair-hauling labor the chute eliminates across a full workday.
What anchor hardware do I need to hang an EasyChute on a typical New Britain wood-frame home?
The most common approach is a 2x4 or 2x6 wedged horizontally across a window rough opening and secured with screws or structural strapping. The four woven loops at the top of the chute clip to this board via carabiners or quick-connects. No specialized brackets, no licensed rigging. On roof-edge applications, a purpose-built roof hook or ladder standoff bracket works similarly.
Can one person set up and strike the chute solo?
Yes, for single-section setups — one 10 ft or 25 ft section — solo setup is straightforward. The chute is lightweight enough that one person manages the anchor hang and the bottom positioning without assistance. For multi-section setups above 35 ft, a second person makes it easier to guide the bottom sections into dumpster alignment, especially on first use. After practice, some crews handle even longer configurations solo.
What materials can actually go through the chute, and are there things I should not put in?
Drywall chunks, roofing shingles, lumber scraps, insulation, bagged material, tile, and light concrete debris all move through the EasyChute without issue. Nothing wider than the 22-inch interior diameter should be loaded. Very large or irregular chunks should be broken down first. Extremely wet or muddy material can slow flow — work it through in smaller amounts. Never load material that could puncture the fabric, such as exposed rebar ends longer than the chute diameter.
Do I need a permit to hang a debris chute in New Britain, CT?
For private residential renovations, a separate chute permit is generally not required — your existing building or demolition permit covers the work. If your dumpster sits on a public street and the chute extends over a public sidewalk, check with New Britain public works about whether a sidewalk closure or encroachment permit is needed. Requirements can change, so confirm with the city before your job starts if there is any doubt.
How does the chute hold up to repeated use across multiple jobs?
The woven, coated poly fabric is designed specifically for the abrasion of construction debris — including roofing shingles, which are among the most abrasive materials a chute will see. A well-cared-for chute lasts through dozens of jobs. After each job, fold rather than tightly roll the sections, store them out of prolonged UV exposure, and rinse off any concrete or adhesive residue that could stiffen the fabric over time. EasyChute sections are a buy-once, use-many investment.
Can I use the EasyChute on a scaffold setup instead of a window?
Yes. The four woven loops can attach to scaffold railings, cross-braces, or any structural scaffold member using carabiners. This is a common configuration on commercial facade work, exterior masonry repairs, and multi-story roofing projects where a window exit is not available. The same dumpster-alignment and guide-rope best practices apply. Make sure the scaffold anchor point is rated for the combined weight and impact load of the chute and passing debris before you hang.
Ready to Set Up Your First Debris Chute in New Britain?
The setup process is genuinely straightforward — and after your first job with the chute in place, you'll wonder why you ever hauled bags down stairs. EasyChute sections ship free to New Britain job sites, arrive in compact boxes that fit in a standard work truck, and are ready to hang the day they arrive.
If you want to see the setup in motion before you order, check out the EasyChute video library — real setups on real job sites, no fluff. If you have questions about which sections fit your specific project, the EasyChute FAQ covers the most common configuration questions, or you can reach out directly and get a straight answer fast.
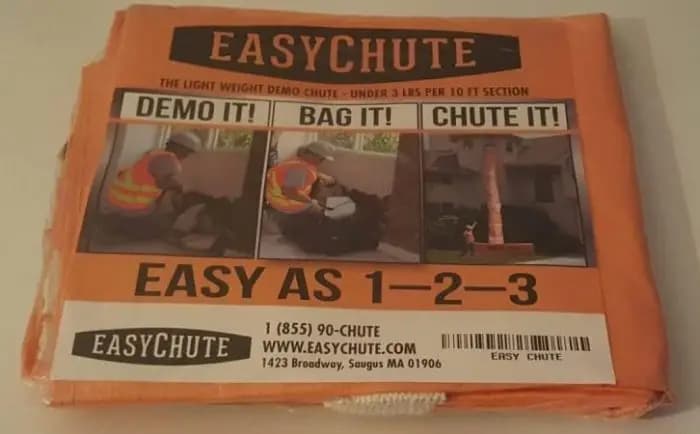
Demo it. Bag it. Chute it.