
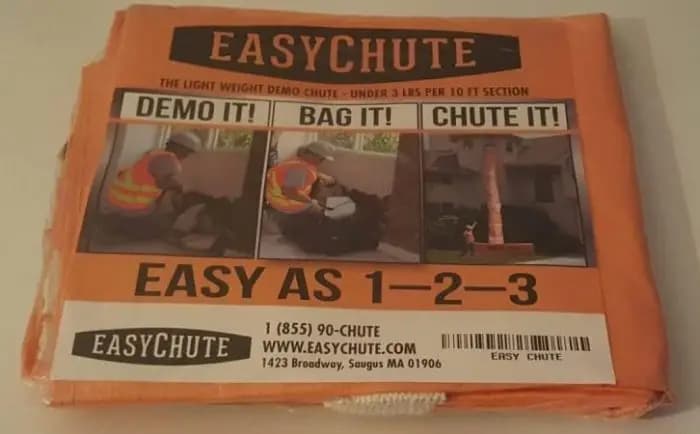
Connecticut contractors work in some of the most demanding conditions on the East Coast — tight colonial lots in Fairfield County, dense triple-deckers in New Haven, century-old brownstones in Hartford, and coastal renovation jobs from Westport to Mystic. Getting debris off upper floors quickly and safely is a daily challenge, and a debris chute is the tool that makes it manageable. But the chute only works if it is set up correctly.
Mistakes in debris chute setup are more common than most crews admit, and they come with real consequences: dropped debris, OSHA violations, damaged dumpsters, and jobs that slow to a crawl. This guide breaks down the most frequent errors Connecticut contractors make during chute setup, explains why each one happens, and gives you a clear playbook for getting it right every single time.
Why Debris Chute Setup Errors Are Especially Costly in Connecticut
Connecticut has a unique combination of job-site conditions that amplify small setup mistakes. The state has a dense urban core (Bridgeport, Hartford, New Haven) surrounded by tight suburban neighborhoods where working space is severely limited. Many of the state's residential structures are 50 to 150 years old, with irregular window openings, non-standard floor heights, and load-bearing walls that restrict where you can anchor a chute.
Add in the state's strict municipal permitting environments — many CT towns require a formal debris management plan before a dumpster permit is issued — and a poorly rigged chute creates cascading problems: inspections that fail, neighbors who complain, and general contractors who pull you off the job. The stakes are real. Getting your debris chute setup right is not just a safety matter; it is a business matter.
The Cost of a Downed Chute Mid-Job
A chute that fails partway through a tear-off does not just inconvenience the crew. It stops production while someone re-rigs the system. If debris has already partially accumulated in the chute, clearing a blockage or re-hanging a section under load is a hazardous task. Time lost is typically 30 to 90 minutes per incident — and that clock is running at your billed labor rate.
Mistake 1: Choosing the Wrong Chute Length for the Job Height
The most fundamental setup error is selecting sections that do not reach from the debris source to the dumpster. Contractors often underestimate floor-to-dumpster distance, particularly on jobs where the dumpster sits at grade below a raised foundation or on a slope — common on Connecticut's hilly terrain in towns like Woodbridge, Avon, and Simsbury.
EasyChute sections come in 10 ft, 25 ft, and 50 ft lengths. They connect with a 1.5 ft overlap, so you do lose a small amount of effective length at each junction. When you are measuring for a job, always measure from the hanging point (window sill, roof edge, scaffold rail) down to the top of the open dumpster, not to grade. If the dumpster lid is 4 ft off the ground and your hang point is 28 ft above grade, your effective chute span needs to be at least 24 ft — but add a few feet of margin so the chute tail drops cleanly into the container.
How to Measure Correctly Before You Order
- Use a tape measure or laser distance tool to get the vertical drop from hang point to dumpster opening.
- Add 3 to 4 ft of tail allowance so the bottom of the chute stays inside the dumpster even when the dumpster begins to fill.
- Account for 1.5 ft of overlap at each section junction.
- When in doubt, order one extra 10 ft section — it weighs under 3 lbs and stores flat, so there is no good reason to come up short.
Review the full range of available sections on the EasyChute product page before your next job so you are not scrambling at the site.
Mistake 2: Using Inadequate Anchor Points
EasyChute hangs from four woven loops using carabiners or quick-connects. That system is fast and reliable — but only when the anchor point itself is solid. Connecticut contractors working on older wood-frame structures frequently encounter window headers, sill plates, and sash frames that look sound but are not. Rotted wood, loose brick lintels, and deteriorated mortar joints are common in pre-1960 construction throughout the state.
A chute loaded with roofing shingles or plaster demo debris can exert meaningful dynamic load on its anchor points, especially when material is being tossed in aggressively from above. Connecting to a compromised header or a loose scaffold pipe fitting is an accident waiting to happen.
Anchor Point Checklist Before Hanging
- Visually inspect the structural member you plan to anchor from. Look for rot, cracks, or movement.
- Apply hand pressure to test for flex or give — solid lumber should not deflect at all.
- If anchoring to scaffold, confirm that the specific tube or frame member is properly pinned and braced.
- Never anchor to a window sash, shutter hardware, or decorative trim.
- When structural integrity is in question, re-rig to a certified scaffold point or use an over-the-peak ridge anchor.
OSHA's Construction Industry safety standards address rigging and anchor requirements in detail — it is worth familiarizing your crew with the relevant sections before a complex hang.
Mistake 3: Ignoring the Dumpster Position Relative to the Drop Zone
The chute should deliver debris into the dumpster, not onto the lid, the rim, or the ground beside it. This sounds obvious, but on many Connecticut job sites — particularly tight city lots in Bridgeport or New Haven where the dumpster placement is dictated by street permit coordinates — the container ends up slightly off-center from the ideal drop line.
When the chute tail misses the dumpster opening by even 12 to 18 inches, debris escapes the container, creates a mess on the street or lawn, and can become a code or HOA violation. It also means someone has to pick that material up by hand — which is exactly what the chute was supposed to prevent.
Aligning the Drop Zone Properly
- Before the dumpster is placed, use string or chalk line to mark the ideal drop point on the ground directly below your planned hang window or roof edge.
- Communicate that mark to the dumpster company driver — they can usually accommodate a 2 to 3 ft positioning adjustment at drop-off.
- If the lot is on a slope, account for the fact that the bottom of the chute will swing slightly toward the downhill side when material is flowing.
- Confirm that the chute tail clears the dumpster lid when the lid is in the open position.
Mistake 4: Rushing the Section Connections
EasyChute sections connect with a 1.5 ft overlap — meaning the bottom of the upper section slides inside the top of the lower section. It is a simple, fast system, but crews under time pressure sometimes shortcut the overlap, connecting sections with only 4 to 6 inches of contact. Under load, an under-overlapped connection can separate, releasing the lower sections of the chute while full of debris.
Even on a two-story residential tear-off, a falling chute section carries real energy. OSHA's ergonomics and safe loading guidance emphasizes controlling dynamic loads throughout a task — not just at the starting point. A 25 ft section of fabric chute loaded with shingles and separating mid-hang is not a soft failure.
Proper Connection Protocol
- Lay both sections on the ground or scaffold deck before hanging.
- Slide the upper section's bottom end into the lower section's top end by a full 18 inches (the full 1.5 ft design overlap).
- Confirm the overlap is consistent around the entire circumference of the chute — it should not be deeper on one side than the other.
- Once hung, visually inspect each connection from the hang point before the first load of debris goes in.
Watch the actual installation process in detail on the EasyChute step-by-step setup guide and the EasyChute video library — these resources show the connection technique clearly.
Mistake 5: Placing the Chute Too Close to Pedestrian or Vehicle Traffic
Connecticut's older neighborhoods — West Hartford, Stamford's South End, Norwalk's Wall Street district — often have sidewalks immediately adjacent to the building face. A debris chute hanging over a public sidewalk requires barricading, signage, and in many municipalities a separate sidewalk closure permit.
Contractors who hang a chute without addressing the pedestrian clearance zone create liability exposure that far exceeds the cost of doing it right. Debris occasionally escapes from the chute opening or bounces off the dumpster rim. A passing pedestrian hit by even a small piece of roofing material is an injury, a workers' comp interaction, and potentially a lawsuit.
Establishing a Safe Debris Zone
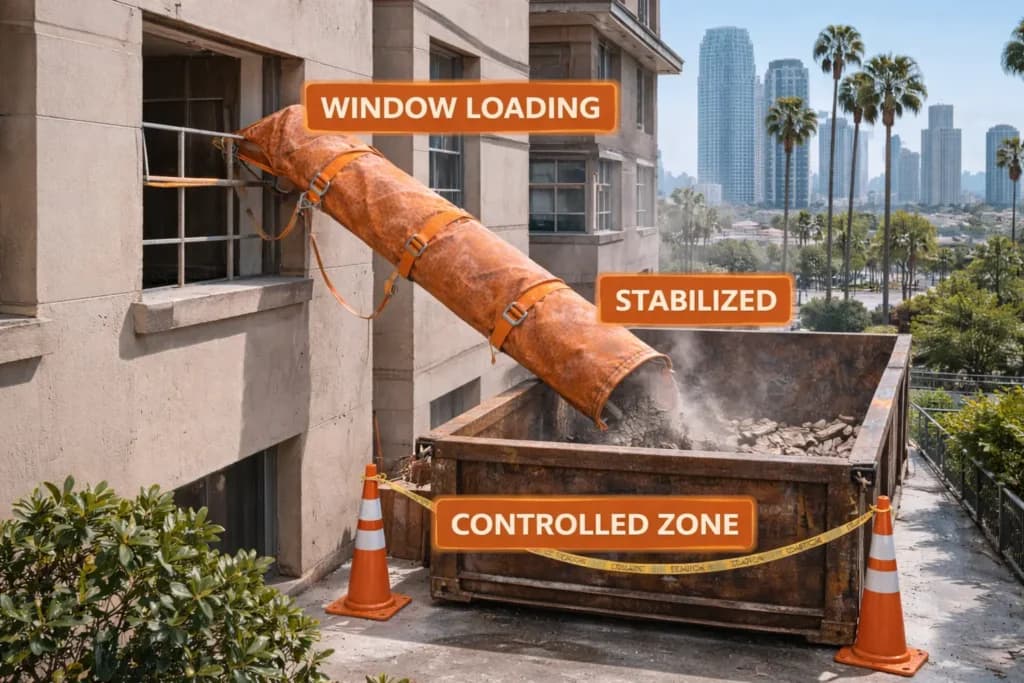
- Barricade a minimum 6 ft radius around the base of the chute and the dumpster drop zone.
- Use construction-grade safety fencing or hard barricades, not just cones.
- Post a spotter at ground level if the site conditions bring pedestrians within 20 ft of the chute base.
- Check with the local municipality — Bridgeport, Hartford, and Stamford each have specific requirements for right-of-way use during construction.
- If a sidewalk closure permit is required, get it before work begins, not after the inspector arrives.
Mistake 6: Overloading the Chute Beyond Its Design Capacity
Fabric debris chutes are designed for continuous flow of construction debris — roofing shingles, drywall chunks, lumber scraps, insulation batts. They are not designed to handle individual objects that exceed the chute diameter. Contractors working on Connecticut gut renovations sometimes try to push cast-iron pipe sections, full-length 2x4 lumber, or large concrete chunks through a chute, which causes blockages, stretches the fabric, and can split a seam.
The EPA's construction and demolition debris data shows that C&D waste is highly varied in composition — which means crews have to make real-time judgment calls about what goes into the chute and what gets carried down by hand or lowered by rope.
What Should and Should Not Go Into a Debris Chute
- Good chute material: Broken drywall, roofing shingles (stripped and broken up), insulation batts, small lumber scraps, ceramic tile fragments, loose plaster.
- Bad chute material: Full-length boards or pipe sections longer than the chute diameter, large masonry blocks, heavy concentrated loads of wet material, any item with a protruding fastener that could snag the fabric.
- Gray-area material: Bundled shingles (too heavy — strip them first), intact windows (too rigid and irregular), and plumbing fixtures (too heavy and awkward).
When in doubt, break material down before it goes into the chute. It takes ten seconds with a demo hammer and prevents a blockage that takes twenty minutes to clear.
Mistake 7: Failing to Secure the Bottom of the Chute
A chute that is anchored at the top but left to swing freely at the bottom will migrate over time as debris flows through it. On a windy day — and Connecticut's coastal and elevated inland areas see real wind, especially in the fall and winter — an unsecured chute tail can swing out of the dumpster entirely, depositing material onto the driveway, landscaping, or street.
Securing the bottom of the chute does not require elaborate rigging. A simple bungee cord or rope tied from the chute tail to the dumpster handle or rail keeps the tail positioned correctly. Some contractors clip a carabiner through one of the chute's lower loops and hook it to the dumpster lip — that works well on steel dumpsters.
Bottom Securing Options by Site Type
- Standard roll-off dumpster: Clip a carabiner from the lower chute loop to the dumpster's side rail or handle bracket.
- Bagster or flexible container: Thread a rope through the lower chute loop and tie it to the bag's handle loops.
- Tight lot with no dumpster access: Stake a ground anchor and use a short rope to keep the tail centered over the container opening.
Mistake 8: Not Communicating Between the Upper and Lower Crew
Debris chute operations involve at least two positions: the crew feeding material in at the top and the crew monitoring the dumpster and chute base at the bottom. When these two groups are not communicating, bad things happen — material gets loaded into the chute while the base crew is repositioning the dumpster, or the top crew does not know that the dumpster is nearly full and debris is backing up in the chute.
This is a human coordination problem, not a hardware problem. But it is worth naming explicitly because it is one of the most common causes of chute-related incidents on Connecticut job sites.
Communication Protocol for Multi-Story Chute Operations
- Designate one person as the chute captain — responsible for all calls to start and stop loading.
- Use two-way radios on jobs where the top floor and dumpster are not in direct line of sight or voice range.
- Establish a simple call system: one radio call before loading begins, one call when the dumpster is 75 percent full (time to slow loading and prepare for swap-out).
- Never load the chute when anyone is working near the base unless they are aware that material is coming through.
Mistake 9: Skipping the Pre-Job Site Walk for Chute Planning
Experienced contractors sometimes skip the pre-job site walk because they have hung chutes hundreds of times. That confidence is an asset — but it can become a liability when the site has unusual conditions that only become apparent on close inspection. Connecticut's varied building stock means that assumptions from the last job often do not transfer cleanly to the next one.
A site walk specifically focused on chute planning should cover the hang point, the anchor quality, the drop line, the dumpster position, the pedestrian and vehicle clearance zone, and the municipal access requirements. It takes ten minutes and prevents most of the mistakes described in this guide.
The Pre-Job Chute Planning Checklist
- Measure the vertical drop from planned hang point to dumpster opening.
- Assess the structural integrity of the anchor point.
- Confirm the drop line clears all obstructions (utility wires, overhangs, landscaping).
- Identify where pedestrian and vehicle barriers will be placed.
- Confirm dumpster placement coordinates with the permit.
- Verify that your chute sections add up to the required length.
For more on how professional contractors approach construction chute planning on multi-story sites, the linked guide walks through each decision point in depth.
Mistake 10: Assuming One Setup Works for Every Trade
Roofers, interior demo crews, and junk removal operators all use debris chutes — but their setup priorities differ meaningfully. A roofing tear-off generates high-density material (shingles, underlayment, nails) in rapid concentrated bursts. An interior gut job generates mixed debris at a lower pace but with more irregular shapes. A junk removal operation generates unpredictable loads of furniture, appliances, and bagged material.
Connecticut contractors who work across multiple trades need to adjust their chute setup — specifically, the section choice, the anchor position, and the loading protocol — to match the job type. The roofing trash chute guide and the demolition chute guide each address trade-specific setup considerations in detail.
Quick Reference: Setup Priorities by Trade
- Roofing: Prioritize a wide-mouth top opening, a secure base anchor, and a bottom spotter. Shingle loads are dense and fast.
- Interior demo: Prioritize section connections — mixed debris is more likely to snag at junctions. Confirm diameter is adequate for plaster chunk sizes.
- Junk removal: Prioritize bottom securing and dumpster alignment. Irregular items can destabilize the tail if the chute is not held steady.
Mistake 11: Neglecting to Inspect the Chute Between Uses
EasyChute sections are built from woven, coated poly fabric specifically designed for reuse job after job. But reuse does not mean ignore. After each job, sections should be inspected for abrasions, tears at the loop attachment points, compromised seams, or areas where the coating has worn through.
A small tear that is cosmetically minor can propagate rapidly under load — particularly if the damaged area is near a seam or a loop attachment. Catching a 2-inch abrasion after job one means you replace one section at low cost. Missing it for three more jobs means a mid-job failure at the worst possible time.
Post-Job Inspection Routine
- Unfold each section fully on a flat surface after the job.
- Run your hands along all seams, feeling for separation or lifted stitching.
- Inspect all four hanging loops for fraying or wear at the attachment point.
- Check the coated fabric surface for abrasions or punctures, especially at the overlap zones where sections connect.
- Store sections folded loosely — do not compress them under heavy equipment, which degrades the coating.
Detailed setup and storage information is available in the EasyChute FAQ — a useful reference to share with new crew members.
Mistake 12: Underestimating the Regulatory Environment in Connecticut Municipalities
Connecticut is not a permissive regulatory environment for construction debris management. Many municipalities — Greenwich, Westport, New Canaan, and others — have strict rules about dumpster placement timelines, sidewalk encroachment, and debris containment. Some require that debris be fully contained within a closed chute-to-dumpster system with no open exposure.
The EPA's materials waste and recycling guidance and local environmental regulations increasingly require that C&D debris not be allowed to escape the job site perimeter. A chute that is not properly set up — with open gaps, missed dumpster alignment, or absent base barriers — can constitute a regulatory violation independent of any OSHA safety concern.
Before hanging a chute in any Connecticut municipality, confirm whether a sidewalk permit, encroachment permit, or debris management plan is required. This is a 15-minute call to the building department and can save significant enforcement headaches later.
Frequently Asked Questions
How do I know what length debris chute I need for my Connecticut job site?
Measure the vertical distance from your planned hang point — a window, roof edge, or scaffold rail — down to the top opening of your dumpster. Add 3 to 4 ft of tail allowance so the bottom of the chute drops cleanly into the container. Account for 1.5 ft of overlap at each section junction. When you are on the edge between two section combinations, always size up. Coming up a few feet short means the chute tail misses the dumpster, which creates a debris scatter problem and defeats the purpose of the system.
Can a one-person crew hang an EasyChute on a Connecticut job site?
Yes, in many configurations. A single 10 ft or 25 ft section weighs under 3 lbs per 10 ft increment and can be carried, positioned, and hung by one person using the four woven loop-and-carabiner system. Longer multi-section configurations are easier with two people — one at the hang point and one managing the lower sections to keep them from tangling during setup. The step-by-step installation guide covers solo and two-person setup procedures in detail.
What debris types should not go into a fabric chute?
Avoid putting full-length rigid objects (boards, pipe sections) longer than the chute diameter into the chute, as they will bridge across the interior and cause a blockage. Large masonry blocks, intact windows, heavy plumbing fixtures, and concentrated wet material should be lowered by other means. Items with protruding nails or sharp fasteners can snag the fabric at seam points. When in doubt, break material into smaller pieces before loading — it protects the chute and keeps material flowing smoothly.
Do Connecticut municipalities require permits to use a debris chute?
Requirements vary by municipality. In many Connecticut cities and towns, using a dumpster on a public street requires a permit, and some jurisdictions require a separate sidewalk encroachment or closure permit if the chute or its barricade zone occupies any portion of a sidewalk or right-of-way. High-income suburban municipalities like Greenwich and Westport tend to have stricter requirements. Always call the local building or public works department before the job starts to confirm what approvals are needed for your specific setup.
How should I secure the bottom of the chute if I am working on a slope?
On sloped sites — common on Connecticut's hilly terrain in areas like Avon, Simsbury, or the Farmington Valley — the chute tail will naturally drift toward the downhill side. Use a rope or bungee clipped from the lower chute loop to the uphill side of the dumpster rim or handle to counteract this drift and keep the tail centered over the container opening. A ground stake with a short line to the lower chute loop also works well when the dumpster does not have a convenient anchor point on the uphill face.
How often should I inspect EasyChute sections between jobs?
Inspect every section after every job, before it goes back into storage. Unfold each section fully and check all seams, loop attachment points, and the coated fabric surface for abrasions, punctures, or lifted stitching. Small damage caught early is an inexpensive fix or section replacement. Damage missed over multiple jobs tends to escalate into a mid-job failure, which is a safety hazard and a production stoppage. Store sections folded loosely — do not compress them under heavy equipment in the work truck or trailer.
Is there a difference in setup between a roofing chute and a demolition chute?
Yes, the setup priorities differ meaningfully by trade. Roofing tear-offs generate dense, fast-moving material in concentrated bursts — prioritize a wide-mouth top opening, a secure base anchor, and a ground-level spotter. Interior demolition generates mixed debris at a lower pace but with more irregular shapes, so the section-to-section connections become the critical focus (irregular material is more likely to snag at junctions). The roofing chute guide and the demolition chute guide each cover trade-specific setup priorities in depth.
Ready to Set Up Your Debris Chute the Right Way on Your Next Connecticut Job?
Every mistake in this guide is avoidable with the right equipment and a fifteen-minute pre-job walk. EasyChute sections are lightweight, reusable, and ship free to job sites across Connecticut — whether you are working a coastal renovation in Westport, a gut demo in Hartford, or a roofing tear-off in New Haven.
Review the full fabric trash chute guide to understand your options, or go straight to the canvas trash chute comparison if you are evaluating material types. When you are ready to order, visit the EasyChute contact page — fixed prices, free shipping, and sections that connect to any height your Connecticut job site demands.
Demo it. Bag it. Chute it.