

Table of Contents
- Pre-Installation Site Assessment
- Choosing the Right Chute System
- Dumpster and Ground Placement
- Mounting Points and Structural Safety
- Assembling Modular Sections
- Angle Alignment and Gravity Flow
- Securing and Wind Bracing
- Testing and Pre-Use Inspection
- Debris Loading Best Practices
- Site-Specific Installation Variations
- Removing and Decommissioning
- Troubleshooting Common Installation Issues
- Frequently Asked Questions
- Ready to Install Your Debris Chute
Pre-Installation Site Assessment
Before ordering or assembling any chute system, conduct a thorough on-site walkthrough. This single step prevents 70% of installation complications, from misjudged clearances to inadequate dumpster access. Measure the vertical drop from your highest work area to ground level, and note any obstacles—power lines, HVAC vents, neighboring structures, or overhanging rooflines.
Measuring Vertical Distance and Slope
Use a laser measure or tape to determine exact fall height. Debris chutes require a minimum 1:3 pitch (one unit down for every three units horizontal) to ensure gravity-fed flow without jamming. Record the precise vertical distance, then multiply by 3 to calculate the horizontal “reach” your chute will occupy. If you have 30 feet of vertical drop, your chute footprint needs roughly 10 feet of horizontal ground clearance away from the building.
Identifying Mounting Structures
Walk the perimeter and identify solid anchor points: roof edges, exterior wall studs, building corners, or temporary bracing frames. Look for stable surfaces capable of supporting concentrated loads. Avoid mounting to fascia, vinyl siding, or non-structural trim. If the building has stone, brick, or concrete façade, these are ideal anchor zones. Document the mounting surface type and approximate height of each anchor point.
Checking Ground and Dumpster Access
Verify that your dumpster placement allows debris to land safely inside, not overshoot onto sidewalks, neighboring properties, or vehicles. Check for underground utilities—gas, electric, water, sewer—before placing the dumpster or any ground-level supports. Contact your local utility locating service (usually free) to mark safe zones.
Choosing the Right Chute System
Debris chutes come in several configurations: polyethylene (lightweight, portable), metal-frame systems (heavy-duty, permanent), window-drop bags, and modular stacked sections. The right choice depends on project duration, debris type, and site constraints.
Polyethylene vs. Metal Frame
Polyethylene chutes are flexible, durable in wind, and ideal for residential renovations, roofing tear-offs, and short-term deployments. They’re quicker to install and require minimal structural modification. Metal-frame systems suit long-duration commercial projects, high-volume debris streams, and sites demanding maximum rigidity. For most contractors in 2026, a modular polyethylene system balances speed, cost, and adaptability.
Calculating System Length
Refer to your vertical measurement and select modular sections accordingly. Common sizes include 10ft, 25ft, and 50ft sections that stack vertically. If your building is 45 feet tall, you might use one 25ft section plus one 25ft section, accounting for overlap and the ground-level dumpster connection. Always add an extra 3–5 feet of overlap at each joint for stability.
Debris Type Matching
Lightweight materials (roofing shingles, drywall, insulation) flow easily and require standard chute diameter. Heavy, angular debris (concrete, brick, structural lumber) may jam in narrow sections. Choose construction debris chute systems specifically rated for your material mix, and consult the weight capacity requirements of each section.
Dumpster and Ground Placement
The dumpster is the terminal point of your chute system. Improper placement causes debris overflow, property damage, and safety hazards.
Positioning the Dumpster
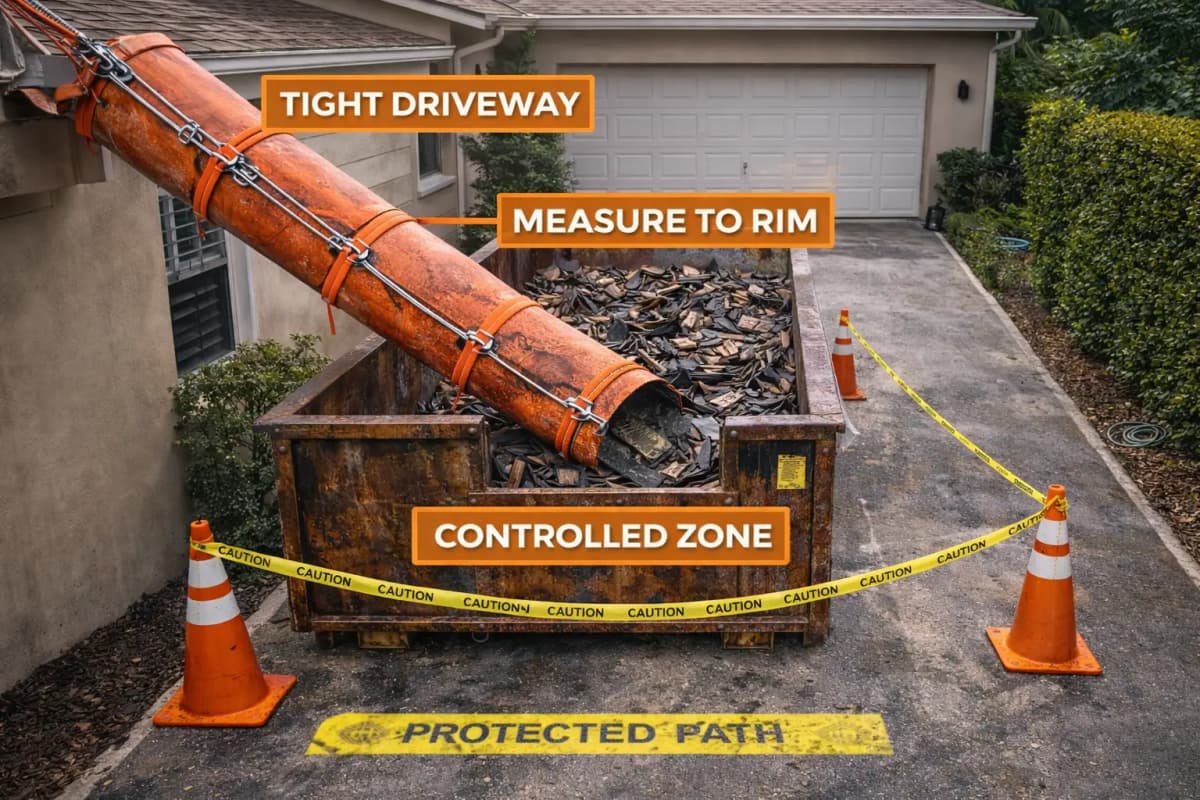
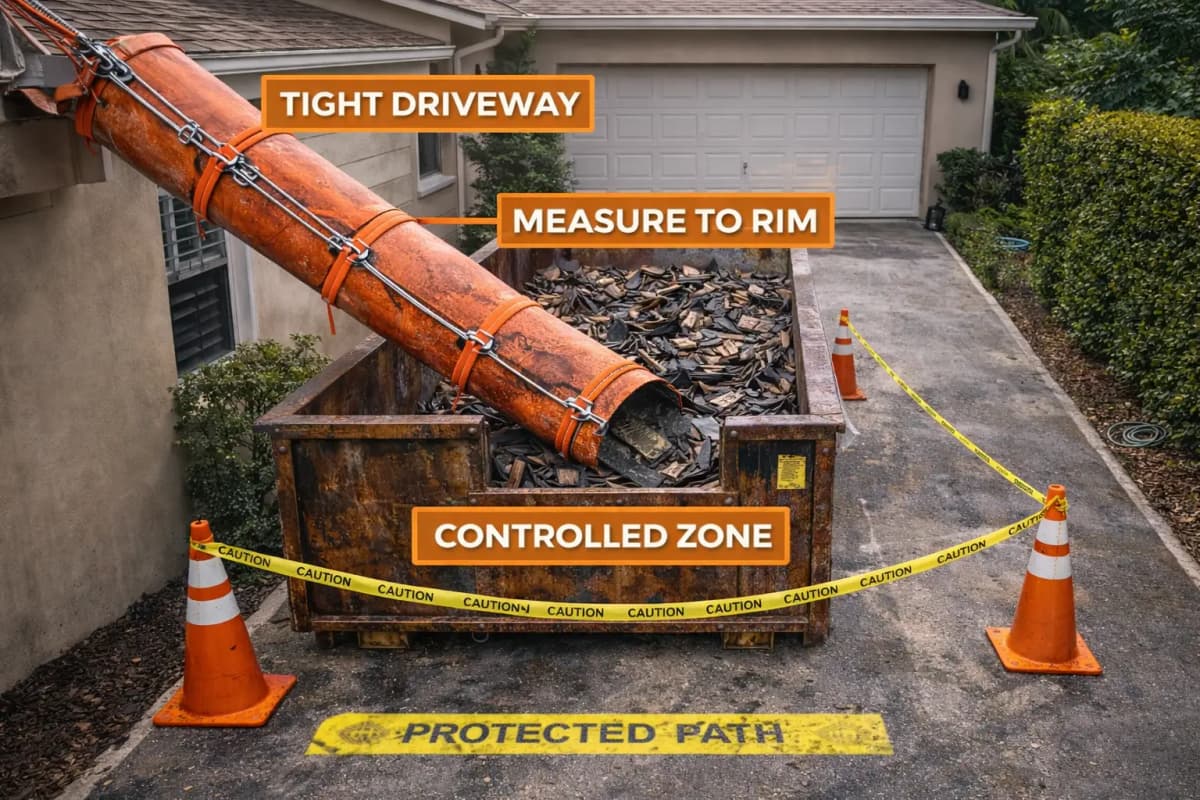
Place the dumpster directly beneath the chute outlet, accounting for a slight angle adjustment (10–15 degrees off-center is normal as gravity pulls debris toward one side). Leave at least 2 feet of clear space on all sides for worker access and debris spillover containment. Avoid placing the dumpster on soft ground, gravel, or uneven surfaces; use plywood or steel plates to distribute weight and prevent tipping.
Clearance and Obstacle Avoidance
Ensure no overhead power lines cross the dumpster zone. Maintain at least 10 feet of horizontal clearance from neighboring properties, parked vehicles, and pedestrian pathways. If the site is tight (urban renovations, narrow driveways), consider smaller dumpster sizes and more frequent pickups, or rent a debris chute rental system designed for confined spaces.
Securing the Dumpster
Wind and falling debris can shift a dumpster. Secure it with stakes or chains if site conditions warrant. In windy areas (coastal regions, open rooftops), tie-downs are mandatory. Check daily for movement and adjust as needed.
Mounting Points and Structural Safety
A poorly secured chute becomes a hazard—to workers below, to the building, and to the public. Every mounting point must handle dynamic loads (impact of falling debris) plus wind forces.
Load Calculation Basics
Estimate the maximum daily debris volume and weight. A roof tear-off generates 1.5–2 tons per 1,000 sq ft; a full kitchen gut produces 2–4 tons per job. Divide the total expected load by the number of mounting points. Each anchor should support at least 1.5× the calculated load (safety factor). If uncertain, consult a structural engineer or the chute manufacturer’s load tables.
Inspecting Mounting Surfaces
Before fastening anything, examine the building façade for cracks, rot, or prior damage. Brick and concrete are ideal; wood framing requires reinforcement. Test the surface by tapping—solid material rings; soft or hollow areas indicate void or decay. If you find structural issues, document them and notify the property owner before proceeding.
Fastener Selection and Spacing
Use galvanized lag bolts or heavy-duty brackets rated for the expected load. Space fasteners per the chute manufacturer’s specifications, typically 4–6 feet apart vertically. Stagger left and right anchors to distribute lateral forces. Never rely on a single mounting point per section; minimum two points per section is the industry standard.
Assembling Modular Sections
Modular chute systems stack vertically, reducing shipping costs and installation time. Assembly is straightforward but requires precision.
Unpacking and Inventory
When chute sections arrive, inspect for shipping damage—tears, bent edges, or cracked seams. Lay sections flat on clean ground, away from sharp objects or vehicle traffic. Count all fasteners, brackets, and connectors. Most systems include a hardware kit; verify you have every piece before beginning assembly.
Connecting Section-to-Section
Most modular chutes use overlap couplings or banding straps at joints. Slide the upper section into the lower section’s top opening, ensuring full engagement (typically 6–12 inches of overlap). Tighten all bolts in a cross pattern (top-left, bottom-right, top-right, bottom-left) to avoid binding. Use a torque wrench if the manual specifies torque values; over-tightening cracks plastic, under-tightening allows slipping.
Pre-Assembly Alignment Check
Before hoisting, lay the full stack flat and verify alignment. The chute should form a smooth, continuous tube with no kinks, twists, or lateral offsets. Any misalignment will worsen once vertical loads apply. Correct alignment now prevents jams and structural stress later.
Angle Alignment and Gravity Flow
Debris flow depends entirely on the chute’s angle. Too shallow, and material jams; too steep, and it accelerates beyond safe limits, creating impact and spillage.
Achieving the Ideal 1:3 Pitch
Most commercial debris chutes perform optimally at a 1:3 pitch: for every 3 feet of horizontal distance, drop 1 foot vertically. This angle—roughly 18 degrees from horizontal—balances gravity flow with deceleration. Use a digital level or angle finder to verify the chute’s slope as you mount sections. If your building’s geometry forces a steeper angle, account for faster flow and heavier impact loads at the dumpster.
Adjusting for Debris Type
Lightweight debris (drywall, insulation) flows at steeper angles; heavy debris (brick, concrete) prefers gentler slopes. If your project mixes debris types, aim for the steeper side of the optimal range (closer to 1:2.5) to keep heavier materials moving. Test the first few loads—if material slides too fast, creating dust or dumpster overshoot, steepen the bottom section slightly by lowering the chute outlet.
Managing Chute Fatigue and Deflection
Long chutes (50+ feet) may sag under their own weight, reducing the effective pitch. Monitor deflection during assembly; if the bottom section appears to sag below the calculated angle, add midpoint bracing or vertical support arms to maintain slope. A sagging chute not only slows debris but can develop low-pressure zones that cause jamming.
Securing and Wind Bracing
Wind is the silent killer of chute installations. A debris chute acts like a sail, catching gusts and converting them to lateral force on mounting points.
Wind Load Assessment
Check the project location’s typical wind speeds. Coastal areas, open rooftops, and tall buildings experience sustained winds of 20–40 mph; inland urban sites average 12–20 mph. Calculate wind load using the formula: Force = 0.613 × velocity² × area × drag coefficient. For a 30-foot polyethylene chute in a 25 mph wind, expect lateral forces around 150–200 lbs. Ensure all mounting points handle this addition load.
Installing Guy-Wires and Cross-Braces
For chutes over 25 feet or in windy locations, install diagonal guy-wires or metal cross-bracing every 15–20 feet. Attach guy-wires to independent anchor points (roof corners, temporary frames) not the main chute fasteners. Cross-braces, welded or bolted metal frames, can also stabilize the chute’s mid-span, reducing deflection and lateral movement.
Chute Strapping and Tie-Down Points
Use polyester or nylon banding straps at regular intervals (every 6–8 feet) to bundle the chute tightly and distribute wind load evenly. Avoid metal bands, which can cut polyethylene. Pre-drilled anchor loops on modern chutes simplify tie-down attachment. In high-wind zones, consider common setup mistakes related to inadequate bracing and apply lessons learned.
Testing and Pre-Use Inspection
Never load a chute in anger; always run a controlled test first. This reveals flow issues, alignment problems, and safety hazards before full operation.
Dry-Run Test with Inert Material
Load a bucket or two of scrap wood, cardboard, or other lightweight inert material. Push it down the chute and observe the flow. Does debris move steadily, or does it stick? Does it reach the dumpster or overshoot? Does the chute vibrate excessively? Note any unusual sounds or movement, then address the root cause (angle, surface roughness, joint misalignment) before proceeding.
Structural Inspection Checklist
- Fasteners: All bolts, lag screws, and brackets are tight and show no movement.
- Welds and seams: Metal chutes have no visible cracks or separations; polyethylene sections have no tears or punctures.
- Joints: All overlaps are fully engaged and secured; no gaps between sections.
- Angle: Digital level confirms pitch meets design specifications.
- Mounting anchors: All points are secure; no building damage or structural cracking around fasteners.
- Wind bracing: Guy-wires are taut, cross-braces are plumb, and tie-down straps are snug.
- Ground clearance: Dumpster is positioned safely, with no obstacles under the outlet.
Load Test and Adjustment
Gradually increase test load—first 50 lbs, then 100, then full-volume loads—while monitoring chute movement and outlet accuracy. If the chute deflects or debris scatters, reduce angle slightly or add additional bracing. Once you achieve smooth, controlled flow with no spillage, you’re ready for production.
Debris Loading Best Practices
Even the best-installed chute fails if workers load it carelessly. Training and supervision are critical to safe, efficient operation.
Size and Weight Limits Per Load
Establish a maximum piece size—typically 12×12 inches for standard chutes, though large systems accept up to 18×18 inches. Break apart oversized material before loading. Avoid dropping items straight down; slide or push them to control velocity and prevent jamming. Distribute loads evenly throughout the day to avoid overloading the dumpster or creating pressure spikes in the chute.
Hazardous Materials and Prohibited Items
Never load liquids, paint, asbestos, or hazardous waste into a chute. These contaminate the debris stream and create liability. Refer to EPA construction debris management guidelines for handling special materials. Separate recyclables (metal, wood, concrete) if the project requires, but do not mix hazardous or non-debris materials.
Worker Safety and Loading Ergonomics
Enforce OSHA ergonomic guidelines for safe loading. Workers should lift with legs, not backs, and use two-person teams for items over 50 lbs. Provide step stools or platforms if the chute inlet is above waist height. Wear hard hats—falling debris from above is a real risk, especially on multi-story projects. Institute a “no running” rule near the chute; debris movement is invisible from below.
Site-Specific Installation Variations
No two projects are identical. Common site constraints require creative chute solutions.
Roofing Tear-Offs and Pitched Roofs
Roofing debris is light but voluminous. Install the chute on the roof’s lower edge (pitch-side) to capture shingles, underlayment, and debris as it slides down. Angle the chute slightly inward, toward the roof, to prevent wind from blowing debris sideways. For roofing-specific setup, use a wide-mouth inlet (30+ inches) to accommodate bulk material and reduce manual sorting.
Multi-Story Residential Renovations
Apartment and condo projects often have tight building envelopes and HOA restrictions. Window-drop chutes or portable bag systems may be required instead of full-height installations. Position the dumpster carefully to avoid blocking parking or landscaping. If the building has a courtyard, route the chute down the interior side to minimize disruption to street frontage.
Historic or Masonry Buildings
Brick, stone, and historic façades require great care. Use non-invasive mounting systems (temporary frame scaffolding) if possible. If direct fastening is necessary, use small-diameter anchor bolts and stainless steel hardware to prevent corrosion and visible damage. Consult the property owner or a historic preservation specialist before drilling.
Narrow Urban Lots and Driveway Constraints
In dense urban areas, driveway space is premium. Use a shorter chute and stack multiple dumpster pickups, or rent a compact debris chute system. Some contractors use chute bag for dumpster solutions—drop bags placed over the dumpster that can be removed and replaced throughout the day. This conserves driveway space and allows the dumpster to remain on-site longer.
Removing and Decommissioning
Once the project is complete, timely and safe removal is essential. Rushed deconstruction creates liability and can damage the building.
Final Inspection Before Disassembly
Before removing anything, photograph the chute installation and mounting points. This documents that you left the building in acceptable condition and helps with damage disputes. Check for any building marks, stains, or physical damage created by the chute.
Staged Section Removal
Lower sections in reverse order: detach the ground-level section first, then work upward. Use a tag line or guide rope to control descent of heavy metal sections. Never drop sections from height; lower them slowly with a winch or multiple personnel. Once removed, inspect each section for damage and clean before storage or return to the rental facility.
Fastener Removal and Surface Restoration
Remove all lag bolts, anchors, and hardware. Fill bolt holes with paintable caulk or epoxy if the building finish requires it. Document any pre-existing damage and report it separately from chute-related wear. Leave the building in the condition specified in your contract.
Troubleshooting Common Installation Issues
Even experienced installers encounter problems. Quick diagnosis and correction prevent cascading delays.
Debris Jamming and Flow Interruption
Symptom: Debris stalls halfway down the chute, blocking flow. Causes: Angle too shallow, material too large, internal obstruction. Fix: Increase angle by 5–10 degrees, reduce piece size, inspect for foreign objects (nails, wire, drywall scraps wedged inside). Use a plumbing snake or pressure washer to clear light blockages.
Excessive Vibration and Noise
Symptom: Chute shakes or bangs as debris falls. Causes: Loose joints, inadequate bracing, debris hitting seams. Fix: Tighten all bolts, verify overlap at joints, add cross-bracing if span exceeds 30 feet. Smooth rough seams with sandpaper or epoxy.
Lateral Drift and Dumpster Overshoot
Symptom: Debris exits the chute and misses the dumpster, landing to the side. Causes: Chute angle offset from vertical, wind force, dumpster positioned incorrectly. Fix: Use a laser level to verify vertical alignment. Reposition the dumpster directly beneath the outlet. Install deflector rings or flare sections at the outlet to direct debris inward. In windy conditions, add a wind baffle or tarp on the downwind side of the dumpster opening.
Building Damage and Cracking Around Anchors
Symptom: Fine cracks appear in brick or stucco near fasteners. Causes: Concentrated load, improper fastener size, building settling. Fix: Reduce load at that anchor point by adding a midpoint support. Use larger-diameter fasteners distributed across a wider surface area (use a backing plate). In older buildings with settlement, monitor cracks and notify the property owner.
Frequently Asked Questions
How long does debris chute installation typically take?
Installation time ranges from 4–8 hours for a single-story residential chute to 2–3 days for a 50+ foot commercial system with multiple bracing points and fastener requirements. Setup includes site preparation, dumpster placement, mounting assembly, section stacking, and full testing. Rushing installation increases safety risks and prolongs commissioning time.
Can I install a debris chute on a vinyl-sided or wooden façade?
Vinyl siding is not suitable for direct chute fastening—it will crack under concentrated load. For wood or vinyl buildings, use a temporary steel frame or scaffolding system to distribute load across a larger surface area, or mount to the roof edge or structural corners. Always consult a structural engineer before deviating from standard mounting.
What’s the difference between rental and owned chute systems?
Rental systems offer flexibility for short-term projects and eliminate storage costs. Owned systems suit contractors with frequent projects and multi-site operations. Evaluate rental cost considerations against your project frequency and duration. For a single 2-week renovation, rental is typically cheaper; for ongoing monthly work, ownership becomes cost-effective within 12–18 months.
How do I ensure the chute outlet aligns precisely with the dumpster?
Use a plumb bob or laser level to mark the vertical line from the chute outlet. Position the dumpster so its center aligns with this mark, accounting for a 10–15 degree angle as debris naturally slides. Use a test load to verify accuracy before the project begins. Consider a deflector ring or funnel attachment to the chute outlet for tighter containment.
What maintenance is required during the project?
Inspect mounting fasteners every 2–3 days for loosening. Check for external debris or obstructions blocking flow. After rain, verify that water is draining from the chute interior (small drain holes are common on plastic systems). Remove any buildup of fine dust or residue that could slow future loads. See post-installation maintenance best practices for detailed guidance.
Are there local permits or safety inspections required for chute installation?
Regulations vary by municipality. Some jurisdictions require a permit for temporary structures over 10 feet; others mandate safety inspections before occupancy. Contact your local building department early in planning. OSHA construction safety standards apply to all sites, and compliance is non-negotiable. Document your cost estimation and budgeting to include permit and inspection costs.
Can I stack debris above the dumpster if the chute outlet is not wide enough?
Stacking debris outside the dumpster defeats the purpose of a chute system—it creates fall hazards, property damage, and cleanup liability. Instead, use a larger dumpster, schedule more frequent pickups, or use a capacity calculator to right-size your system for the actual debris volume. Oversized debris must be broken down before loading, not accommodated with improper dumpster overflow.
Ready to Install Your Debris Chute?
Successful debris chute installation is a balance of planning, precision, and safety vigilance. Start with a detailed site assessment, choose the right system for your project, and never skip the pre-use testing phase. Build in time for adjustments—few installations are perfect on day one.
For project-specific guidance, consult the complete trash chute installation guide or reach out to discuss your site constraints. Whether you’re planning a roofing tear-off, a full-scale renovation, or a multi-story commercial project, the principles outlined here will keep your team safe, your dumpster full, and your timeline on track. Use the resources available—capacity calculators, setup checklists, and local compliance guides—to ensure every installation meets professional standards and regulatory requirements.