

Index
- Why Trash Chute Maintenance Matters
- Daily Cleaning Best Practices
- Weekly Inspection Checklist
- How to Unclog a Trash Chute
- Odor Control & Sanitization
- Mold and Moisture Prevention
- Safety Protocols During Maintenance
- Extending Your Chute’s Lifespan
- Common Maintenance Mistakes to Avoid
- Seasonal Care and Weather Considerations
- When to Repair vs. Replace
- Frequently Asked Questions
- Get Started With a Maintenance Plan
Why Trash Chute Maintenance Matters
Trash chutes are the backbone of efficient debris removal on construction and renovation sites. When they’re clean and well-maintained, they move material fast, prevent backups, and keep your crew safe. When they’re neglected, you face clogs, safety hazards, pest issues, and potential damage to the chute structure itself.
Proper maintenance isn’t just about performance—it’s a regulatory and liability requirement. OSHA Construction Industry safety standards require that all equipment, including debris chutes, be kept in safe working condition. A poorly maintained chute can lead to worker injuries, project delays, and costly emergency repairs.
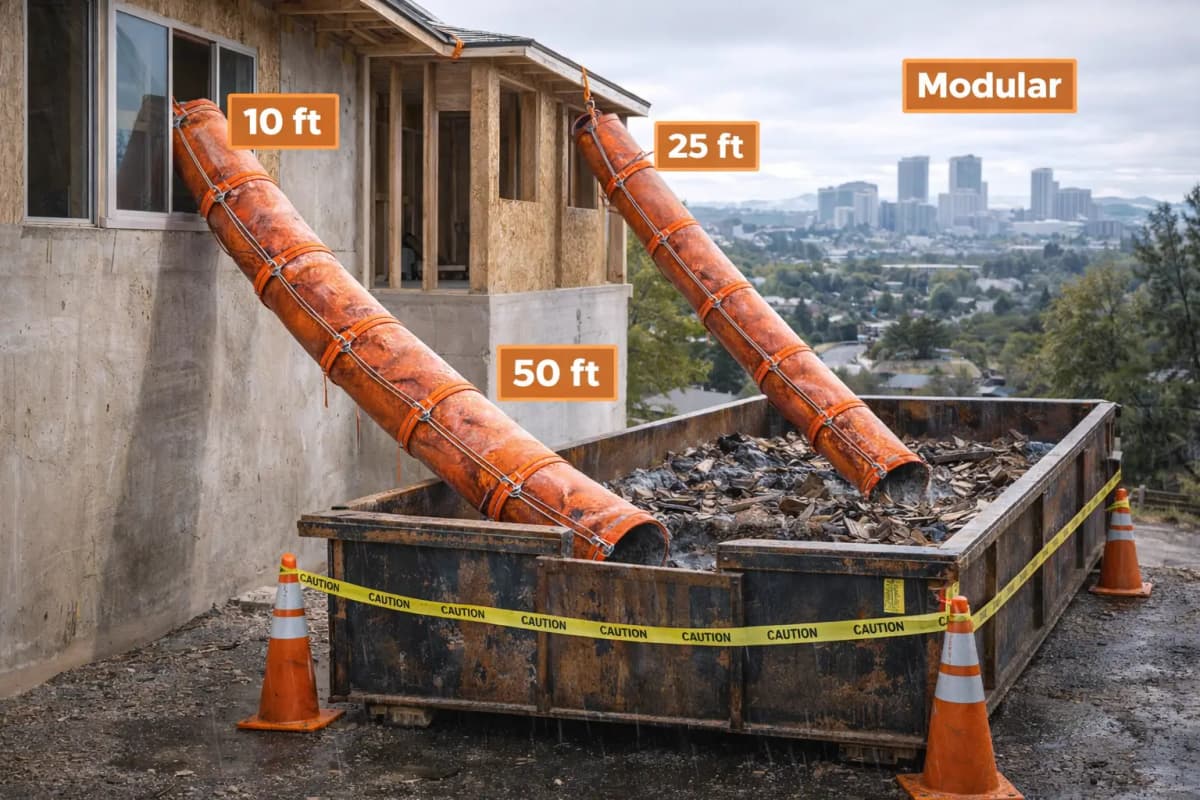
Think of chute maintenance like vehicle service: regular upkeep prevents breakdowns and extends asset life. On a typical multi-story project, a well-maintained chute can function reliably for months, while a neglected one may jam after weeks of heavy use.
Daily Cleaning Best Practices
The most effective maintenance strategy is consistency. Daily cleaning takes 15–30 minutes and prevents most problems from escalating.
End-of-Shift Flush Protocol
At the end of each work shift, run water or rinse fluid through the chute for 2–3 minutes. This clears loose debris and prevents material from drying and bonding to the interior walls. If you’re using a modular trash chute system, flush each section starting from the top.
- Use a garden hose with moderate pressure (60–80 PSI) pointed down the top opening.
- For heavy buildup, use a foam cleaner or mild detergent mixed with water.
- Never use high-pressure washers on the interior—they can damage seals and cause water pooling.
- Allow 5 minutes of drainage time before the next load or end of day.
Interior Wall Wipe-Down
Once weekly, use a long-handled brush or foam applicator to scrub the interior walls while running water through. This prevents sticky buildup, especially in warmer months when adhesives and sealants become tacky.
Dumpster Interface Cleaning
Where the chute meets the dumpster is a critical zone. Debris and moisture accumulate here, and it’s often the source of clogs.
- Remove any material buildup around the discharge opening.
- Ensure the dumpster rim or chute bag is seated correctly and free of obstructions.
- Wipe the exterior discharge area with a dry cloth to prevent slipping hazards.
- Check that water drainage isn’t pooling or leaking onto the ground.
Weekly Inspection Checklist
Beyond cleaning, weekly visual and functional inspections catch small issues before they become expensive repairs. Use the trash chute cleanliness maintenance checklist as your reference guide.
Visual Inspection Points
- Cracks or tears: Examine the exterior polyethylene for signs of impact damage, UV degradation, or material fatigue.
- Seam integrity: Check where sections connect for gaps, leaks, or separation.
- Strap and bracket condition: Ensure all fasteners are tight and straps are not frayed or corroded.
- Discharge alignment: Confirm the chute is still positioned correctly above the dumpster—settling or vibration can shift alignment.
- Water pooling: Look for standing water inside the chute or beneath it, which indicates drainage issues.
Functional Tests
Drop a test load of light debris (e.g., cardboard scraps) down the chute and observe:
- Does material flow smoothly without catching?
- Do you hear unusual grinding, rubbing, or cracking sounds?
- Does discharge happen within seconds, or does material pause midway?
- Is there any visible damage to the test material (e.g., it arrives shredded), suggesting rough interior spots?
If flow is sluggish or interrupted, you likely have a clog or partial blockage—address it immediately (see unclogging section below).
How to Unclog a Trash Chute
Clogs are the most common maintenance challenge. They happen when large or wet items jam, or when fine debris packs into narrow sections. The faster you respond, the faster you get back to work.
Step 1: Stop All Material Input
Post a sign at the top of the chute: “DO NOT USE—MAINTENANCE IN PROGRESS.” Ensure no crew member drops anything while you’re working.
Step 2: Locate the Blockage
Drop a weighted rope or chain down the chute and let it hit the clog. Pull it back up to feel where resistance occurs. Most clogs are at discharge (the bottom) or at a connector between sections.
Step 3: Clear the Blockage
For discharge-level clogs: Remove the dumpster (or chute bag), look directly into the opening, and manually pull out visible debris. Wear gloves and a dust mask.
For mid-chute clogs: Use a flexible plumbing snake or a long fiberglass rod to push or extract the clog. Work gently—aggressive pushing can damage the chute interior.
For stubborn blockages: Flush with hot water (if available) to soften packed material, then re-attempt mechanical removal. For extremely hard clogs, you may need a professional drain-cleaning service with a motorized snake.
Step 4: Flush and Test
Once the clog is removed, flush the entire chute with 5–10 minutes of water flow to clear any remaining loose debris. Test with a light load before resuming normal operations.
Odor Control & Sanitization
Odor in a trash chute usually signals moisture, decomposing material, or bacterial growth. Construction debris alone doesn’t smell—the smell comes from organic matter (food scraps, yard waste, etc.) or stagnant water.
Odor Prevention Strategies
- Keep it dry: Ensure water drains completely after rinsing. A chute that stays wet will develop mold and bacteria.
- Establish material rules: If your site has an office or break area nearby, prohibit food waste in the debris chute. Use a separate organic waste bin.
- Spray deodorizer: Once weekly, spray an EPA-approved odor-control agent (e.g., enzymatic or chlorine-based) into the chute. Let it sit for 15 minutes, then flush.
- Use chute liners: Commercial-grade biodegradable liners can reduce direct contact between debris and the chute interior, making cleanup easier and odor less likely.
Sanitization During Heavy Rain
Wet weather creates ideal conditions for mold and algae. After heavy rain, flush the chute with a 1:10 bleach-water solution (or an approved antimicrobial cleaner) and let it drain fully. Do not leave the chute full of water overnight.
Mold and Moisture Prevention
Mold growth is both a maintenance and a health concern. It thrives in damp, dark environments and can spread across polyethylene quickly if not addressed.
Preventing Mold Growth
- Daily drainage: Never leave standing water in the chute overnight or over weekends. Tilt the chute slightly (if design allows) to encourage flow toward discharge.
- Ventilation: Ensure the top opening is not fully sealed. Air circulation helps the interior dry faster.
- Material monitoring: Damp or muddy debris is more likely to promote mold. On very wet days, consider using covered containers or delaying debris disposal until conditions improve.
- Seasonal closure: If you’re storing a chute offline for months, ensure it’s completely dry before storage. Place moisture-absorbing packets inside sealed sections.
Treating Existing Mold
If you spot black or green spots on the interior, spray with a mold-killing solution (e.g., hydrogen peroxide or approved algaecide), let it sit for 30 minutes, and then flush thoroughly. Follow up with a disinfectant rinse.
Safety Protocols During Maintenance
Cleaning and maintenance work on a trash chute involves hazards. Following strict safety protocols protects you and your crew.
Personal Protective Equipment (PPE)
- Hard hat: Required when working near or in a chute, especially on multi-story sites where tools or material could fall.
- Safety gloves: Leather or nitrile, to protect against sharp debris, splinters, and chemical irritants.
- Dust mask or respirator: Wear at minimum a particulate mask (N95 or equivalent) when brushing interior walls or clearing dry debris. For mold or chemical application, use a respirator with appropriate cartridges.
- Safety glasses: Protect eyes from splashing water or debris particles.
- Closed-toe boots: Required for all work on the ground near the chute discharge.
Work Practices
- Never work alone on a chute maintenance task. Always have a second person present and aware of what you’re doing.
- Lock out or barricade the top opening so no one can drop material while you’re working.
- Do not enter the chute yourself. Use long-handled tools and rope techniques instead.
- When using water, ensure there’s proper drainage and no electrical hazards (e.g., generators, extension cords) near wet areas.
- Follow OSHA ergonomics guidelines when lifting or reaching; avoid twisting while holding tools or heavy items.
Refer to the trash chute setup mistakes guide for additional safety considerations specific to chute installation and positioning.
Extending Your Chute’s Lifespan
A well-maintained trash chute can last through multiple projects. Here’s how to maximize its service life.
UV Protection
Polyethylene degrades under direct sunlight over time. If your chute is stored outdoors between projects, cover it with a UV-protective tarp or move it to a shaded location. This is especially important in warm, sunny climates.
Proper Storage
When a chute is not in use:
- Completely dry all interior surfaces before disconnecting sections.
- Store sections vertically or in a stable horizontal stack, not at angles that stress the material.
- Keep sections in a cool, dry place (ideally 50–80°F) to prevent warping.
- Do not store near heat sources, chemicals, or sharp objects that could puncture the material.
Seasonal Transition
Before deploying a chute for a new project, inspect it as if it were new. Check for cracks, discoloration, or stiffness that might indicate age or environmental stress. Clean it thoroughly with water and mild detergent to remove dust and any residual debris.
Common Maintenance Mistakes to Avoid
Learning from others’ errors can save you time, money, and headaches. Here are the most frequent maintenance pitfalls:
Skipping Daily Flushing
Contractors often skip the end-of-shift flush to save time. This is false economy—a 15-minute flush prevents a 2-hour unclogging session the next day. Build flushing into your standard closeout checklist.
Using High-Pressure Washers
Blasting the interior with a 2,000+ PSI power washer can damage seams, strip protective coatings, or force water into areas where it can’t drain. Stick to garden-hose pressure (60–80 PSI).
Ignoring Drainage Issues
If water is pooling under the chute or inside discharge areas, don’t ignore it. Stagnant water leads to mold, odor, and structural problems. Clear the drainage path and tilt the chute if needed.
Allowing Clogs to Worsen
A partial clog that you ignore for a day becomes a complete blockage that shuts down the project. Address sluggish flow immediately.
Mixing Incompatible Cleaners
Never mix bleach with ammonia or acidic cleaners—the fumes are dangerous. Use approved products only and follow label instructions.
Neglecting Bracket and Strap Inspection
The chute’s support system is as important as the chute itself. Rust, bent straps, or loose bolts can cause the entire chute to shift or fail. Check fasteners weekly.
Seasonal Care and Weather Considerations
Different seasons present different challenges. Adjust your maintenance routine accordingly.
Spring and Summer (Warm, Wet)
- Increase flushing frequency if rain is heavy or frequent.
- Monitor for mold more often due to warmth and moisture.
- Check for UV damage and discoloration on the exterior.
- Clear gutters and drainage paths around the chute discharge to prevent pooling.
Fall (Drying and Cooler)
- Leaves and fine debris can clog discharge areas—clear them daily.
- Check for cracks as temperature fluctuations can stress material.
- Ensure all openings are sealed if the chute will be stored or left idle.
Winter (Cold, Potential Freeze)
- Trapped water can freeze and expand, cracking the chute. Always drain completely at end of day.
- Ice buildup on exterior surfaces can shift the chute’s weight distribution—inspect support straps more frequently.
- De-icing salt spray can corrode metal fasteners. Rinse these areas periodically with fresh water.
- Heavy snow can accumulate on top sections—clear it to prevent pressure damage.
When to Repair vs. Replace
Not every issue requires a new chute. Understanding when to repair and when to replace saves budget and keeps projects moving.
Repair if:
- Damage is localized (one crack, one torn section).
- The chute has been in service for fewer than 3–4 years.
- Overall structural integrity is sound (straps tight, no warping, no widespread cracking).
- Repair cost is less than 30% of replacement cost.
Replace if:
- Multiple cracks or tears are present along the length of the chute.
- The chute shows significant UV degradation (discoloration, brittleness).
- The interior surface has become rough or pitted, causing drag and clogs.
- Discharge has been distorted and can’t be realigned.
- Support straps or brackets are corroded or bent beyond straightening.
- The chute has served 4+ years of heavy use.
Consult the weight capacity guide if you’re uncertain whether damage is within tolerable limits. A chute that’s compromised structurally is a liability and safety risk.
Frequently Asked Questions
How often should I clean my trash chute?
Daily flushing at the end of each shift is best practice. Weekly deep cleaning with brushing and inspection is minimum. Sites with very heavy debris flow or wet material may need twice-daily flushing. Follow the trash chute cleanliness maintenance checklist to track your schedule.
Can I use bleach in my trash chute?
Yes, but only in diluted form (1 part bleach to 10 parts water) and never mixed with other cleaners. Apply it for odor control or mold treatment, let it sit 15 minutes, and flush thoroughly with fresh water. Always wear gloves and a respirator when applying bleach.
What’s the best way to prevent clogs?
Consistent daily flushing is the #1 clog preventer. Keep the interior smooth and debris-free by removing buildup weekly. Avoid dropping excessively large items or dense bundles; break up heavy loads. Ensure the dumpster or chute bag is always properly positioned and never overfilled.
Is it safe to enter a trash chute to clean it?
No. Never enter a chute yourself. Use long-handled tools, ropes, and techniques that allow you to work from the top or outside. Entering creates severe entrapment and fall hazards.
How do I know if my chute has suffered UV damage?
Look for discoloration (fading or yellowing), brittleness (the material feels stiff or cracks easily when flexed), and increased surface roughness (which slows debris flow). These signs indicate the polyethylene is degrading. If you see this, plan for replacement within 1–2 years or reduce sun exposure with a protective cover.
What should I do if my chute is leaking at the seams?
Small seam leaks can often be sealed with a polyethylene-specific patching tape or sealant (check manufacturer recommendations). If leaks are widespread or the seam is coming apart, the section should be replaced. Do not ignore seam leaks, as water intrusion can damage fasteners and weaken the entire structure.
Can I store my chute outdoors year-round?
Long-term outdoor storage accelerates UV degradation and moisture infiltration. If possible, store it in a shaded, dry area such as a garage, warehouse, or under a tarp. If outdoor storage is unavoidable, use a heavy-duty UV-protective tarp and ensure the chute is completely dry before covering. Inspect it monthly for water infiltration or mold.
Get Started With a Maintenance Plan
Effective chute maintenance begins with a plan. Here’s a simple first step:
- Download or create a weekly inspection and cleaning log—use the trash chute cleanliness maintenance checklist as your template.
- Assign one crew member as the chute maintenance lead for each project.
- Schedule daily end-of-shift flushing and weekly deep cleaning in your project timeline.
- Keep a maintenance kit on-site: garden hose, long-handled brush, mild detergent, foam cleaner, gloves, dust mask, and a plumbing snake.
- Document any repairs, clogs, or unusual observations—this helps you learn what works for your projects and where preventive measures are needed most.
If you’re new to chute deployment, the first-time contractor guide covers setup and foundational maintenance. For roofing-specific chute setup or other specialized applications, review the relevant guide to ensure your maintenance routine accounts for project-specific challenges.
Regular maintenance isn’t a burden—it’s an investment in safety, productivity, and asset protection. A clean, well-maintained trash chute keeps your crew safe, your site organized, and your project on schedule.