

Index
- Why Trash Chute Cleanliness Matters
- Daily Maintenance Checklist
- Weekly Deep-Clean Protocol
- Monthly Inspection Tasks
- Seasonal Maintenance Schedule
- Common Blockages and How to Prevent Them
- Cleaning Equipment and Supplies You’ll Need
- Safety Protocols During Cleaning
- Modular Chute Section Maintenance
- Troubleshooting Slow Debris Flow
- Maintaining the Dumpster Discharge Area
- Documenting Maintenance Records
- Frequently Asked Questions
- Get Started with Your Chute Maintenance Plan
Why Trash Chute Cleanliness Matters
A clean debris chute is the backbone of an efficient construction site. When chute walls accumulate dust, drywall mud, and fine debris, friction increases—debris slows down, gets stuck, and creates bottlenecks that halt your workflow. More importantly, buildup reduces safety margins on scaffolding attachments and can harbour moisture that weakens polyethylene sections over time.
Contractors who maintain clean chutes report fewer onsite delays, lower injury risk from manual debris handling, and longer equipment life. Regular cleanliness also protects your team from respiratory hazards associated with fine dust clouds and prevents the spread of contaminants across the jobsite.
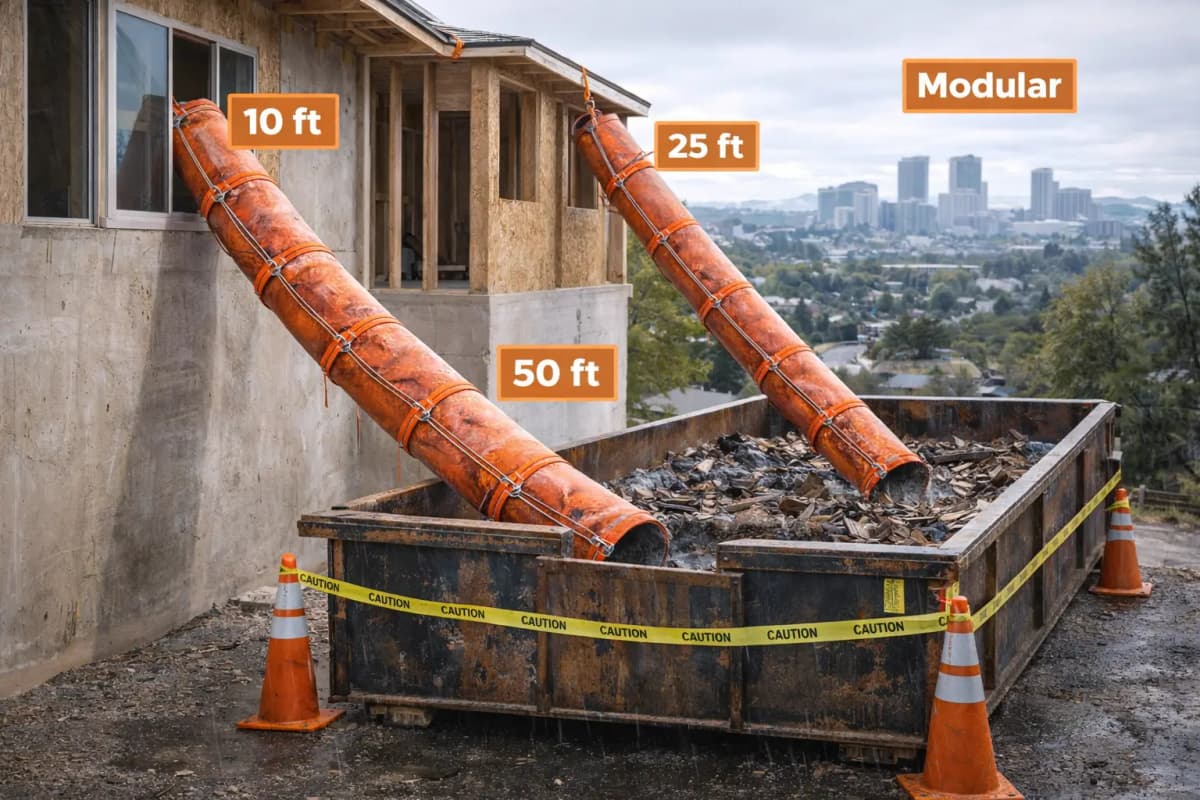
According to OSHA construction safety standards, worksite cleanliness directly impacts slip, trip, and fall incidents. A well-maintained chute minimizes debris spillage around the discharge area, reducing these hazards.
Daily Maintenance Checklist
Daily tasks should take 10–15 minutes and focus on debris flow and visible obstructions.
- Visual inspection: Walk the full height of the chute system. Look for visible blockages, torn sections, or material wedged in seams.
- Test debris flow: Drop a small volume of typical debris (drywall scrap, wood offcuts) down the chute and watch it travel to the dumpster. Note any slowdowns or jams.
- Check dumpster clearance: Confirm the discharge hose or chute exit is clear of packed debris. If material has built up around the opening, clear it immediately.
- Inspect attachment points: Verify all straps, bolts, and fasteners securing the chute to scaffolding or building are tight and show no wear.
- Monitor moisture: If rain or water spray has wet the chute, check interior for pooling. Tilted or sagging sections trap water and accelerate deterioration.
- Clear debris around the base: Sweep the ground immediately under the discharge area to prevent trip hazards and allow easy spotting of any new leaks.
Daily checklists prevent small issues from becoming costly blockages. Assign a crew member each morning to complete this task and initial a log—this habit saves downtime.
Weekly Deep-Clean Protocol
Once per week, dedicate 45–60 minutes to a thorough interior and exterior clean.
Interior Cleaning
Accumulated fine dust and dried mud cling to polyethylene walls, reducing flow. Use a long-handled soft-bristle brush and gentle water spray (not high-pressure wash, which can damage seams).
- Working from top to bottom, brush down the interior walls of each section, dislodging dust and light debris.
- Use a spray bottle or garden hose to wet the walls lightly—this helps suspended particles slide downward.
- If drywall dust is heavy, pre-wet the chute 30 minutes before brushing to soften the coating.
- Do not use chemical solvents or acidic cleaners; they degrade polyethylene over time.
- Allow the chute to dry fully before resuming debris loading (2–3 hours in dry conditions).
Exterior Cleaning
Dirt, mud, and rust from metal fasteners can accelerate chute aging.
- Wipe down the exterior of each section with a damp cloth, paying attention to seams and bolt heads.
- Use a soft brush on metal fasteners to remove surface rust before it spreads.
- Inspect visible caulking or sealant; if it’s cracked or peeling, note it for monthly repair assessment.
After weekly deep-clean, test the chute with a sample load to confirm debris flows smoothly.
Monthly Inspection Tasks
Each month, conduct a more rigorous assessment of structural integrity and wear.
Detailed Section-by-Section Review
Following your trash chute sections manual, inspect each modular unit:
- Surface cracks or tears: Small punctures or stress cracks can widen under load. Mark them with tape and schedule repair or section replacement.
- Seam separation: If overlapping sections show gaps where water or debris can infiltrate, tighten fasteners or re-caulk.
- Polyethylene discoloration or brittleness: Sections exposed to direct sunlight degrade faster. Brittle plastic is a sign of age; prioritize replacement.
- Interior debris buildup: If dust or dried mud persists despite weekly cleaning, there may be a partial blockage lower in the chute. Use a plumbing snake or flexible rod to locate and clear it.
Fastener and Hardware Check
Vibration and weather loosen bolts and straps over time.
- Tighten all visible bolts, nuts, and hose clamps using the correct wrench size—over-tightening can crack plastic flanges.
- Replace any missing or corroded fasteners immediately.
- Check zip-ties or plastic fasteners for UV damage; replace any that are brittle or cracked.
Attachment Point Stability
Per the OSHA ergonomics guidelines, chute mounting must support the static and dynamic load of debris.
- Verify that all straps anchoring the chute to scaffolding or the building are rated for the debris chute weight capacity you’re using.
- Check for rust or corrosion on metal straps and anchors; replace if structural integrity is compromised.
- Confirm no section is tilted or sagging—this indicates a mounting failure or internal obstruction.
Seasonal Maintenance Schedule
Seasonal changes present unique challenges. Adapt your maintenance rhythm accordingly.
Spring (Post-Winter)
Winter weather accelerates deterioration. Inspect thoroughly after freeze-thaw cycles.
- Check for water damage or ice buildup from winter rains or snow melt inside the chute.
- Verify that drainage holes (if your chute model includes them) are not clogged with debris or ice.
- Look for cracks caused by expansion and contraction stress.
Summer (Peak Season)
High-volume debris flow and heat stress demand more frequent oversight.
- Increase interior cleaning to twice per week if you’re running roofing tear-offs or heavy demolition.
- Monitor UV exposure on sections in direct sun—accelerated aging may warrant early section rotation.
- Ensure adequate ventilation around the chute to prevent heat buildup, which can warp polyethylene.
Fall (Material Transition)
Seasonal debris types change—leaves, wet drywall, and heavy framing all behave differently.
- If you’re switching from roofing to interior demo, adjust your cleaning schedule; interiors generate finer dust that builds up faster.
- Check that dumpster size and disposal schedule can handle the shift in material volume and weight.
Winter (Cold/Wet Challenges)
Moisture and cold are your chute’s enemies.
- After rain or snow, drain water from the chute interior using a wet-dry vacuum or by tilting sections (with proper safety rigging).
- Increase fastener checks—vibration increases on frozen ground, and fasteners loosen faster.
- Consider protective covers for idle chutes to prevent ice accumulation.
Common Blockages and How to Prevent Them
Understanding what jams your chute helps you prevent costly downtime.
Drywall Mud and Dust Accumulation
This is the leading culprit in interior renovation projects. Drywall dust is fine and sticky when moistened by humidity or water spray.
- Prevention: Use a wet mop or damp cloth when breaking down drywall pieces before loading them into the chute. This reduces airborne dust.
- Clearing: If dust has caked on the interior, spray a light mist of water and allow 15–20 minutes for it to soften before brushing.
Long Pieces of Wood or Rebar Getting Wedged
Framing lumber or reinforcing steel sometimes angle across the chute opening and jam.
- Prevention: Pre-cut long pieces to lengths shorter than your chute diameter. Briefing crews to cut material before dropping prevents most jams.
- Clearing: If a piece is wedged, use a long pole or grappling hook to rotate or knock it loose from outside the chute. Do not reach into an open chute.
Seam Blockages
If your modular trash chute system has overlapping seams or protruding bolts, debris can snag there.
- Prevention: Ensure all bolts are countersunk (flush or recessed) and seams are smooth. Use grease or silicone lubricant (food-safe, non-toxic) on seam edges to reduce friction.
- Clearing: A plumbing snake or flexible cleaning rod inserted from the top can dislodge material caught on seams.
Compaction at the Discharge
If the dumpster is nearly full or the chute exit angle is too shallow, material compacts instead of flowing freely.
- Prevention: Monitor dumpster fill level; request pickup before the dumpster is overfilled. Ensure the chute discharges at a steep angle (ideally 45° or more).
- Clearing: Lower the collection bin or dumpster slightly if clearance allows. Use a rake or shovel to break up compacted material inside the dumpster.
Cleaning Equipment and Supplies You’ll Need
A well-stocked toolkit keeps your chute operational and safe.
Essential Tools
- Soft-bristle brush (long-handled): 4–6 feet long for reaching interior sections. Bristles must be soft to avoid scratching polyethylene.
- Garden hose with spray nozzle: Use a low-pressure, fan-pattern nozzle—avoid high-pressure washers, which damage seams.
- Plumbing snake or flexible cleaning rod: 25–50 feet long for dislodging blockages deep within the chute.
- Damp rags and microfiber cloths: For exterior wiping and seam inspection.
- Adjustable wrench set: For tightening fasteners and bolt inspection.
- Tape (painter’s or duct): Mark damage for repair; create visual logs of section condition.
Cleaning Solutions
- Water only: Mild water spray with a brush is sufficient for 90% of cleaning tasks.
- Vinegar solution (1:1 with water): For stubborn dried mud or light rust on metal fasteners.
- Non-toxic silicone lubricant: Applied lightly to seams to reduce friction and improve flow.
- Do not use: Bleach, acidic degreasers, or solvents—these degrade polyethylene over time.
Store all tools in a dedicated bin at the jobsite for easy access during daily or weekly cleaning cycles.
Safety Protocols During Cleaning
Chute cleaning involves working at height, moving debris, and using water and tools—all present injury risks.
Personal Protective Equipment (PPE)
- Hard hat (mandatory when working under or on the chute).
- Safety glasses (debris particles and water spray can hit the face).
- High-visibility vest (especially important if working near active construction zones).
- Work gloves (nitrile or leather for grip and protection).
- Steel-toed boots with good grip (wet surfaces increase slip risk).
Hazard Controls
- Never reach into an open chute: If a blockage is visible, use a pole or snake to dislodge it from outside.
- Isolate the chute during cleaning: Place a sign or barrier at the top so no crew members drop debris while you’re working.
- Use fall protection when accessing high sections: If you need to inspect or brush sections more than 6 feet high, use a harness and anchor per OSHA construction safety standards.
- Keep the area around the discharge clear: Do not allow crew members to stand directly under the chute while debris is flowing.
- Shut down nearby equipment: Disconnect or disable equipment that vibrates the chute (compactors, air compressors) during cleaning to avoid unexpected movement.
Water and Electrical Safety
- Use a grounded, GFCI-protected extension cord if using an electric wet-dry vacuum to clear water from the chute.
- Ensure the chute is thoroughly dry before resuming debris loading to prevent slips.
Modular Chute Section Maintenance
If you’re using a modular debris chute system, each section requires individual attention.
Inter-Section Gasket and Seal Inspection
Where sections connect, rubber gaskets or silicone seals prevent debris from leaking between joints.
- Monthly: Inspect gaskets for cracks, hardening, or separation from the plastic flange.
- Replacement: If a gasket is compromised, order a replacement section or gasket kit. Running with a damaged seal can allow debris to spill onto scaffolding or workers below.
Connector Bolt Torque and Alignment
Bolts connecting sections must be snug but not over-tightened (which cracks the plastic mounting ears).
- Use a torque wrench set to the manufacturer’s specification (typically 15–25 ft-lbs for polyethylene flanges).
- Check alignment: sections should be coaxial (centered on the same axis). Misalignment creates stress and increases blockage risk.
Replacement Strategy
As sections age, decide whether to repair or replace:
- Minor surface cracks (<2 inches): Patch with waterproof tape or flexible epoxy.
- Stress cracks or seam separation: Replace the section. Temporary repairs on high-stress areas fail under load.
- UV degradation (brittleness): Replace sections that feel brittle or show discoloration. Brittle plastic can shatter under impact.
Troubleshooting Slow Debris Flow
If debris moves sluggishly despite no visible blockage, several factors may be at play.
Angle and Gravity Issues
- Check the chute angle: Ideally, the chute should drop at 45–60° from horizontal. Less steep angles allow debris to slow or stop. If the chute sags, it may be due to a blockage deeper inside or a mounting failure.
- Measure and adjust: Use a level to confirm the chute is not tilted sideways, which causes debris to collect on one wall.
Interior Surface Friction
- Rough interior walls: UV damage, stress cracks, or embedded debris roughen the polyethylene. A smooth surface ensures faster flow.
- Solution: Apply a non-toxic silicone spray lubricant to the interior. Allow it to dry fully (per product instructions) before resuming debris loading.
Partial Internal Blockage
- Material may be partially obstructing the chute without fully jamming it. This creates a “narrowing” that slows flow.
- Detection: Drop a tracer object (a brightly colored plastic ball or lightweight scrap) down the chute and time its descent. Compare to a baseline time from when the chute was new. A significant slowdown indicates a blockage.
- Clearing: Feed a plumbing snake down the chute in the direction of flow to dislodge the obstruction.
Dumpster Clearance Problems
- If the dumpster is nearly full, material compacts at the discharge and backs up into the chute, appearing as slow flow higher up.
- Solution: Request immediate dumpster pickup or swap. Never overfill a dumpster by more than 10% above the rim.
Maintaining the Dumpster Discharge Area
The area immediately under the chute discharge is a spillage zone. Proper maintenance there protects workers and ensures clean debris transfer.
Daily Discharge-Area Sweep
- After each shift, sweep loose material around the dumpster base. This prevents trip hazards and allows early spotting of spills or leaks from the chute.
- Use a damp broom to avoid dust clouds.
Dumpster-to-Chute Clearance
- The chute discharge hose or funnel should be 2–4 inches above the dumpster opening for safe material transfer without splashing.
- If the hose hangs too low, it can get stuck in the dumpster when material compacts; if it’s too high, debris scatters.
- Check and adjust clearance weekly.
Spillage Containment
- If your chute handles fine materials (drywall dust, flooring debris), place a tarp or spillage mat under the discharge to catch material before it spreads across the site.
- Empty the containment mat into the dumpster at the end of each day.
Protecting Surrounding Infrastructure
- Debris splashing from the dumpster can damage parked vehicles, landscaping, or finished areas nearby. Use plywood or corrugated plastic shields if needed.
- Keep the dumpster staging area clear of trip hazards and ensure adequate lighting if work continues into dusk.
Documenting Maintenance Records
Organized maintenance records help you track chute condition, plan repairs, and prove compliance with safety standards.
Daily Log
Create a simple checklist card kept at the chute:
- Date and time of inspection.
- Crew member name (signature).
- Blockages observed (yes/no and description).
- Cleaning completed (yes/no).
- Any damage or concerns noted.
Monthly Inspection Report
Document findings from your detailed monthly review:
- Each section’s condition (good, fair, poor).
- Any bolts or seals tightened or replaced.
- Estimated remaining service life of sections showing wear.
- Repair or replacement recommendations.
Maintenance Schedule Tracker
- Record dates when you completed weekly deep-cleans and monthly inspections.
- Note any missed cycles and reasons (e.g., weather shutdown, equipment unavailability).
- Use this to plan ahead and ensure consistent upkeep.
Incident and Repair Log
- Document any blockages or failures that occurred, the cause, and how you resolved it.
- Track all repairs (parts replaced, labor hours, downtime).
- Over time, this log reveals patterns—e.g., if you always jam on drywall projects, you can adjust your process.
Frequently Asked Questions
How often should I clean the inside of a trash chute?
Daily visual and quick-flow checks are essential. A full weekly deep-clean with brushing and water spray is the industry standard for most construction projects. If you’re running high-volume demolition or roofing, increase to twice per week. Neglecting interior cleaning leads to blockages, slow flow, and potential safety issues as dust buildup obscures structural damage.
What’s the best cleaning solution for a polyethylene chute?
Plain water and a soft-bristle brush are your best tools. For stubborn dried mud, pre-wet the chute 15–20 minutes before brushing. A light vinegar solution (1:1 water) works on rust and mineral deposits. Avoid bleach, solvents, or acidic degreasers—these degrade polyethylene and shorten section lifespan significantly. Silicone lubricant spray (food-safe, non-toxic) can be applied to improve flow but should be used sparingly.
What should I do if debris gets stuck in the middle of the chute?
Never reach into an open chute. Instead, use a long pole, flexible plumbing snake, or grappling hook to dislodge the blockage from outside. If the blockage is severe, you may need to disconnect and tilt the affected section (with proper rigging and safety support) to shake the debris loose. If blockages happen frequently, review your debris-prep process—pre-cutting long pieces and breaking up heavy materials before loading reduces jams.
Can I use a high-pressure washer to clean my chute?
No—high-pressure washers can damage seams, gaskets, and plastic flanges. The force of a pressure washer at 2000+ PSI can separate overlapping sections or create hairline cracks that spread over time. Stick to gentle water spray from a garden hose with a fan-pattern nozzle set to low pressure. A soft brush and manual effort take more time but preserve the chute’s structural integrity.
How do I know when a chute section needs to be replaced?
Replace a section if you observe deep cracks (over 2 inches), stress fractures radiating from bolt holes, seam separation, or brittleness (the plastic cracks or shatters when flexed). Minor surface scratches or small dents don’t require replacement. UV-damaged sections that feel stiff and discolored should be prioritized for replacement before they become a hazard. Check your heavy-duty trash chute or product manual for expected service life (typically 3–5 years in heavy-duty use, longer for lighter loads).
Should I lubricate the inside of a trash chute, and if so, how often?
Light lubrication with a non-toxic silicone spray can improve flow, especially on older or roughened sections. Apply sparingly—once per month or when you notice slow flow—and allow it to dry fully (per product instructions) before resuming debris loading. Over-lubricating creates a slippery surface that can accelerate debris movement unpredictably, posing safety risks. Lubrication is an enhancement, not a substitute for regular cleaning.
Ready to Implement Your Chute Maintenance Plan?
A consistent cleaning and inspection routine is the fastest path to reducing downtime, extending chute life, and keeping your crew safe. Start with our daily checklist—a 10-minute morning walkthrough catches most issues before they escalate. Layer in weekly deep-cleans and monthly detailed inspections, and you’ll maintain optimal debris flow throughout every project.
Whether you’re running a trash chute for demolition contractors, a trash chute for roofing contractors, or managing multiple chutes across a complex renovation, systematic maintenance pays dividends in efficiency and safety. For specific guidance on your chute model or help designing a site-specific maintenance plan, contact EasyChute today at (855) 902-0883. Our team can recommend the right modular debris chute system and support documentation for your jobsite.