

Index: Heavy Duty Trash Chute Setup & Specifications
- What Is a Heavy Duty Trash Chute?
- Capacity & Weight Limits You Need to Know
- Material & Durability Standards
- Installation Requirements & Site Prep
- Safety Compliance & OSHA Standards
- Dumpster Alignment & Discharge Management
- Maintenance & Cleaning Best Practices
- Heavy Duty vs. Lightweight Alternatives
- Choosing the Right Chute Length
- Cost, ROI & When to Buy vs. Rent
- Common Failure Modes & How to Prevent Them
- Frequently Asked Questions
- Ready to Order Your Heavy Duty Chute
What Is a Heavy Duty Trash Chute?
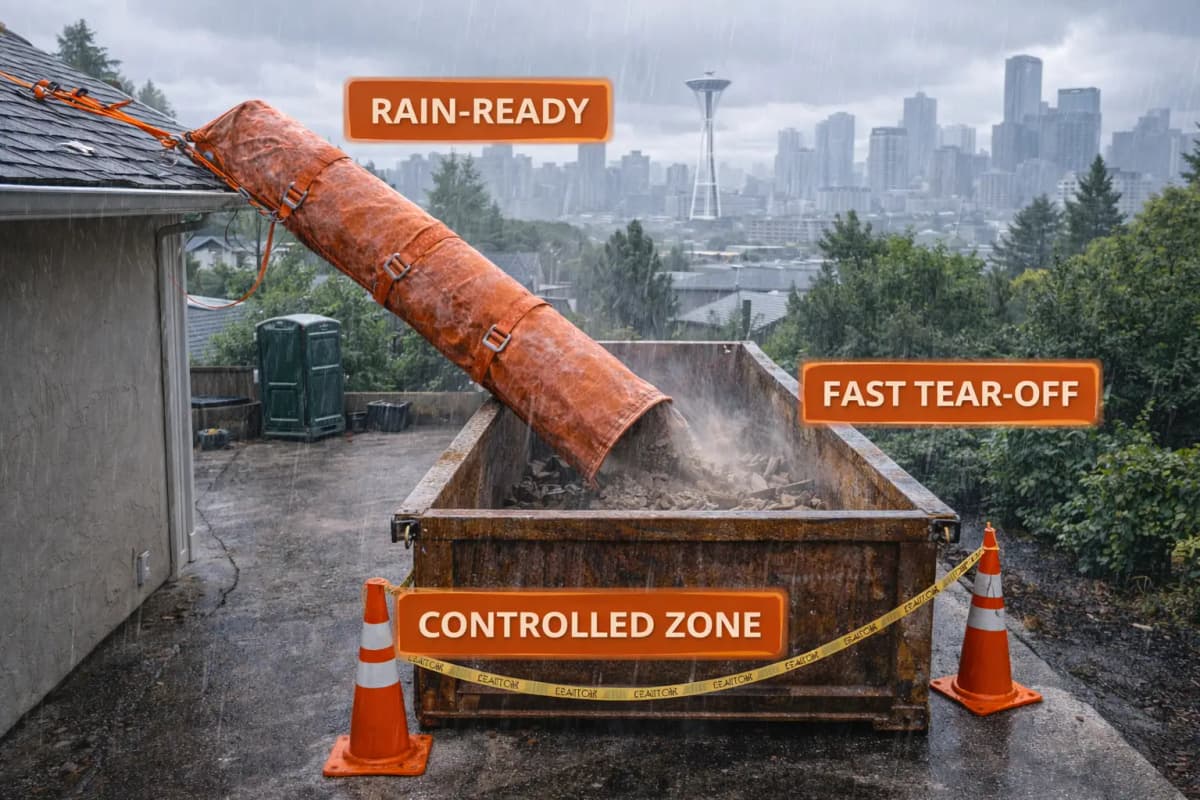
A heavy duty trash chute is a reinforced polyethylene or metal slide system designed to safely channel high volumes of construction debris from upper floors to ground-level dumpsters. Unlike lightweight single-use chutes, heavy duty systems are engineered to handle repeated, sustained loading without deformation, cracking, or separation at seams.
Heavy duty chutes are the standard for:
- Demolition projects (full tear-outs, structural removal)
- Roofing tear-offs with high shingle/debris volume
- Multi-floor renovation workflows (kitchen/bath demo, framing removal)
- Commercial construction waste streams (drywall, concrete, metal scrap)
- Extended-duration jobs (weeks to months of continuous use)
The key difference: heavy duty chutes are built with thicker wall stock, reinforced internal ribbing, extra-wide seam welds, and locking mechanisms rated for sustained pressure. They maintain structural integrity even when partially clogged or subjected to impact from oversized debris.
Capacity & Weight Limits You Need to Know
Capacity is the single most important specification for heavy duty chutes. Exceeding weight limits causes jamming, chute separation, and costly site delays.
Typical Heavy Duty Chute Capacity Ranges:
- Standard duty: 500–1,000 lbs per 8-hour shift (lightweight remodels, single-floor drywall removal)
- Heavy duty: 2,000–5,000 lbs per 8-hour shift (multi-floor demolition, roofing tear-offs)
- Industrial/Commercial grade: 5,000–10,000+ lbs per shift (full structural tear-down, continuous-flow waste)
Refer to the weight capacity guide for detailed load calculations based on material type (wood vs. concrete vs. metal) and chute diameter. A 4-inch chute handles roughly 30–40% of the volume of a 6-inch chute at the same slope; heavier materials (concrete, brick) require wider chutes even at lower total volumes.
How to Calculate Your Daily Load:
- Estimate total demolition or debris volume (cubic yards or tons)
- Divide by project duration in days
- Convert to weight using material density (wood ~35 lbs/cubic foot, drywall ~12 lbs/cubic foot, concrete ~150 lbs/cubic foot)
- Select a chute with rated capacity 20–30% above your peak daily load to avoid bottlenecks
Material & Durability Standards
Heavy duty chutes are manufactured from either high-density polyethylene (HDPE) or galvanized/powder-coated steel. Each material has trade-offs.
High-Density Polyethylene (HDPE):
- Lightweight, easier to transport and handle
- Naturally anti-corrosive (no rust); good for coastal or humid sites
- Quieter operation (less noise bouncing off plastic walls)
- Can develop surface crazing or stress cracks over years of heavy use
- Excellent for 2–3 year deployment cycles
Galvanized Steel:
- Highest impact and abrasion resistance (handles concrete chunks, rebar)
- Heavier; requires proper rigging and tie-off infrastructure
- Susceptible to rust if coating is compromised; requires protective touch-up
- Lifespan: 10+ years with maintenance; preferred for long-term rental fleets
For most contractors, HDPE heavy duty chutes offer the best balance of durability, cost, and ease of use. Modular chute sections are designed to be inspected and replaced incrementally; worn sections can be swapped without replacing the entire system.
Installation Requirements & Site Prep
Proper installation is non-negotiable for safety and performance. A poorly secured chute can shift, disconnect, or discharge debris outside the dumpster—creating liability and rework.
Site Prep Checklist:
- Clear the discharge zone (at least 6 feet around dumpster base) of personnel and obstacles
- Position the dumpster perpendicular to the building face; measure distance from wall to dumpster lip (typically 2–4 feet)
- Inspect the mounting surface (roof edge, window sill, scaffold) for load-bearing capacity and any cracks or corrosion
- Identify anchor points (roof cleats, window frames, exterior beams rated for the chute’s fully loaded weight)
- Confirm electrical or utility lines are not in the discharge path
Mounting Options:
- Roof-edge mounting: Chute hangs from the roof parapet or cleat system; most stable for multi-floor drops. Requires clear edge access and tie-off points.
- Window-sill or wall-bracket mounting: Chute anchors to lower-floor window frames or exterior brackets. Lower cost, but limited to shorter heights and lighter loading.
- Scaffold mounting: Chute is strapped to exterior scaffolding. Flexible for phased work; see scaffold mounting guidance.
- Mobile chute stand: Free-standing frame on wheels or legs; useful for sideward or alley drops where wall-mounting is not feasible.
See the installation process guide for step-by-step rigging, angle setup (typically 45–60 degrees for optimal flow), and tie-off verification.
Safety Compliance & OSHA Standards
Heavy duty trash chutes fall under OSHA construction safety standards. Non-compliance exposes your crew to serious penalties and injury liability.
Key OSHA Requirements for Debris Chutes:
- Confined discharge: Debris must drop into a contained receptacle (dumpster, debris bin) to prevent spillage into pedestrian zones
- Barrier/signage: Discharge zone must be cordoned with barricades or cones; warning signs posted at ground level and upper floors
- Personal protective equipment: Workers loading chutes must wear hard hats, safety vests, and gloves. No jewelry or loose clothing.
- Load monitoring: Supervisor must periodically verify the chute is not jamming or overflowing; debris must not spill outside the dumpster
- Angle and slope: Chutes must be angled 45–60 degrees for reliable gravity-fed flow and to prevent workers from reaching into obstructed sections
For ergonomic guidance on safe loading techniques, refer to OSHA ergonomic guidelines. Heavy debris (concrete, brick) should be broken into manageable chunks (under 30 lbs) to avoid strain injury during loading.
Dumpster Alignment & Discharge Management
Improper dumpster placement is a leading cause of spillage, worker frustration, and chute misalignment. Even heavy duty chutes can have debris miss the container if the angle is off by more than a few degrees.
Alignment Best Practices:
- Measure before installation: Establish the chute discharge point (the opening of the lowermost chute section) and position the dumpster directly below it, not off to one side
- Account for dumpster depth: Debris should land in the center of the dumpster box, not on the lid or front edge. Adjust chute starting height accordingly.
- Wind considerations: On windy days, lighter debris (drywall dust, insulation scraps) can be blown outside the container. Use chute bags or tarping to contain wind-blown material.
- Daily verification: Visually check dumpster alignment each morning before loading. Dumpsters can shift during pickup cycles or from heavy debris impact.
- Secondary containment: On sensitive sites (near neighbors, HOA-controlled lots), use ground tarps or plywood to capture any spillage outside the dumpster
Heavy duty chutes with wider diameters (5–6 inches) are more forgiving of minor misalignment; narrower chutes (3–4 inches) require stricter alignment discipline.
Maintenance & Cleaning Best Practices
Heavy duty chutes accumulate dust, resin, paint, and debris buildup—especially during long projects. Regular cleaning preserves flow speed and prevents clogs.
Weekly Cleaning Protocol:
- Daily shake-down: At end of each work day, tap the exterior of the chute with a rubber mallet to dislodge loose debris stuck to interior walls
- Water flush (if applicable): For drywall or dust-heavy projects, use low-pressure water spray (hose) to rinse the interior. Avoid high-pressure washers, which can force clogs deeper
- Visual inspection: Look for cracks, separation seams, discoloration, or moisture spots that suggest internal corrosion or damage
- Section disconnect: Every 2–3 weeks on long-running jobs, disconnect sections at the coupling points, inspect for wear, and reset the locking bands
Seasonal Maintenance:
- Winter projects: Ice and snow can freeze debris inside the chute, causing blockages. Use mild heat (heat guns, NOT open flame) or salt-based chute-cleaning solutions to soften ice. Never hammer on a frozen chute; risk of cracking.
- Humid/coastal sites: Polyethylene doesn’t rust, but HDPE can absorb moisture at seams. Dry out the chute completely before storage.
- Storage: After job completion, rinse the chute, allow it to dry, and store it out of direct sunlight to prevent UV degradation and discoloration
Heavy Duty vs. Lightweight Alternatives
Not every job requires a heavy duty chute. Understanding the trade-offs helps you right-size equipment and control costs.
When to Use Heavy Duty:
- Projects lasting more than 2 weeks
- Daily debris load exceeds 2,000 lbs
- Demolition, tear-offs, or full-scale renovations
- Mixed materials (wood, concrete, drywall, metal)
- Sites with wind, steep angles, or challenging discharge zones
When Lightweight Chutes Suffice:
- Single-room remodels (bathroom, kitchen) with low debris volume
- Short-term jobs (1–3 days)
- Light materials only (drywall, insulation, cardboard)
- Tight budget projects where cost is the primary driver
Heavy duty chutes cost 30–50% more upfront but deliver 3–5× longer lifespan and can handle 5–10× higher throughput. For demolition and roofing contractors, the ROI is clear. For one-off remodels, a lightweight alternative may be more practical.
Choosing the Right Chute Length
Chute length is determined by the height of the upper floors and the angle of deployment. Longer chutes require stronger anchors and more tie-offs.
Modular Chute Lengths (typical offerings):
- 10-foot chute: Single-story residential (ground to second floor) or low-rise commercial. Lightweight, easy to handle.
- 25-foot chute: Multi-story residential or mid-rise commercial (typically 3–4 floors). Most common for general contracting.
- 50-foot chute: High-rise commercial, tall industrial buildings. Requires heavy-duty rigging, professional installation, and wind-load analysis.
- Custom lengths: Chute sections stack to any height; custom lengths are available for atypical buildings (towers, unusual angles).
See guidance on modular chute sections for coupling specifications and how sections are locked together.
Cost, ROI & When to Buy vs. Rent
Heavy duty trash chutes represent a significant capital or rental expense. Understanding the financial trade-offs is critical for job profitability.
Typical Heavy Duty Chute Costs (2026 pricing):
- Purchase (HDPE modular system, 25 feet): $2,500–$4,500
- Rental (weekly): $150–$350 per week, depending on length and location
- Delivery & pickup: $100–$300 per trip
- Installation labor: $200–$600 (contractor self-install) or outsourced rigging ($1,000–$2,000)
Buy vs. Rent Decision:
Rent if: Job duration is under 4 weeks, you don’t have a warehouse to store equipment between jobs, or you lack the labor to install/remove.
Buy if: You run multiple projects per year, you have crew trained in setup/removal, or your fleet is growing. A heavy duty chute amortizes over 3–4 years of regular use.
For detailed cost and workflow analysis, see demolition debris removal and modular trash chute systems guides specific to your project type.
Common Failure Modes & How to Prevent Them
Understanding how chutes fail helps you avoid expensive downtime and rework.
Chute Jamming / Clogging:
- Cause: Oversized debris, wet materials (drywall after rain), or stringy materials (insulation, wire mesh) wedging inside
- Prevention: Break concrete and lumber into 12–18 inch chunks; remove insulation batting from scrap wood; inspect chute daily for obstructions
- Recovery: Clear jams from the top using a plunger-like tool; never reach into a jammed chute blindly
Section Separation / Leaking:
- Cause: Improper coupling of modular sections; locking bands not fully seated; impact damage to seams
- Prevention: Follow debris chute system setup instructions exactly; verify locking bands are hand-tight before loading
- Recovery: Disconnect the offending section, inspect for cracks, and replace if damaged
Angle Drift / Misalignment:
- Cause: Wind pressure, uneven loading (always dumping on one side), or loose tie-offs
- Prevention: Tighten tie-offs weekly; instruct crews to load debris toward the center of the chute opening, not to one side
- Recovery: Realign chute with reference plumb line or laser level; retighten all anchor points
UV Degradation (HDPE only):
- Cause: Years of direct sunlight exposure without UV-inhibitor coating
- Prevention: Store chutes indoors or under tarps between projects; purchase HDPE with UV-stabilizer additive
- Recovery: Surface crazing is cosmetic; structural failure is rare. Replace severely embrittled sections.
Frequently Asked Questions
What’s the difference between heavy duty and standard trash chutes?
Heavy duty chutes are engineered with thicker wall stock, reinforced seams, and wider diameters to handle sustained high-volume loading (2,000–10,000 lbs per shift) without deformation or separation. Standard chutes are lighter, cheaper, and suited to single-room remodels or light debris streams. For demolition, tear-offs, or extended projects, heavy duty is the only practical choice.
Can I use a heavy duty chute for multiple projects, or is it a one-time-use system?
Heavy duty chutes are built for reuse across dozens of projects over 3–5+ years. The modular design allows worn sections to be replaced individually. With proper storage and maintenance, a purchased heavy duty chute becomes a long-term asset that amortizes quickly over a busy contracting practice.
What’s the maximum height a heavy duty chute can safely drop debris?
Heavy duty chutes are available in 10-, 25-, and 50-foot lengths, and custom configurations can reach 75+ feet for high-rise work. Height is limited more by tie-off and rigging capacity than by the chute itself. Consult a structural engineer or rigging company for projects exceeding 50 feet, especially in windy areas.
Do I need a permit to install a trash chute on a jobsite?
Permit requirements vary by municipality. Most jurisdictions require notification to the building department if the chute will be in place for more than 30 days or if it spans public right-of-way (sidewalk, alley). Confirm local regulations before ordering. Check your city or county code office website for debris/waste management rules.
How do I prevent debris from overshooting or missing the dumpster?
Proper dumpster alignment (directly below the chute discharge point), correct chute angle (45–60 degrees), and accurate measurement of the chute starting height are critical. On windy days, use chute bags or ground tarps to contain lighter materials. For window-drop chute setup, position the dumpster with clearance on all sides and verify alignment every morning.
What’s the best way to clean a clogged heavy duty chute?
Start with a daily shake-down using a rubber mallet to loosen debris inside the chute. For stubborn clogs, use a plunger-like tool inserted from the top (never reach into the chute blindly). Low-pressure water spray can help; avoid high-pressure washers. If the clog persists, disconnect the offending section and clear it manually. For ice or resin blockages, use mild heat or specialized chute-cleaning solvents.
Is it cheaper to rent a heavy duty chute or buy one for my contracting business?
Rental costs $150–$350 per week plus delivery. Over a 4-week project, that’s $600–$1,400 plus delivery fees. A new heavy duty HDPE chute costs $2,500–$4,500 and lasts 3–5 years. If you run 2+ projects per year, buying pays for itself in 1–2 years. Renters benefit if they do sporadic work or lack storage space; buyers benefit from continuous workflow and fleet growth.
Ready to Order Your Heavy Duty Trash Chute
Heavy duty trash chutes are mission-critical for any contractor managing high-volume debris. The right system reduces labor time, minimizes site spillage, and keeps crews safe and productive.
Next Steps:
- Assess your load: Calculate your daily debris volume and select a chute rated 20–30% above peak load
- Choose your configuration: Decide on length (10, 25, or 50 feet), material (HDPE for lightweight portability; steel for maximum durability), and mounting method (roof, window, scaffold, or mobile stand)
- Verify your site: Measure from upper floor to dumpster; confirm anchor points; check local permit requirements
- Plan delivery and installation: Budget 2–4 hours for setup; ensure your crew is trained or hire professional rigging labor
- Get support: Contact our team at 855-902-0883 or ordering@easychute.com for pricing, recommendations, and installation guidance tailored to your jobsite
Whether you’re renting for a single project or building a long-term fleet, a heavy duty trash chute is the most reliable way to manage construction debris on time and safely.