

Index
- What Is Chute Capacity and Why It Matters
- How to Estimate Debris Volume on Your Project
- Chute Diameter and Section Sizing
- Step-by-Step Capacity Calculation Methods
- Debris Density and Weight Considerations
- Height, Staging Zones, and Flow Rate
- The Case for Oversizing Your Chute System
- Common Capacity Calculation Mistakes Contractors Make
- Tools and Worksheets for Quick Estimation
- Capacity Requirements by Project Type
- Regulatory and Safety Considerations in Sizing
- Frequently Asked Questions
- Ready to Size Your System
What Is Chute Capacity and Why It Matters
Chute capacity refers to the volume of debris a system can safely handle over a defined time period — typically measured in cubic yards per hour or total project volume. Unlike a dumpster that simply holds material, a chute must balance gravity flow, worker loading pace, and ground-level collection. Undersizing leads to blockages, worker frustration, and safety risks; oversizing wastes rental dollars but rarely causes problems.
Your capacity calculator should answer three questions: How much total debris will your project generate? Over how many days will you load that debris? How many workers will be feeding the chute at peak times? The answers determine the diameter, length, and configuration of sections you need.
How to Estimate Debris Volume on Your Project
The foundation of any capacity calculation is an honest estimate of how much debris your project will produce. Overestimating slightly is safer than underestimating, because running out of space mid-project forces expensive emergency rentals or work stoppages.
Square Footage and Debris Removal Type
Start with the project’s square footage and the type of work. A full house tear-off produces far more debris than an interior remodel; a foundation excavation differs from roofing shingles.
- Interior demolition / gutting: 0.5–1.0 cubic yards per 100 sq ft
- Roofing tear-off (asphalt shingles): 1.2–1.5 cubic yards per 1,000 sq ft of roof
- Framing removal / structural demo: 1.5–2.5 cubic yards per 100 sq ft
- Foundation excavation / soil: 1 cubic yard per 27 cubic feet of excavation
- Renovation (drywall, flooring, trim): 0.3–0.7 cubic yards per 100 sq ft
These are conservative estimates. Always add a 20–30% buffer for contingencies, unexpected finds, and worker loading variation.
Using Floor Plans and Visual Inspection
Walk the site and note the scope visually. Count the number of walls being removed, the square footage of roofing, the depth of excavation. If you have architectural plans, use them to cross-check your estimate. Photos from the client’s site visit are invaluable for referencing the condition and extent of existing material.
For renovation projects, take note of multiple floors. A five-story brownstone renovation will require far more chute height and overall system length than a single-family home.
Chute Diameter and Section Sizing
Debris chutes come in standard diameters, typically 18″ to 24″ for commercial use. The diameter directly affects flow rate and the size of material that can fit through. Your choice of diameter drives the number of sections you’ll need and the overall rental cost.
Standard Diameter Options
- 18″ diameter: Ideal for lighter debris (drywall, tile, insulation), slower flow, lower cost. Best for small single-family projects or interior-only work.
- 20″ diameter: The middle ground. Handles roofing tear-offs, framing scraps, and general renovation debris. Most common for mid-size commercial projects.
- 24″ diameter: Accepts larger material pieces (lumber, structural beams), fastest flow rate. Necessary for demolition-heavy projects and multi-floor high-volume sites.
Choosing the right diameter is as important as the length. A 24″ chute on a 3-story building moves debris faster than an 18″ on a 10-story job, so project height, debris type, and worker count all factor in.
Section Lengths and How They Stack
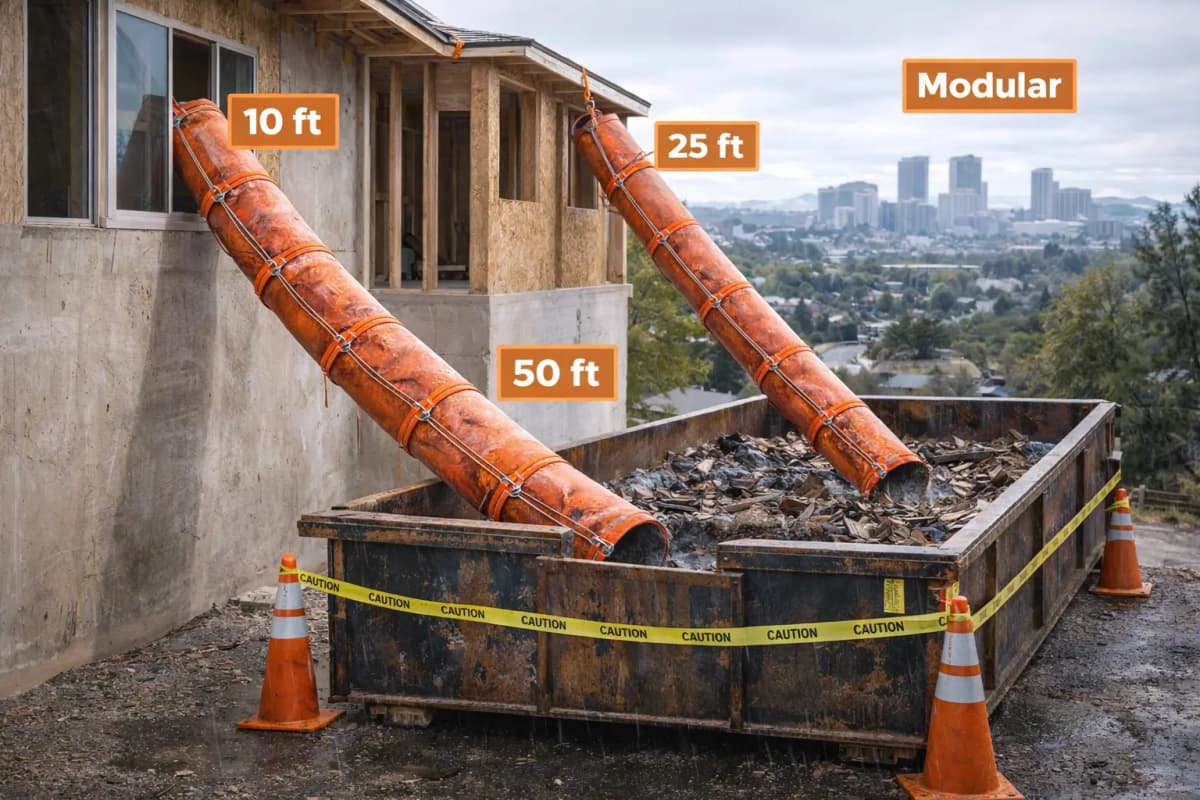
Chutes are delivered as modular sections — commonly 10 ft, 20 ft, and 50 ft lengths. You combine sections vertically to match your building height. A 10ft trash chute section clips easily into the next; most systems allow you to mix and match for optimal fit.
For a 45-foot tall building, you could use one 50ft section (or four stacked 10-footers, plus a 5-foot adapter). Calculate your exact height early and confirm with your vendor that the section configuration is available.
Step-by-Step Capacity Calculation Methods
Three practical methods dominate contractor use: the volume-per-hour method, the total-project-volume method, and the crew-pace method. Use all three as cross-checks.
Method 1: Volume Per Hour
Estimate how many cubic yards per hour a loaded chute can move at full capacity, then compare it to your crew’s loading pace.
- Determine your chute diameter and the density of debris (light, medium, heavy).
- Light debris (drywall, insulation): ~3–4 cubic yards per hour through an 18″ chute; ~6–8 through a 24″ chute.
- Medium debris (mixed demolition): ~2–3 cubic yards per hour through an 18″; ~4–6 through a 24″.
- Heavy debris (concrete, wet soil): ~1–2 cubic yards per hour through an 18″; ~2–4 through a 24″.
- Time your crew’s actual loading on day one. If they load faster than the chute can move, you need a larger diameter or dual chutes.
If your crew will load 4 cubic yards per hour and an 18″ chute handles only 2, you’ll have a backup — a clear sign to upgrade to 20″ or 24″.
Method 2: Total Project Volume Divided by Days
Add up all debris and divide by the number of active work days.
- Total debris: 50 cubic yards (from your square-footage estimate).
- Active demo days: 5 days.
- Daily target: 50 ÷ 5 = 10 cubic yards per day.
- With an 8-hour work day, 10 ÷ 8 = 1.25 cubic yards per hour required throughput.
- An 18″ chute in medium debris easily handles this. But if your estimate is 200 cubic yards over 5 days, you need 5 cubic yards per hour — a job for 20″ or 24″.
This method is intuitive and works well for rough bidding. Always add 50% extra capacity as a safety margin to avoid mid-project overflow.
Method 3: Crew-Pace and Number of Workers
Observe how much debris one worker can feed into a chute per hour, then multiply by your crew size.
- One worker loading an 18″ chute with light debris (drywall, insulation): ~2–3 cubic yards per hour.
- Same worker with framing and mixed material: ~1–1.5 cubic yards per hour.
- If you have 4 workers on the debris removal, multiply: 4 × 1.5 = 6 cubic yards per hour required throughput.
- Cross-check this against your chosen chute diameter’s rated capacity.
This method is highly practical for real-time adjustments. If actual crew pace exceeds chute capacity, you can reduce crew size, slow the work, or upgrade the chute — all important decisions for schedule and budget.
Debris Density and Weight Considerations
Not all cubic yards weigh the same. Lightweight insulation fills space but weighs little; wet concrete or soil is heavy and flows differently. Your debris chute weight capacity guide covers load limits in detail, but density also affects how fast material flows and how much you can safely compact in the chute.
Density Categories
- Light (0.3–0.5 tons per cubic yard): Drywall, insulation, roof foam, cardboard, packing. Flows freely but takes up space.
- Medium (0.5–1.0 tons per cubic yard): Mixed demolition, roofing shingles, framing scraps, tile. Standard assumption for most projects.
- Heavy (1.0–1.8 tons per cubic yard): Concrete, soil, wet debris, brick, stone. Flows slowly and stresses equipment.
A project with 50 cubic yards of light drywall debris will occupy more space and move faster than 50 cubic yards of concrete. If your project includes heavy materials (foundation demo, excavation), account for slower chute flow and consider reinforced modular trash chute kit configurations designed for high-density loads.
Height, Staging Zones, and Flow Rate
Building height affects both the total chute length needed and the rate at which gravity accelerates debris. Taller chutes move lighter material faster; shorter chutes may cause slower flow and backing up.
Vertical Height and Acceleration
- 1–3 stories (30–50 feet): Gravity acceleration is moderate. Light debris flows steadily; medium and heavy material may require occasional manual clearing or gentle compaction.
- 4–8 stories (50–100 feet): Gravity pull is strong. Debris flows quickly; workers must feed steadily to avoid gaps and air blockage. Consider intermediate support frames to prevent sway.
- 9+ stories (100+ feet): Very high velocity. Workers need training to load safely; material jam-up is rare, but impact force at the bottom is high. Padding at the discharge and frequent monitoring of the dumpster are critical.
Staging Zones on Multi-Floor Projects
On large buildings, do not channel all debris from all floors into a single chute opening at the roof. Instead, establish staging zones:
- Place debris collection points (e.g., 5th, 10th, and roofline floors).
- Use separate chute sections for each zone, or a single chute with multiple feed openings at different heights.
- This distributes the load, speeds up worker flow, and reduces bottlenecks.
The trash chute installation guide walks through the specifics of rigging chutes for tall buildings with intermediate landings.
The Case for Oversizing Your Chute System
It may seem counterintuitive, but oversizing a chute system often saves money and headaches. Here’s why:
- Avoids mid-project upgrades: If you undersize and hit 10 days into a 2-week demo, renting an additional chute for the final week is expensive and disruptive.
- Improves crew morale and productivity: Workers move faster when they’re not waiting for the chute to clear. A slightly oversized system reduces frustration and keeps the project on schedule.
- Reduces jams and blockages: Larger diameters tolerate awkward shapes and occasional oversize pieces without backing up.
- Lowers rental cost per cubic yard: A larger system costs slightly more per day, but if it prevents a 2-week delay, you save money overall.
- Provides flexibility: An oversized chute can handle unexpected debris finds (hidden demolition, additional scope) without panic.
A good rule of thumb: size your chute for 150% of your estimated peak load. If your peak is 5 cubic yards per hour, choose a chute rated for 7.5 cubic yards per hour. The marginal rental cost is usually under $100–200 per week and buys significant peace of mind.
Common Capacity Calculation Mistakes Contractors Make
Even experienced crews cut corners on sizing. Here are the most expensive errors:
Underestimating Debris Volume
Contractors often forget to include framing lumber, wall cavities full of insulation, roof decking, and underlayment. A “simple” kitchen demo can fill 8 cubic yards, not 3. Always add 25–30% for unknowns.
Confusing Cubic Yards with Square Footage
A 2,000 sq ft roof doesn’t equal 2 cubic yards of tear-off debris — it’s closer to 2.5–3 cubic yards. Read your estimates carefully and cross-check with density tables.
Not Accounting for Crew Size Scaling
A 2-person crew on day 1 and an 8-person crew on day 3 will load the chute at very different rates. Your sizing should handle peak-crew loading, not average. See the trash chute setup mistakes post for more real-world examples.
Forgetting About Worker Loading Technique
Loose material (shredded drywall, insulation) takes longer to drop and flows slower than compact chunks. If your crew will compact material before loading, flow improves. If they throw stuff in loose, account for air pockets and slower descent.
Ignoring Building Height and Sway
On a windy site, a 50-foot chute may sway, creating temporary blockages. Secure rigging and intermediate bracing reduce risk, but they also cost time and money. Factor in these real-world complications when you quote.
Tools and Worksheets for Quick Estimation
While a full capacity calculator requires site-specific input, several faster methods exist:
Simple Spreadsheet Template
Build a one-page spreadsheet with columns for:
- Project scope (roof tear-off, interior demo, full gutting, etc.)
- Square footage and debris type
- Cubic yard estimate (using the density table above)
- Number of work days
- Estimated peak crew size
- Calculated required throughput (cubic yards per hour)
- Recommended chute diameter (cross-referenced to your equipment specs)
This takes 15 minutes per project and prevents costly guesses.
Photo and Measure Method
Take overhead photos of the site using a drone. Mark the rough boundaries of areas to be demolished. Pace off rough dimensions, then plug them into a spreadsheet. This visual approach is more accurate than phone estimates and builds client confidence.
Vendor-Provided Calculators
Many equipment suppliers now offer online capacity calculators tied to their chute models. These account for diameter, height, and material type. While marketing-driven, they’re often reliable for baseline estimates and worth using as a second opinion.
Capacity Requirements by Project Type
Different project types have distinct debris profiles and loading patterns. Use these benchmarks to size faster:
Roofing Tear-Off
A typical asphalt-shingle tear-off (3,000 sq ft single-family home) generates 3.5–4.5 cubic yards of material. With a 3-person crew working 8 hours, you need ~0.5–0.75 cubic yards per hour throughput. An 18″ chute is often adequate, though a 20″ is safer for faster work. See our trash chute for roofing contractors guide for specifics.
Full House Renovation / Gutting
Stripping out drywall, flooring, framing, and MEP (mechanical, electrical, plumbing) from a 2,000 sq ft house typically yields 12–18 cubic yards. Spread over 5–7 working days with a 4–6 person crew, peak hourly throughput is 2–3 cubic yards. A 20″ chute is standard; 24″ for aggressive schedules.
Demolition Work
Full structural demolition (bringing down walls, removing concrete slabs) is the highest-volume scenario. A single-family demolition can yield 80–150+ cubic yards. Use a 24″ chute, consider dual chutes for very large sites, and plan for 10–15 working days. Read the trash chute for demolition contractors guide for phasing strategies.
Interior Renovation (Paint, Flooring, Trim)
Light interior work (no structural changes) generates 2–5 cubic yards for a 2,000 sq ft space. An 18″ chute is often overkill, but cost difference is minimal. Many contractors use 18–20″ for simplicity and flexibility across multiple project types.
Regulatory and Safety Considerations in Sizing
Capacity isn’t just about speed — it’s also about safety and compliance. Overfilling a chute or exceeding weight limits creates hazards and can violate building codes.
Weight Capacity and Structural Load
Your chute mounting brackets and support frame have maximum weight limits. A fully loaded 50-foot 24″ chute can weigh several tons. Confirm your building’s facade can support the load; some older buildings require temporary bracing or reinforcement. Your structural engineer or the chute vendor can provide load calculations.
OSHA and Labor Safety
OSHA ergonomics guidelines limit the weight and awkwardness of debris pieces workers can safely lift and drop. Oversized chunks (e.g., a full sheet of plywood that barely fits the chute opening) are a pinch hazard. Ensure your crew is trained to break down large items or use mechanical assistance when needed. OSHA construction industry standards also cover fall protection around chute openings and proper rigging.
Local Building Codes and Permits
Some jurisdictions require permits for temporary chute installations, especially on occupied multi-family or commercial buildings. Check local rules early. Oversizing may be a code requirement in high-density areas to prevent daily overflow into streets. Read trash chute regulations by state for region-specific guidance.
Environmental and Waste Stream Rules
The EPA construction and demolition debris facts highlight waste diversion mandates in many states. Your chute capacity must be sized not just for total volume, but to support sorting and recycling — e.g., separating wood, metal, and mixed debris into different dumpsters or bins. Plan your chute placement and staging zones accordingly.
Frequently Asked Questions
What size chute do I need for a 2,000 square foot house renovation?
For a typical interior renovation (kitchen, bathroom, flooring), a 2,000 sq ft house generates roughly 4–8 cubic yards of debris. An 18″ or 20″ diameter chute is usually adequate if your crew is 3–5 people and the project spans 5–7 days. If you’re also removing structural elements (walls, ceilings), expect 10–15 cubic yards; use a 20″ or 24″ chute. A modular debris chute system lets you scale sections as needed.
How do I account for debris that won’t fit through a chute opening?
Larger pieces (e.g., full framing lumber, door frames, appliances) often need to be broken down before dropping. Factor in 10–15% of crew time for pre-processing. If your project has large structural members, ask your chute vendor about removal options: some pieces can bypass the chute and go directly to the dumpster via crane or manual placement.
Can I use the same chute diameter for both roofing and demolition work?
A 20″ chute works for both, though it’s not optimal for heavy demolition (slower flow due to larger chunks). If you run multiple project types, a 20″ is a good middle ground. A 24″ is more versatile across both types but costs more. Assess your annual mix: if 80% roofing, stay with 18–20″; if 60%+ demolition, invest in 24″.
What happens if my crew outpaces the chute capacity?
Material backs up at the opening, workers must slow down, and the chute may clog. Signs include debris piling above the opening, slow descent, or voids (air pockets) in the flow. If this happens on day one, you have a few options: reduce crew size, extend the work over more days (lower peak load), add a second chute, or upgrade to a larger diameter. Catching this early is far cheaper than an emergency mid-project fix.
Does weather (wind, rain) affect chute capacity calculations?
Indirectly. Wind can sway the chute and slow flow slightly; rain can compact debris and reduce velocity. If you’re working in a high-wind area (coastal or mountain sites), factor in 10–15% reduction in effective capacity and ensure the chute is properly guyed. For rain-prone regions, plan for slower flow with heavier, wetter material.
How do I size a chute for a multi-floor apartment or condo renovation?
Add up debris from all floors being renovated, then divide by the number of active renovation days. If you’re renovating 10 units at 800 sq ft each (8,000 sq ft total), expect 30–50 cubic yards. Spread over 6–8 weeks with staggered crews per floor, you might have 3–4 cubic yards per day, requiring 0.4–0.5 cubic yards per hour. A 20″ chute is standard. Consider staging zones on every 2–3 floors to distribute the load and speed crew efficiency.
What’s the difference between a capacity calculator and a flow-rate calculator?
Capacity refers to total volume (how many cubic yards can the chute handle overall). Flow rate refers to speed (cubic yards per hour). A capacity calculator estimates project scope; a flow-rate calculator (cross-referenced to chute diameter) tells you if that scope will fit your timeline. You need both: total volume, divided by working days, divided by work hours per day, should equal or be less than the chute’s rated flow rate for your debris type.
Ready to Size Your System
Calculating trash chute capacity doesn’t require advanced engineering — just clear thinking, honest estimates, and a bit of conservative buffer. Start with the volume-per-day method, cross-check with the crew-pace method, and always choose a chute one size larger than your minimum estimate.
For your next project, gather a tape measure, your floor plan, and a count of your crew size. Use the cubic-yard estimates and throughput tables above. If you hit any snags — unusual debris type, height limits, or tight site conditions — reach out to your equipment vendor or review EasyChute’s other guides, including our maintenance checklist to keep your system running smoothly during and after the project.
Get started today: Use our step-by-step framework to estimate your next project’s debris volume, confirm your crew size and timeline, and choose the right chute configuration. When you’re ready to place an order or request a custom sizing consultation, contact EasyChute at +1-855-902-0883 or visit our online ordering system. We’re here to help you right-size your system and keep your project on schedule.