

Index
- What Is a 50ft Trash Chute Section?
- Understanding the Modular Design
- Capacity and Performance Specifications
- Step-by-Step Installation Guide
- Site Preparation and Dumpster Alignment
- Safety and OSHA Compliance
- Maintenance and Ongoing Care
- Optimizing Debris Flow and Preventing Clogs
- Troubleshooting Common Issues
- Cost, Rental, and ROI for 50ft Systems
- Best Project Types for 50ft Chutes
- Frequently Asked Questions
- Ready to Install Your 50ft Chute?
What Is a 50ft Trash Chute Section?
A 50ft trash chute section is a modular, polyethylene-constructed debris disposal system designed for mid-to-large commercial construction, roofing, and renovation projects. Unlike single fixed chutes, a 50ft section is typically built from five 10ft segments that couple together, allowing contractors to customize the total drop height and adapt to multi-story building layouts.
The 50ft configuration is the sweet spot for projects spanning 5–6 stories or sites where debris must travel a significant vertical distance before landing in a ground-level dumpster. It balances ease of assembly, durability, and cost-effectiveness compared to shorter or longer chute runs.
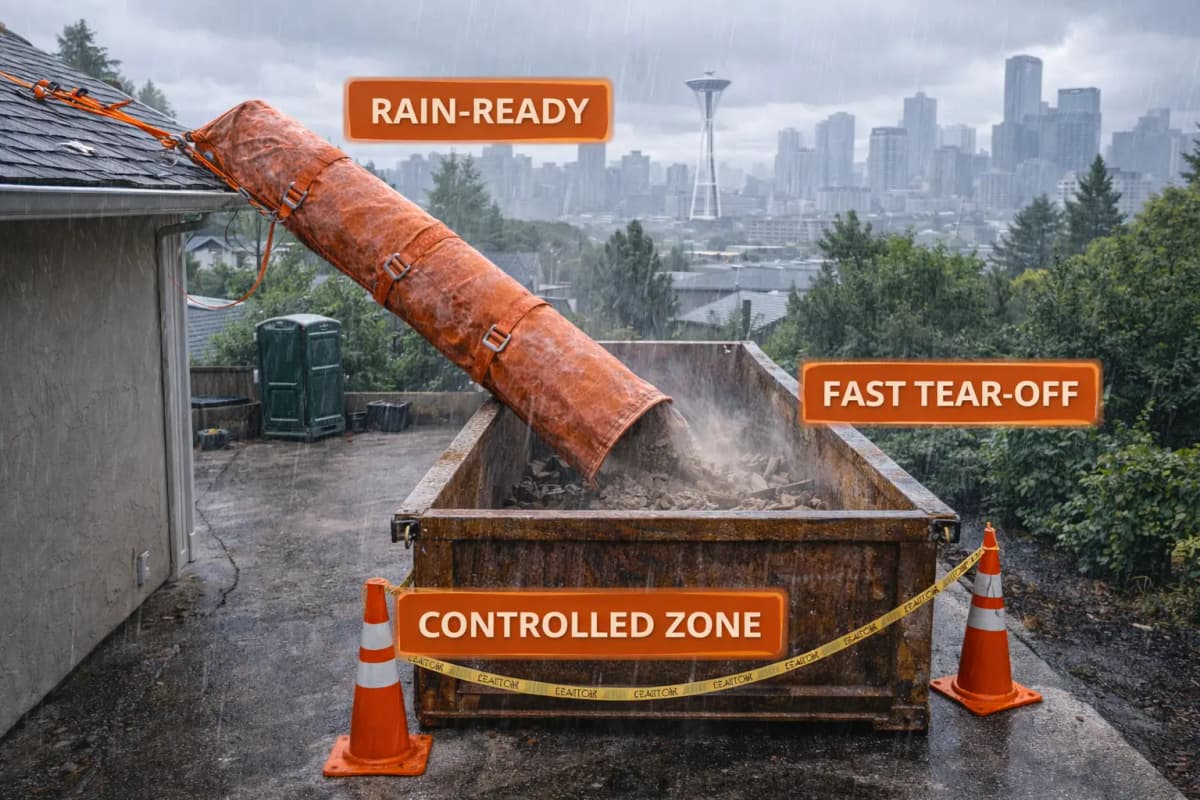
EasyChute’s 50ft sections feature:
- Modular 10ft coupling segments for flexible configuration
- Bright orange polyethylene construction for visibility and UV resistance
- Reinforced edges and smooth interior walls to minimize debris hang-ups
- Male/female coupling connectors that lock securely in place
- Wide entry opening at the top for rapid loading and minimal spillage
Understanding the Modular Design
The modular architecture of a 50ft chute system is what makes it so flexible and contractor-friendly. Rather than a single rigid tube, five 10ft sections can be stacked, coupled, and adjusted to suit your site’s exact dimensions.
How the Coupling System Works
Each 10ft section has a male connector on one end and a female connector on the other. The male end slides into the female end of the next section below, creating a secure, overlapping seal that prevents debris from escaping at the joints. The connection is held by locking bands or fasteners that cinch down to ensure stability during heavy loading.
This overlap design also allows for slight angulation when sites are not perfectly vertical, accommodating buildings with subtle lean or where chute sections must be positioned slightly off-axis to clear architectural features like ledges or window protrusions.
Advantages of Modular Configuration
Modular design means you can:
- Assemble only the length your project needs (e.g., 3 × 10ft = 30ft for a 3-story site, or 5 × 10ft = 50ft for taller builds)
- Reuse individual sections across multiple projects
- Adjust the top entry point height to match loading zones (rooflines, window heights, scaffold platforms)
- Repair or replace a single damaged section without scrapping the entire system
- Transport sections separately, reducing vehicle-size requirements
For a deeper dive into how modular chutes work across different project types, refer to our modular chute architecture guide.
Capacity and Performance Specifications
Understanding the weight and volume limits of a 50ft section ensures you choose the right system and avoid overloads that compromise safety and durability.
Weight Capacity Per Section
A single 10ft section of heavy-duty polyethylene chute typically handles 500–800 lbs of debris loading at any given moment. When fully assembled into a 50ft system, the total distributed load is supported by five segments and the entire tie-off and mounting infrastructure. However, do not exceed the per-section limit by concentrating all debris into a single segment at the top; instead, stagger loads and maintain steady flow rates.
For specific weight-load engineering on your project, consult our weight capacity guide.
Throughput and Flow Rate
A 50ft chute with a 10-inch diameter opening can manage approximately 2–5 cubic yards of debris per hour, depending on debris type, moisture, particle size, and loading consistency. Heavier, compacted debris (roofing shingles, drywall sections) flows slower than loose, lightweight debris (insulation, small wood scraps).
Professional crews using a 50ft chute for roofing tear-offs or demolition typically process 8–15 cubic yards per full work shift, which aligns with standard dumpster capacities (e.g., 20–30 yard bins).
Material Composition and Durability
50ft chutes are constructed from UV-stabilized polyethylene, selected for:
- Impact resistance against sharp debris edges and dropped tools
- Weather resistance to UV radiation, rain, and temperature cycling
- Friction properties that allow smooth debris descent while minimizing static buildup
- Low-cost replaceability compared to metal or composite alternatives
Well-maintained polyethylene chutes reliably handle 50+ projects before needing replacement sections.
Step-by-Step Installation Guide
Proper installation is critical for safety, stability, and debris containment. Follow this step-by-step installation process to ensure your 50ft system is set up correctly.
Phase 1: Site Assessment and Planning
Before unloading any chute sections:
- Measure the vertical drop: From the intended top entry point (roofline, scaffold, or window opening) to the ground-level dumpster location. Confirm it is 50ft (or close to it).
- Inspect anchor points: Identify and evaluate existing tie-off points—roof parapets, parapet anchors, window frames, or structural columns. Ensure they meet load-bearing requirements.
- Check dumpster alignment: Position the dumpster directly below the chute’s exit point, centered as much as possible. Account for ground slopes or uneven surfaces.
- Clear obstructions: Remove power lines, signage, planters, or landscaping that might interfere with the chute’s descent or swinging.
- Notify building management and local authorities: Many municipalities and HOAs require debris chute permits or inspections.
Phase 2: Assembling Sections and Coupling
Lay out all five 10ft sections on the ground in order. Begin coupling from the bottom:
- Place the bottom (exit) section on sawhorses or a level platform to keep it stable during coupling.
- Slide the male connector of the second section into the female end of the bottom section until the overlap is snug (typically 6–12 inches).
- Secure the coupling with locking bands, bolts, or hose clamps, depending on your chute model. Tighten all fasteners evenly to prevent tilting.
- Repeat this process for sections 3, 4, and 5, working upward. Check alignment after each coupling.
- Once all five sections are coupled, the assembled 50ft chute will weigh 150–250 lbs. Do not attempt to lift the full assembly alone.
Phase 3: Positioning and Tie-Off Installation
With the fully coupled chute still on the ground, position it so the top entry is directly above where workers will load debris and the bottom exit aligns with the dumpster opening.
- Install the top tie-off first: Secure a heavy-duty rope, strap, or cable from the top section to a roof parapet or structural anchor point. Leave minimal slack to prevent swinging.
- Install mid-point tie-offs: For a 50ft chute, install at least 2–3 additional tie-offs at the 15ft and 35ft marks (approximately sections 2 and 4). This prevents the chute from bowing or oscillating under load.
- Install the bottom tie-off: A light tie-off or positioning strap at the bottom section prevents it from shifting laterally once secured.
- Tension check: Once all tie-offs are in place, visually inspect the chute for vertical alignment. Use a plumb bob or laser level if available.
For detailed scaffold-mounting techniques, see our scaffold mounting guide.
Phase 4: Dumpster and Ground Containment Setup
Align the dumpster so the chute’s exit is centered over the bin opening. If the dumpster cannot be positioned directly below (e.g., due to street or alley constraints), use a chute bag containment solution to capture debris and funnel it into the bin.
- If space allows, position a spotter or safety monitor 10–15 feet from the dumpster exit to track debris flow and alert loaders of any blockages.
- Lay tarps or plastic sheeting around the dumpster base to catch spillover and contain dust.
- Have a broom, shovel, and hand-truck nearby for frequent cleanup.
Phase 5: Safety Barriers and Signage
Before loading any debris:
- Install caution tape or barricades around the dumpster to prevent pedestrians or unauthorized personnel from standing under the chute.
- Post “Debris Chute in Use” signs at the top loading area and at ground level near the dumpster.
- Brief all crew members on loading procedures, fall zones, and hand-signal protocols.
Site Preparation and Dumpster Alignment
Site preparation is often overlooked but directly impacts chute performance and safety. A poorly prepared site leads to debris spillage, dumpster damage, and delayed work.
Ground Leveling and Dumpster Positioning
If the ground is uneven, use shims, gravel, or wooden blocks to level the dumpster base so it sits stable and centered under the chute exit. A tilted dumpster creates a funnel effect, causing debris to ricochet off the edge and scatter across the site.
Ideal dumpster offset: ±6 inches from directly below the chute exit. Beyond that, debris spillage increases significantly.
Clearance Zones
Mark out a 15-foot radius around the dumpster as a “Debris Fall Zone.” Prohibit parking, storage, or worker staging in this area during chute operation. Falling or ejected debris can cause serious injury.
Access Routes for Debris Removal
Plan a clear path from the job site (roofline, interior demolition area) to the chute’s top entry point. Remove trip hazards, ensure handrails or rope guides are in place on stairs or ramps, and use slip-resistant surfaces where workers will be handling heavy debris loads.
Weather and Environmental Factors
In windy conditions (sustained winds >20 mph), reduce chute loading rates and inspect tie-offs more frequently. Rain or snow can make debris heavier and slower-flowing, so adjust loading pace accordingly. In cold climates, polyethylene can become brittle; inspect for cracks or stress fractures in winter months.
Safety and OSHA Compliance
Debris chute safety is governed by OSHA Construction Industry standards and site-specific fall-protection regulations. Compliance protects your crew and reduces liability.
Fall Protection for Top-Loading Personnel
Workers at the chute’s entry point must wear:
- Hard hats (ANSI Z89.1 certified)
- Safety vests with high-visibility coloring
- Fall-arrest harnesses when working on roofs or elevated platforms (OSHA 1926.501)
- Non-slip footwear rated for construction environments
Never allow workers to stand on unstable platforms, lean over the chute opening, or work alone at the top loading point.
Ground-Level Safety Zone Management
Designate a ground-level spotter whose sole responsibility is monitoring the dumpster area and preventing unauthorized entry into the debris-fall zone during active loading. Equip the spotter with a hand signal to communicate with the top-level loading crew (e.g., “Chute Clear” or “Stop Loading”).
Ergonomics and Load Handling
Follow OSHA ergonomics guidelines for safe lifting. Large debris items (roofing sections, drywall sheets) should be broken into smaller pieces before loading to reduce individual load weight and lower the risk of dropped objects or strain injuries.
Use mechanical aids (hand-trucks, dollies, pneumatic nailers) wherever possible to move heavy debris to the chute rather than manual carrying.
Regular Inspection and Maintenance Logs
Conduct daily visual inspections of the chute before the first load of the day. Document any cracks, separation at coupling points, or loose tie-offs in a log. Address defects immediately or remove the chute from service.
Maintenance and Ongoing Care
A well-maintained 50ft chute remains reliable across dozens of projects. Neglected systems develop clogs, joint failures, and structural weakness.
Daily Maintenance Tasks
At the end of each work shift or when debris flow slows:
- Flush the interior: Use a damp mop or cloth to wipe interior walls, especially at coupling points where debris tends to accumulate.
- Inspect for lodged debris: If the chute becomes clogged (rare with consistent flow), disassemble sections as needed to remove the blockage. Never force debris down with excessive pressure.
- Check tie-offs and fasteners: Verify that all ropes, straps, and bolts remain tight and show no visible wear.
- Clear the exterior: Wipe down the outside of the chute with a brush or dry cloth to remove dust and prevent material buildup that can make inspection harder.
Weekly Deep-Clean Protocol
Once per week (or more frequently on longer projects):
- Remove exterior sediment with a soft brush; avoid high-pressure washers, which can degrade the polyethylene over time.
- Inspect all coupling bands and hose clamps; re-tighten if any have loosened.
- Check the interior for rust stains or mineral deposits (common in humid regions). Gently rinse if needed.
- Verify that the top entry opening remains unobstructed and free of debris buildup around the rim.
End-of-Project Preparation
Before moving the chute to the next site:
- Disassemble the 50ft system back into individual 10ft sections at a safe, level location.
- Inspect each section for cracks, discoloration, or permanent deformation. Replace any sections showing structural damage.
- Clean all sections thoroughly and allow them to dry completely before storage or transport.
- Store sections indoors or under a tarp to protect from UV exposure and weather during downtime.
Optimizing Debris Flow and Preventing Clogs
Debris flow problems are the leading cause of chute downtime. Understanding what causes clogs and how to prevent them keeps your crews moving.
Optimal Loading Practices
Maintain steady, continuous flow rather than dump-and-wait cycles:
- Load smaller, frequent batches: Several small loads per hour are better than one massive dump every few hours. This keeps debris moving and prevents settling.
- Mix debris types: Don’t load all shingles, then all drywall, then all lumber. Vary the debris to prevent uniform packing that leads to wedging.
- Monitor entry velocity: Debris should enter the chute with enough speed to keep flowing without being violently launched. Let heavier items “drop” gently rather than throwing them.
- Avoid oversized pieces: Limit individual items to no more than 3–4 feet in length and 1–2 feet in width. Larger pieces risk jamming at coupling points.
Moisture Management
Wet debris (rain-soaked drywall, damp insulation) is slower-flowing and more prone to sticking. If weather permits, allow debris to dry slightly before loading. In humid climates, run the chute more frequently during high-moisture days to prevent accumulation.
Coupling-Point Attention
The overlap zones where sections couple are the most common clog sites. Periodically insert a soft brush or cloth through the interior (starting from the top) to dislodge any trapped material. Never use metal tools or rigid objects that could pierce the polyethylene.
Troubleshooting Common Issues
Slow or Restricted Flow
Symptom: Debris moves downward very slowly or hesitates at one point. Likely cause: Partial blockage, moisture accumulation, or debris wedged at a coupling. Solution: Stop loading. From the top, use a long pole or soft brush to dislodge material. If unsuccessful, disassemble the chute section by section from the top until you locate the obstruction. Remove it and reassemble.
Spillage or Overflow at the Top Entry
Symptom: Debris bounces or overflows around the sides of the entry opening. Likely cause: Chute is tilted, entry opening is blocked by another object, or loading pace is too fast. Solution: Check vertical alignment using a plumb bob. Verify the entry opening is clear. Reduce loading pace and brief crew to load more carefully, aiming debris toward the center of the opening.
Separation or Leaking at Coupling Points
Symptom: Debris or water seeps from the joint between two sections. Likely cause: Fasteners have loosened, or the overlap is insufficient. Solution: Tighten all coupling bands or hose clamps evenly. If leaking persists, fully disassemble the joint, check the male/female connectors for debris, and re-couple with additional fasteners if needed.
Chute Swaying or Oscillating
Symptom: The chute visibly sways side-to-side under load. Likely cause: Insufficient tie-offs, loose mid-point fasteners, or high winds. Solution: Add additional tie-off straps at mid-points (15ft and 35ft). Tighten all existing tie-offs. Reduce loading rates in windy conditions and monitor forecast before starting.
Cracks or Surface Damage
Symptom: Visible cracks, punctures, or gouges in the polyethylene. Likely cause: Impact from sharp debris, UV degradation, or cold-weather brittleness. Solution: For small cracks (<2 inches), a polyethylene repair patch kit may suffice. For larger damage, replace the affected section. Do not use a damaged chute that could allow debris escape or structural failure.
Cost, Rental, and ROI for 50ft Systems
Understanding the economics of a 50ft chute helps contractors decide whether to purchase, rent, or lease for their projects.
Purchase Cost
A complete 50ft system (five 10ft sections plus all coupling hardware, fasteners, and basic tie-off equipment) typically costs $2,500–$4,500, depending on the supplier and polyethylene grade. Buying trash chute systems online often provides better pricing than local suppliers.
Individual 10ft sections cost $500–$900 each, so purchasing allows for scaling to shorter heights and replacing damaged sections without replacing the entire system.
Rental and Lease Options
A 50ft system can be rented for $300–$600 per week or leased for $100–$200 per project (3–7 day engagements). Debris chute rental is ideal for one-off projects or contractors who do not want to manage inventory and storage.
Rental includes delivery, assembly support, and end-of-project pickup, which reduces your on-site labor burden.
Break-Even Analysis
For a contractor running 4+ projects per year, purchasing a 50ft system typically pays for itself within 12–18 months. Ownership eliminates rental costs and offers scheduling flexibility. Rental is better for contractors with sporadic or seasonal demand.
Operating Costs
Beyond purchase or rental, plan for:
- Maintenance supplies (repair patches, fasteners, cleaning materials): ~$50–$100 per year
- Storage or shelter during downtime: included if you own site space; else ~$50–$200/month if renting offsite
- Delivery and transport to job sites: $150–$300 per delivery if outsourced; free if you own a truck
- Section replacement (expected every 50–100 projects): ~$500–$900 per section
Best Project Types for 50ft Chutes
While 50ft chutes are versatile, they excel in specific scenarios:
Roofing Tear-Offs and Replacements
A 50ft chute is ideal for 5–6 story residential or commercial roofing projects. Roofing contractor chute setups benefit from the steady, high-volume debris flow of shingles, underlayment, and flashing. Most roofing crews prefer chutes over manual carrying or crane-lifted dumpsters because the workflow is faster and hands remain free.
Interior and Exterior Demolition
For mid-sized demolition jobs—removing partition walls, flooring, or façade elements—a 50ft chute handles the variety of debris types well. The height covers both upper-floor and lower-level removal zones.
Multi-Unit Renovation and Remodeling
Apartment buildings, condos, and townhouse complexes commonly use 50ft systems to manage debris from kitchen, bathroom, and interior wall renovations. The chute keeps debris off hallways and elevators, reducing contamination and safety hazards.
Commercial Build-Out and Tenant Fit-Out
Office and retail renovation projects with moderate debris volumes (drywall scraps, flooring removal, HVAC ducting) are excellent fits for a complete debris chute system at the 50ft length.
Projects NOT Ideal for 50ft
- Short buildings (1–2 stories): A 10–20ft chute is more cost-effective.
- Very tall skyscrapers (10+ stories): Consider 75–100ft systems or multiple chutes at different heights.
- Extremely hazardous debris: Asbestos, contaminated soil, or chemical waste requires specialized containment systems beyond standard chutes.
- High-precision environments: Pharmaceutical clean rooms or laboratories may require dust-sealed chutes or no chute at all.
Frequently Asked Questions
Can I assemble a 50ft chute solo, or do I need a crew?
While a single person can technically couple all five 10ft sections, it’s safer and faster with two people. The fully coupled chute weighs 150–250 lbs and must be lifted and positioned. A two-person team can safely assemble, position, and tie-off a 50ft system in 3–4 hours. Three people cuts the time to 2 hours and reduces strain injuries.
What’s the maximum safe loading rate for a 50ft chute?
Maintain a continuous flow of 2–5 cubic yards per hour. This translates to roughly 100–300 lbs of debris every few minutes. Exceeding this rate risks overloading a single section and jamming the chute. Most professional crews unconsciously regulate themselves; slow down if you notice spillage or blockage.
How do I know if my tie-off points are strong enough?
Roof parapets, structural columns rated for live load (e.g., HVAC units, satellite dishes), and certified roof anchors are typically adequate. Avoid tying off to gutters, downspouts, or decorative trim—these are not designed for load and can fail catastrophically. When in doubt, consult a structural engineer or the building’s architectural plans. Many commercial buildings have load-rated anchor points already installed; locate and verify them before chute assembly.
Can I use a 50ft chute in winter or snowy climates?
Yes, but with extra caution. Polyethylene becomes more brittle in freezing temperatures, so handle sections gently during assembly and transport. Snow accumulation on the chute’s exterior is normal and does not affect interior flow; however, heavy icing can create weight imbalances. Inspect for cracks weekly during winter projects. Debris may move slower if wet with snow melt, so allow extra time for loading cycles.
What debris is unsafe to load in a standard 50ft chute?
Avoid hazardous, oversized, or liquid-heavy materials:
- Asbestos, lead paint, mold-contaminated materials (use certified hazmat chutes)
- Wet concrete, wet mortar, or heavy slurry (restricts flow and hardens in the chute)
- Metal scraps or rebar (punctures polyethylene and creates safety hazards)
- Items larger than 3–4 feet (risk jamming)
- Liquids or paint buckets (spillage and contamination)
For heavy-duty chute systems with reinforced construction, metal and oversized items may be acceptable; verify with your supplier.
How often should I replace coupling bands or fasteners?
Inspect fasteners daily; replace any that show corrosion, bending, or looseness. Under normal use (30–50 projects per year), fasteners last 2–3 years. In humid coastal climates, plan to replace annually due to rust. Buy spare fastener kits in bulk to always have replacements on hand.
Is a 50ft chute covered by rental insurance?
Most rental agreements include liability insurance for the equipment itself, protecting against damage claims if the chute is damaged on your site. However, liability for debris injuries or property damage from spilled debris typically falls on the contractor. Verify your project’s liability insurance and clarify coverage limits with your rental company before starting.
Local Notes for Massachusetts Contractors
If you’re operating in Massachusetts, state and local building codes govern debris chute use on residential and commercial projects. The Massachusetts State Building Code Section 3401 requires temporary erosion and sedimentation controls, which include containment of construction debris.
Many municipalities (Boston, Cambridge, Worcester, Springfield) require debris chute permits and may mandate environmental inspections, especially if the project is near wetlands or waterways. Check your local town or city building department website for specific debris chute or construction waste requirements. County-level guidance is available through your regional Massachusetts Department of Environmental Protection office.
For reference, consult the Massachusetts construction debris management resources for state-level guidelines.
Local Notes for EPA and National Debris Standards
EPA construction & demolition debris facts indicate that over 600 million tons of construction and demolition waste are generated annually in the U.S. Many states and municipalities now require diversion of at least 50–75% of this waste from landfills. Using an organized debris chute system (vs. scattered debris piles) makes it easier to sort and recycle materials on-site, supporting both regulatory compliance and sustainability goals.
Ready to Install Your 50ft Chute?
A properly installed and maintained 50ft trash chute section transforms debris management on mid-to-large construction projects. By following the assembly, safety, and maintenance protocols outlined above, you’ll keep your crews productive, protect site safety, and minimize the delays caused by poor debris control.
Whether you’re planning your first 50ft chute project or scaling up your fleet, contact EasyChute today for rental options, purchasing information, or on-site assembly support. Our team has installed hundreds of 50ft systems across the Northeast and beyond, and we’re ready to help yours succeed.
Call us at +1 (855) 902-4883 or visit easychute.com for a quote and delivery schedule that fits your timeline.