

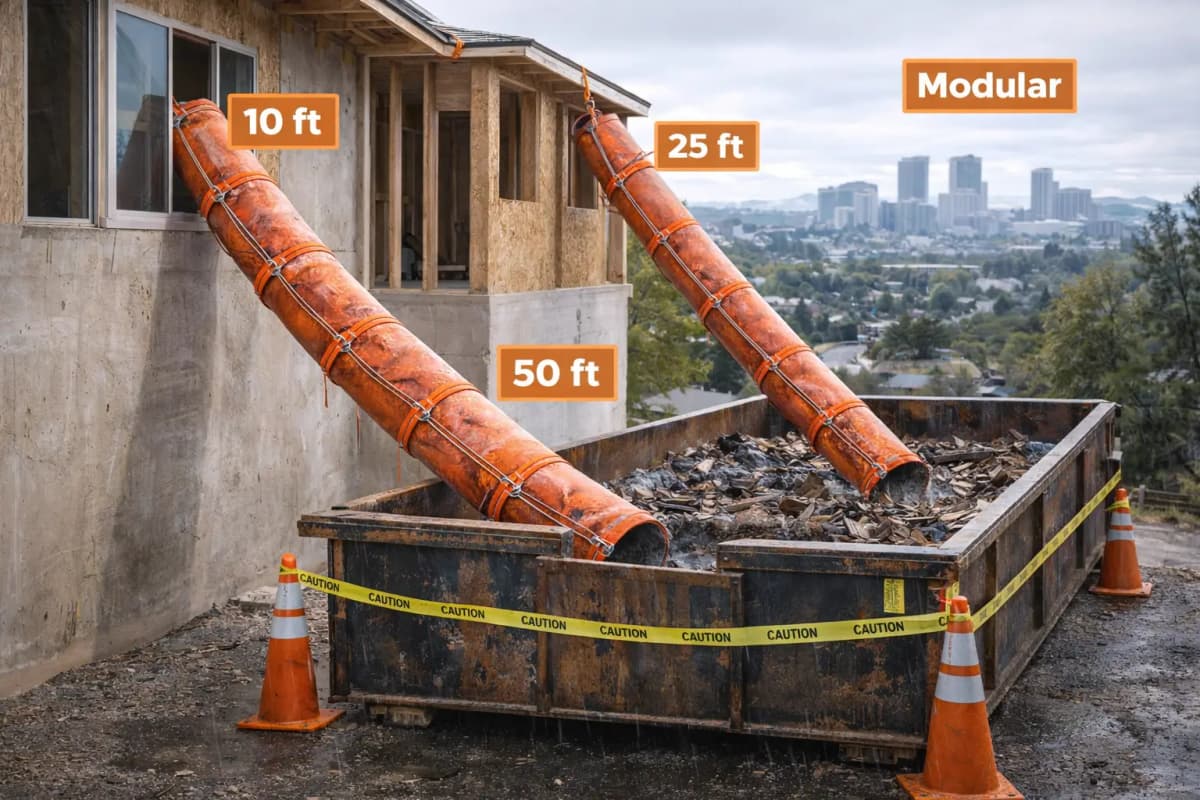
- Overview: Why 25 Feet Is the Sweet Spot
- Section Configuration & Components
- Pre-Setup Checklist & Site Assessment
- Step-by-Step Assembly
- Vertical Securing & Tie-Off Requirements
- Ground-Level Placement & Dumpster Logistics
- Capacity & Weight Management
- Safety & Operational Best Practices
- Maintenance During Use & Post-Project Care
- Common Setup Errors & How to Avoid Them
- Frequently Asked Questions
- Ready to Set Up Your 25ft Chute
Overview: Why 25 Feet Is the Sweet Spot
A 25-foot trash chute system strikes the ideal balance for most mid-sized commercial renovations, roofing tear-offs, and interior demolition work. This height covers three to four stories on most buildings, avoiding the cost and complexity of a 50-foot rig while still reaching floors that a 10-foot section cannot.
Contractors choose 25-foot configurations because they minimize debris handling on intermediate floors, reduce ground-level congestion, and fit within standard dumpster placement zones. A 25-foot chute—typically made of five 5-foot modular sections—is also light enough for two to three workers to assemble and reposition if site conditions change mid-project.
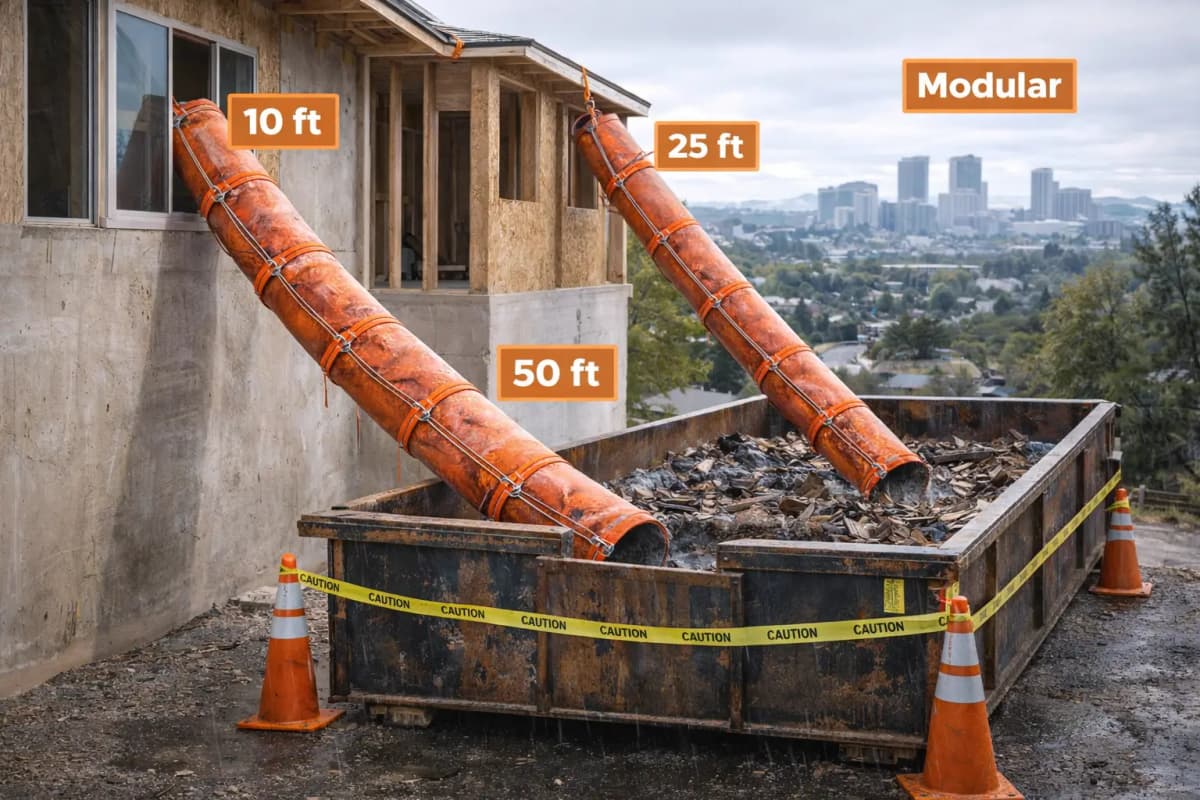
This guide walks you through selection, assembly, securing, and troubleshooting a 25-foot system so you can deploy it safely and efficiently the first time.
Section Configuration & Components
A standard 25-foot chute consists of five interlocking 5-foot modular sections, each 10–16 inches in diameter (depending on load class), made of extruded polyethylene or similar abrasion-resistant plastic. Each section includes:
- Tubular body: The main chute barrel, beveled at the top and bottom to overlap with adjacent sections.
- Coupler bands: Metal or plastic rings that clamp the joints between sections; tightened by bolts, screws, or quick-cinch mechanisms.
- Discharge collar: A reinforced opening at the bottom of the lowest section, sometimes with a flared lip to guide debris into the dumpster.
- Mounting brackets or flanges: Connection points for tie-offs, guy-wires, and building clamps (if affixed to the structure).
- Optional hood or opening guard: A removable top cap that limits debris overspill and controls wind exposure during high winds.
Understanding each component ensures you don’t miss fasteners, misalign sections, or create weak points that could collapse under repeated use.
Pre-Setup Checklist & Site Assessment
Before touching a single section, conduct a thorough site walk and document conditions. This step prevents delays, injuries, and equipment damage.
- Measure vertical rise: Confirm your target window or loading point is indeed 20–27 feet above ground. Use a measuring tape or laser distance tool.
- Check window or opening dimensions: Your chute must fit through (or be positioned outside) the opening without jamming. Standard 25-foot chutes are 10–16 inches wide.
- Inspect the building facade: Look for protruding brick, stone ledges, electrical lines, or HVAC equipment that could obstruct the chute path.
- Verify dumpster access and positioning: Confirm the dumpster can be placed directly below (or nearly below) the chute’s discharge point, and that ground is level and stable.
- Check load limits: Review your building’s window sill strength or facade integrity if you plan to use window-mounted clamps. Older buildings may require additional bracing.
- Document weather exposure: Note prevailing winds, rain exposure, and sun direction; plan tie-off angles and protective measures accordingly.
- Verify local code compliance: Check municipal ordinances for setback requirements, sidewalk safety zones, and fall-protection rules in your jurisdiction.
- Review crew skill level: First-time operators benefit from extra assembly time and a second experienced worker on-site during the first lift.
Create a simple checklist on site and photograph the setup area for your records. This documentation protects you if questions arise later.
Step-by-Step Assembly
Assembly happens in two phases: ground-level stacking, then vertical positioning and securing.
Phase 1: Ground-Level Stacking
Lay out all five sections on a flat, clear area of the job site. Organize them in order (1–5, from top to bottom once installed). Check each section for cracks, dents, or loose fasteners. Minor cosmetic damage is normal; anything that affects tube integrity must be reported to your rental provider.
Position section 1 (top) upright. Slide section 2 into the overlapped joint, ensuring the beveled edges mate smoothly. Tighten coupler bands by hand first, then use a wrench or socket to final-torque them (typically 20–30 foot-pounds, depending on band design—check your system’s manual).
Repeat for sections 3, 4, and 5. As you stack, rotate the assembled chute 90 degrees every two sections to verify straightness and alignment. Wobbling or visible gaps signal misalignment; disassemble, clean the joint, and reseat.
Once fully stacked, the assembled chute should stand vertically without lateral play. Walk around it and look up; the tube should appear straight and centered.
Phase 2: Positioning to the Vertical
With the crew in place, carefully tilt the assembled chute vertical. Most 25-foot systems can be lifted by three workers using rope and lever techniques, or you may rent a light crane (4–6-ton capacity) for safer deployment on larger sites.
Position the discharge end (section 5) to hover 12–24 inches above the open dumpster. The inlet (top of section 1) should align with your window opening or load point. Use adjustable legs, braces, or temporary 2×4 blocking to stabilize the chute before securing.
Once positioned, do not move the chute again without first removing tie-offs and securing devices.
Vertical Securing & Tie-Off Requirements
A 25-foot chute must be secured at least at the midpoint (around 12–13 feet) and again near the top to prevent sway and wind-induced movement. OSHA Construction Industry guidelines require that debris handling systems be anchored to prevent displacement.
- Guy-wire method (most common): Attach 1/4-inch galvanized steel cable to mounting brackets on the chute (at sections 2 and 4) and anchor to stable building elements (window frames, roof edges, exterior handrails) using come-alongs or turnbuckles. Angle the wires 45 degrees from the chute centerline for maximum stability.
- Building-clamp method: For window-drop setups, use heavy-duty plastic or metal window clamps that grip the window frame and support the chute weight. Tighten clamps evenly; verify they do not crack the window frame.
- Vertical bracing: Install diagonal 2×4 lumber or adjustable metal braces between the chute and the building face, spaced 6–8 feet apart. Brace-to-chute bolts should be torqued to 40–50 foot-pounds.
- Fall-zone safety: Mark a perimeter around the chute’s base with caution tape and cones. Enforce a “no-entry” zone directly below the chute opening for pedestrians and non-project vehicles.
Before debris loading begins, have a second worker visually inspect all tie-offs, clamps, and braces. Pull on the chute at mid-height; it should not sway more than 1 inch laterally.
Ground-Level Placement & Dumpster Logistics
The dumpster is your debris collection point, and its placement directly affects chute safety and operational efficiency.
Dumpster Positioning
Position the dumpster as close to the chute’s discharge point as possible—ideally within 12 inches horizontally. A gap of more than 24 inches allows debris to scatter on the ground, creating slip hazards and reducing efficiency.
Ensure the dumpster sits on level, compacted ground. Soft or uneven ground causes the bin to settle unevenly, which misaligns the chute opening and can cause discharge jams.
Ground Clearance & Pedestrian Safety
Maintain at least a 10-foot perimeter around the dumpster and chute base on all sides. This buffer accommodates falling debris, worker movement, and equipment repositioning.
If pedestrians or traffic must cross near the site, install barriers, temporary fencing, or deploy a safety monitor during active debris loading.
Load-In Sequence
Brief your crew on the optimal load sequence: lighter debris (drywall, insulation) first, followed by heavier materials (concrete, tile, metal studs). This keeps the chute from jamming with heavy material early and reduces pressure on tie-offs as you fill.
Do not exceed the dumpster’s weight limit. A standard 20-yard roll-off bin holds 10–12 tons; a compact 10-yard holds 4–6 tons. Monitor weight as you load; overfilled bins can tip or require extra pickups, extending your rental period and increasing costs.
Capacity & Weight Management
A 25-foot chute’s capacity depends on its tube diameter and material grade. Most commercial-grade systems handle 500–1,500 pounds per minute of continuous debris flow.
Use the chute capacity calculator to estimate your project’s debris volume and match it to the right chute class. Exceeding rated capacity causes:
- Jams and blockages (requiring disassembly to clear).
- Excessive stress on coupler bands and tie-offs.
- Increased vibration and noise.
- Accelerated wear on the tube interior.
Monitor debris type. Bulky, lightweight material (insulation, drywall) flows freely; dense material (concrete, tile) loads slower and requires workers to manage flow with a push pole.
For heavy single pieces (e.g., a large section of concrete or a full cabinet), lower them slowly using a rope and pulley rather than dropping them into the chute. Free-falling dense objects can jam the discharge and crack the tube.
Safety & Operational Best Practices
Safe operation protects your crew and protects you from liability claims and regulatory action.
Personal Protective Equipment (PPE)
All workers loading or positioned near the chute must wear:
- Hard hat (to guard against falling debris).
- Safety glasses (for dust and splinters).
- Work gloves (to prevent splinters and abrasion from the chute walls).
- Steel-toe boots (in case of dropped materials).
- High-visibility vest or shirt (for site awareness).
Lifting and Loading Technique
Refer to OSHA safe lifting practices to minimize back injuries. Load from waist height when possible; bend at the knees, not the back. Limit individual debris pieces to 50 pounds if being lifted repeatedly.
Traffic Control at the Discharge Point
Do not allow workers or vehicles beneath the chute discharge opening during active loading. Debris can bounce or scatter unexpectedly.
Position the dumpster so its open lid is at least 3 feet away from the chute outlet; this allows some debris to tumble safely into the bin rather than striking the opposite edge.
Dust and Noise Management
Construction debris chutes generate dust and noise. Wet material down slightly before loading to suppress dust; use a spray bottle on dry drywall or insulation. Position the chute away from adjacent occupied buildings or residences if possible.
Weather Considerations
High winds (above 25 mph) can sway the chute and scatter lightweight debris. On windy days, reduce load frequency and monitor tie-offs closely. Rain makes material slippery and can cause discharge jams if water accumulates inside the chute; ensure the top is covered with a hood or tarp during heavy rain.
Maintenance During Use & Post-Project Care
A well-maintained 25-foot chute will serve reliably for multiple projects. Check and clean regularly.
Daily Inspection
Before each workday, visually inspect:
- Coupler bands for looseness (hand-tighten if needed).
- Tie-offs and braces for slack or displacement.
- The chute’s exterior for new cracks, dents, or splits.
- The discharge area for blockages or debris buildup.
Weekly Cleaning
Debris can build up inside the chute, especially if wet material is loaded or if material is dropped too fast. Weekly, use a push pole to dislodge stuck material and ensure water drainage. For detailed guidance, see trash chute cleaning and maintenance.
Post-Project Decommissioning
At the end of your project:
- Empty and inspect the entire chute interior.
- Flush with water to remove dust and debris residue.
- Loosen all coupler bands slightly to relieve stress during storage or transport.
- Document any damage (cracks, deep scratches) on the rental company’s inspection form.
- Remove all tie-offs and bracing hardware.
- Disassemble the chute carefully, lay sections flat, and prepare for pickup or return.
Prompt return protects your rental security deposit and maintains your professional reputation with the rental provider.
Common Setup Errors & How to Avoid Them
Learning from other contractors’ mistakes saves time and money. See common setup mistakes for a detailed rundown; here are the most frequent 25-foot-specific errors:
Inadequate Tie-Offs or Bracing
Error: Securing the chute only at the bottom or using thin rope instead of cable.
Fix: Anchor at minimum two points (one at mid-height, one near the top) using 1/4-inch galvanized cable or heavy-duty metal bracing. Test the system with a hand-pull before loading.
Misaligned Joint Couplers
Error: Forcing misaligned sections together, resulting in a bent coupler or cracked joint.
Fix: During ground stacking, ensure each section’s beveled edges are clean and smooth. Apply a light coat of silicone spray to ease insertion. Align sections by eye before tightening any bolts.
Dumpster Too Far from Discharge
Error: Placing the dumpster more than 24 inches away, causing debris scatter and floor damage.
Fix: Park the dumpster as close as safely possible. If the site layout prevents it, consider a chute bag or secondary containment to catch overflow.
Exceeding Weight or Flow Capacity
Error: Dumping concrete chunks or roofing material too quickly, jamming the chute.
Fix: Control load rates based on material type. Heavy, dense material should flow slower than light, fluffy material. Use a push pole to manage flow and break up clogs.
Ignoring Weather or Wind
Error: Operating in high winds without additional bracing, causing sway and unsafe conditions.
Fix: Install a hood on the top section. Add diagonal bracing if winds exceed 20 mph. Monitor the chute throughout the day; tie-offs can loosen as the structure settles.
Frequently Asked Questions
How do I know if my building can support a 25-foot chute?
Most modern commercial buildings and residential structures can support a 25-foot chute. The total weight (including accumulated debris) is typically 400–800 pounds. Check your building’s facade condition and window frame strength. Older brick or stone buildings may need a structural engineer’s sign-off. If using window clamps, verify the frame can tolerate the clamping load without cracking. When in doubt, consult the building owner or property manager before setup.
What’s the difference between a 25ft and a 50ft chute?
A 25-foot chute covers approximately three to four stories; a 50-foot chute covers six to eight stories. The 50-foot system requires more robust tie-offs, handles greater wind sway, and costs more to rent. For most residential and small commercial projects, a 25-footer is sufficient and more cost-effective. Choose based on your tallest loading point, not the building height.
Can I set up a 25ft chute by myself?
Technically, one experienced worker can assemble a 25-foot system. However, safely lifting and positioning the assembled chute vertically requires at least two people and ideally three. For your first install, bring a second crew member or rent a small crane. The extra labor cost is far less than the liability or delay from an accident.
How long does assembly and setup typically take?
Ground-level stacking takes 30–45 minutes. Vertical positioning, bracing, and tie-off installation add 45–90 minutes, depending on building access and site conditions. Budget 2–3 hours for a typical first-time setup. Once you’ve done it a few times, you’ll shave 30 minutes off.
What happens if the chute jams?
Jams usually occur at coupler joints or at the discharge opening. Stop all loading immediately. Use a push pole to dislodge the blockage from above if accessible. If the jam is deep inside, you may need to disassemble one or two sections to clear it. To prevent jams: control load rate, avoid dropping large heavy pieces, and inspect the interior weekly. First-time contractors often benefit from a debris hose or feed tube to meter material flow.
Are there local codes or permits I need for a 25ft chute?
Regulations vary by city and county. Many municipalities require notification to the planning or building department, especially if the chute hangs over public sidewalks. Check with your local code office before setup. Some jurisdictions mandate safety netting, barriers, or traffic control. Budget 1–2 weeks for permit turnaround if required.
What’s the typical rental cost for a 25ft chute?
Rental prices range from $150–$400 per week depending on your region, chute grade (light-duty vs. heavy-duty), and rental company. Delivery and pickup fees are often separate (typically $75–$150 each way). See rental pricing for current market rates and regional variations.
Ready to Set Up Your 25ft Chute
A properly installed 25-foot trash chute transforms debris removal on mid-sized projects. Use this guide as your setup blueprint: assess your site, stack and position carefully, secure with redundant tie-offs, manage weight and flow rates, and maintain safety disciplines throughout the project.
Questions about specific site conditions, building requirements, or equipment specifications? Reach out to EasyChute at +1-855-902-4883 or visit easychute.com. Our team can recommend the right system for your scope, provide detailed specs, and support your setup.
For deeper dives into related topics, explore our guides on modular section architecture, heavy-duty chute specifications, and cost estimation and budgeting. Whether you’re a roofing contractor tackling a tear-off, a remodeler managing renovation debris, or a demolition crew clearing a building, the 25-foot system is a reliable workhorse that keeps your site clean and your crew safe.