
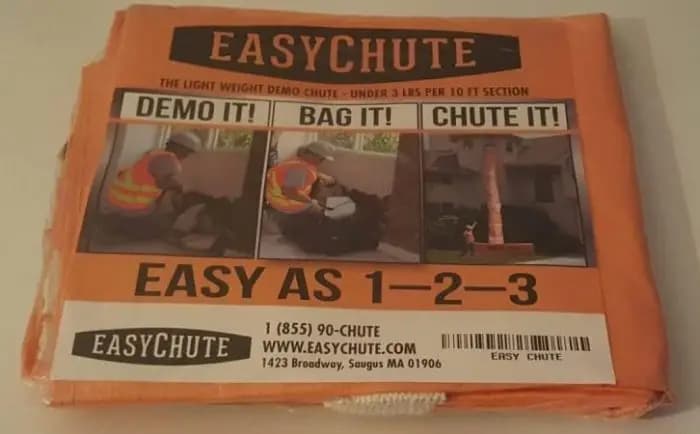
New Jersey job sites are unforgiving. Whether you are running a gut renovation in Hoboken, tearing off a roof in Cherry Hill, or demoing a brownstone staircase in Jersey City, the margin for error is thin — tight lots, busy streets, strict municipal rules, and neighbors who notice everything. A debris chute should make your life easier. But set one up wrong, and it becomes a liability: damaged materials, OSHA exposure, dumpster misses, and angry property owners.
This guide breaks down every significant setup mistake New Jersey contractors make with debris chutes, why each one happens, and exactly how to avoid it. If you have ever wrestled a chute off a third-floor window ledge at the end of a long day and thought, there has to be a better way, keep reading.
Why Debris Chute Setup Errors Are More Common Than You Think
Most setup mistakes are not about carelessness — they come from using systems that were not designed with field crews in mind. Heavy fiberglass or metal chute sections are awkward to hang solo, so corners get cut. Rope lashing substitutes for proper attachment hardware. Sections get skipped to save time. The chute ends up crooked, unsecured, or misaligned with the dumpster, and somebody ends up throwing debris by hand anyway.
Understanding why mistakes happen is the first step to eliminating them. The sections below cover every major failure point — from anchor selection all the way through strike and storage.
Mistake 1 — Not Calculating the Right Chute Length Before the Job
This is the single most common error, and it costs real money. Contractors underestimate the drop distance, order too few sections, and end up either improvising with rope extensions (dangerous) or manually tossing debris from wherever the chute ends (slow and messy).
How to Measure Drop Distance Correctly
- Measure from the anchor point (window frame, roof edge, scaffold rail) down to the top lip of the dumpster — not to the ground.
- Add at least 2 to 3 feet of extra length so the chute mouth clears the dumpster edge cleanly and debris drops inside rather than bouncing off the rim.
- Account for any horizontal offset: if the dumpster is set away from the building face, you will need additional length to angle the chute outward at a usable pitch.
- When in doubt, go longer. A 10 ft section weighs under 3 lbs with EasyChute's fabric design — adding a section costs almost nothing in labor.
EasyChute sells sections in 10 ft, 25 ft, and 50 ft lengths so you can configure exactly the drop you need without waste. Learn more about configuration options on the debris chute overview page.
Mistake 2 — Choosing the Wrong Anchor Points
An anchor point is only as strong as whatever it is attached to. New Jersey job sites frequently involve older wood-frame construction, deteriorated masonry window frames, and decorative trim that looks structural but is not. If your anchor point fails mid-job, the chute drops — and anything or anyone below it is in danger.
Anchor Points That Work
- Structural window framing (the rough opening king studs, not the casing trim)
- Scaffold rails or cross-bracing rated for static loads
- Roof ridge boards or doubled rafters, accessed from the attic side
- Steel I-beams or columns on commercial sites
Anchor Points That Fail
- Decorative brick soldier courses — mortar joints in older NJ rowhouses can be badly deteriorated
- Single-nail casing trim or window stop molding
- Rope tied around HVAC conduit or plumbing stacks
- Chain-link fence fabric used as a hanging point near a dumpster
EasyChute sections hang from four woven poly loops that accept standard carabiners or quick-connects. The load is distributed across four points rather than a single hook, which significantly reduces stress on any one anchor. Still — the building element you attach to must be capable of holding the weight of the chute plus the peak load of falling debris.
Mistake 3 — Skipping Sections to Save Time and Creating a Mid-Air Gap
It is tempting when you are three sections short of a full drop to simply skip a middle section and try to bridge the gap with the top and bottom pieces angled toward each other. The result is a debris stream that exits the gap at speed and rains material on whoever is working below or on passersby on a New Jersey sidewalk.
Every section of a properly designed fabric chute should overlap the section below it by at least 1.5 feet. EasyChute sections are built specifically for this overlap connection — debris stays inside the chute from the top window to the dumpster mouth with no gaps. If you need more length, add a section. Learn how contractors configure full-drop setups here.
Mistake 4 — Not Securing the Bottom of the Chute to the Dumpster
Even when the top anchor is perfect and the sections are connected correctly, an unsecured chute bottom creates a dangerous funnel whip. High-velocity debris — heavy shingles, chunks of drywall, broken concrete — enters the chute fast and exits even faster. If the bottom section can swing freely, it redirects debris unpredictably.
How to Secure the Chute Bottom Properly
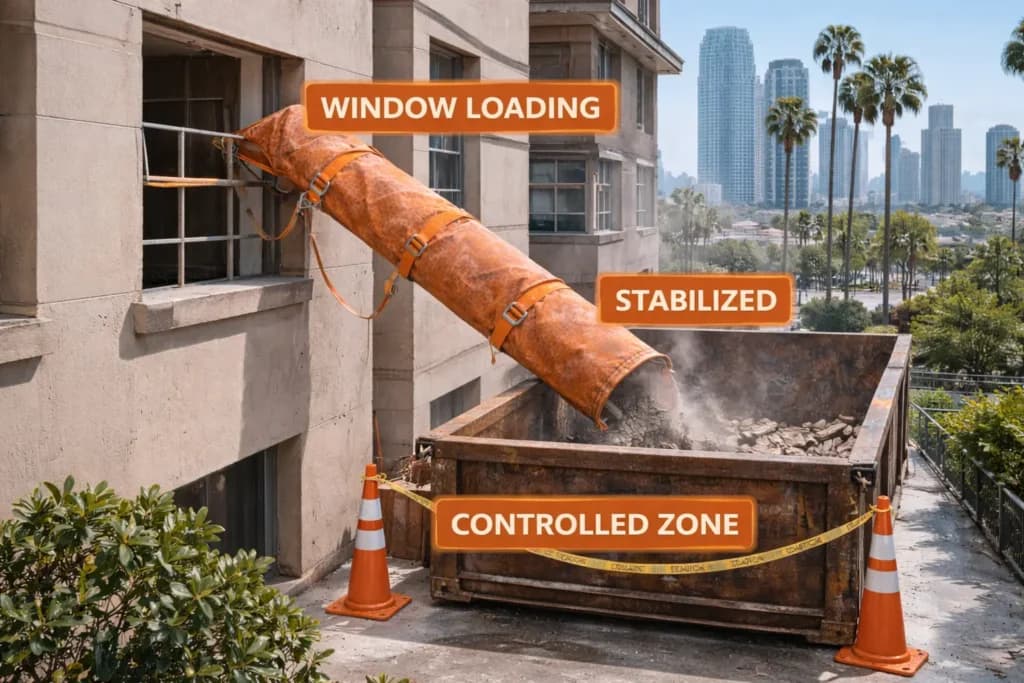
- Hook the bottom section's loops to the dumpster's side rail or top lip with two carabiners — one on each side.
- If the dumpster has no accessible rail, use a ratchet strap threaded through the loops and anchored to the dumpster's axle frame.
- Keep the chute mouth inside the dumpster edge, not hovering above it. Debris should drop into the box, not onto the rim.
- Confirm the chute cannot swing more than a few inches in any direction before the first load goes down.
The step-by-step EasyChute installation guide walks through bottom-securing techniques for common dumpster styles, including roll-off boxes with and without side rails.
Mistake 5 — Ignoring OSHA Fall Protection and Proximity Rules
Hanging a debris chute from a roof edge or upper window means someone is working at height. In New Jersey, as in every state, OSHA construction safety standards require fall protection for workers at or above six feet on a construction site. The chute installation step is frequently where this gets ignored — crews lean out windows or walk unprotected roof edges to hook sections in place.
Staying OSHA-Compliant During Chute Setup
- Use a safety harness and anchor lanyard whenever leaning past a window sill to hook chute loops.
- On roof setups, establish a fall protection zone — either guardrails, a safety net, or a personal fall arrest system — before the first section goes over the edge.
- Brief the entire crew before setup: who is hanging, who is spotting below, and what the hand signal or radio call is to stop debris loading while someone is near the drop zone.
- Keep a clear exclusion zone on the ground around the dumpster. No one should walk through that zone while the chute is loaded.
OSHA violations on a New Jersey commercial site can carry fines starting at over $16,000 per serious violation in 2026. No time savings from a rushed chute setup is worth that exposure. See the EasyChute FAQ for common compliance questions contractors ask about debris chute use on active job sites.
Mistake 6 — Using the Wrong Chute for the Material Being Dropped
Not all debris is the same, and not all chutes are rated for the same loads. This matters especially in New Jersey, where you may be doing a full roof tear-off with heavy architectural shingles and underlayment on a Monday, then pivoting to light drywall and trim demo on a condo interior Wednesday.
Matching Chute Duty Rating to Debris Type
- Lite-duty 10 ft sections: best for light demolition debris — drywall scraps, insulation, old trim, light roofing felt.
- Heavy-duty 10 ft sections: designed for roofing — asphalt shingles, ridge caps, nails-on-board underlayment, heavy tiles.
- 25 ft and 50 ft sections: suitable for mid-height and high-rise drops; check the debris weight per load, not just per piece.
Sending heavy concrete chunks or ceramic tile down a lite-duty fabric section can accelerate wear on the material and in extreme cases cause a seam failure. For roofing-specific setups, the roofing trash chute guide goes deep on material selection, angle of attack, and shingle load management.
Mistake 7 — Blocking Egress or Violating Local Ordinances
New Jersey municipalities vary widely in how strictly they enforce right-of-way and sidewalk clearance rules. Towns like Montclair, Morristown, and Hoboken have active code enforcement departments that will shut a job down if a dumpster and chute setup blocks a pedestrian path without proper permits and barriers.
Pre-Setup Checklist for NJ Municipal Compliance
- Confirm whether a dumpster placement permit is required from the local municipality — many NJ towns require this for curbside roll-offs.
- Check sidewalk clearance requirements: many NJ towns require a minimum of 5 feet of clear walkway alongside a dumpster.
- If the chute extends over public sidewalk, a pedestrian protection canopy or hard-hat exclusion zone may be required under state construction safety rules.
- Verify hours of operation — debris dropping that creates noise may be restricted to specific hours in residential zones.
- Contact your general contractor or project manager before setting up: permits are usually their responsibility, but trade subs get cited when they are on-site.
Mistake 8 — Not Briefing the Loading Crew on What Can and Cannot Go Down
A debris chute is not a universal waste conveyor. The fastest way to damage a chute, miss the dumpster, or create a material recycling problem is to let the loading crew throw anything and everything down without direction.
What Should Never Go Down a Construction Chute
- Large, rigid pieces wider than the chute opening — they will jam and require someone to clear the blockage from above or below
- Heavy, solid concrete chunks (over approximately 40 lbs per piece) — these accelerate dangerously and can burst a seam on impact
- Hazardous materials: lead paint debris, asbestos-containing tile, or anything requiring separate EPA-regulated disposal
- Wet materials that clump together — saturated insulation or drywall mud can adhere inside the chute and create a clog
According to the EPA's construction and demolition debris data, C&D waste generation in the United States is substantial, and a growing share of states — including New Jersey — are implementing material diversion requirements. Knowing what goes in the dumpster versus what needs a separate container protects both your crew and your compliance record.
Mistake 9 — Setting Up Without a Spotter or Ground Crew Coordination
Even on small residential jobs, running a debris chute without a designated spotter on the ground is a risk. The spotter's job is to watch the dumpster fill level, confirm the chute bottom stays secured, and keep unauthorized people out of the drop zone. Without one, a full dumpster gets loaded past capacity and debris starts bouncing off the top — sometimes into the street or onto neighboring property.
Spotter Responsibilities During Active Chute Use
- Maintain a visual on the dumpster fill level throughout the loading period.
- Signal the upper crew to pause when the dumpster reaches 75 percent capacity so the load can be redistributed or a swap arranged.
- Check bottom anchor connections every 30 minutes during heavy loading.
- Keep the exclusion zone clear of foot traffic, especially on sidewalk-adjacent sites where pedestrians may wander into the zone.
- Call a full stop if the chute begins to swing, twist, or if any section appears to be pulling loose from its anchor.
Mistake 10 — Storing the Chute Wet or Without Inspection After Use
Reusable fabric chutes are a significant investment, and improper storage is how they degrade long before their design lifespan. New Jersey weather is variable — a November job in Trenton can leave sections soaked by afternoon rain, and folding a wet fabric chute into a storage box traps moisture that promotes mildew and can degrade the coated fabric over time.
Post-Job Chute Care Protocol
- Shake out each section and lay it flat on a clean surface to air-dry before folding, even if it means waiting until the next morning.
- Inspect every section visually: look for abrasion marks along the bottom seam (caused by rough dumpster edges), small tears near the loop attachment points, and any discoloration that might indicate UV degradation.
- Check all woven loops for fraying or delamination where the loop meets the fabric body.
- Store in a dry location — a job trailer shelf or a covered van shelf is ideal. Avoid storing under tools or heavy equipment that can compress and crease the fabric permanently.
- Label sections by duty rating so the right sections get grabbed for the next job without having to unbox and check.
A well-maintained EasyChute section can be reused across dozens of jobs. The fabric trash chute care guide covers long-term maintenance in more detail.
Mistake 11 — Overlooking Ergonomic Loading Practices
The chute itself does the heavy lifting — but the act of loading it still puts physical strain on workers. Repetitive overhead lifting, awkward postures at window openings, and carrying heavy debris across uneven floors before it reaches the chute all contribute to musculoskeletal injuries that sideline good workers and inflate insurance costs.
The OSHA ergonomics program provides clear guidance on safe lifting techniques and workstation design for construction tasks. Applied to chute loading, the principles are straightforward:
- Break large debris pieces before carrying — a full sheet of drywall is a two-person carry; smaller pieces can be fed into the chute solo.
- Position the loading point (window, scaffold opening) at or near hip height when possible. Lifting debris overhead to a high sill adds unnecessary strain.
- Use a debris cart or wheelbarrow to stage material at the chute entry rather than hand-carrying individual pieces from across the floor.
- Rotate workers on loading duty every 45 to 60 minutes during heavy demo days.
Mistake 12 — Not Having a Plan for Unexpected Chute Jams
Even with the right sections and a briefed crew, jams happen. A large piece catches on a seam, wet debris clumps at a connection point, or a worker throws down a piece that is too big. Without a clear jam-clearance protocol, the natural response is for someone to lean into the chute from above — which is dangerous — or to shake the entire assembly from below, which stresses the anchors.
Safe Jam Clearance Steps
- Call a full stop on debris loading immediately — no additional material goes in while a jam is being cleared.
- From above, use a long push tool (a broom handle works) to gently break up the blockage from the top. Never reach inside the chute.
- If the jam is at a section connection point, disconnect the two sections at that joint, clear the blockage, and reconnect before resuming.
- After clearing, identify what caused the jam and add it to the crew's list of prohibited materials for that chute size and duty rating.
For a visual walkthrough of connecting and disconnecting sections safely, the EasyChute videos page shows the process in real-time on actual job sites.
How EasyChute Eliminates Most of These Mistakes by Design
Many of the mistakes above are symptoms of using chute systems that were not designed with working contractors in mind. Metal or fiberglass systems are heavy, require multiple workers to hang, and are unforgiving when sections misalign. EasyChute's woven, coated poly fabric is fundamentally different:
- Under 3 lbs per 10 ft section — one person can carry, hang, and connect a section without a second set of hands.
- Four woven loop attachment points per section — load distribution reduces anchor stress and makes secure hanging faster.
- 1.5 ft overlap connection — sections mate cleanly with no debris gap and no specialized hardware beyond a standard carabiner.
- Folds into a small box — easy to store dry, easy to inspect, easy to stage at the job site before the dumpster even arrives.
EasyChute was built by contractors — Tim Hogan and Leo Guarente — who ran into every one of these problems with the systems available to them. The design solves for field realities, not warehouse specifications. See the About EasyChute page for the full origin story.
New Jersey contractors working on everything from Bergen County renovations to Atlantic City commercial teardowns use EasyChute because the system ships free to job sites across the United States, prices are fixed, and there is no rental clock running while you sort out your site setup. For a complete look at available configurations, visit the all services page.
Frequently Asked Questions
How do I know what length debris chute I need for my New Jersey job site?
Measure from your anchor point — window frame, roof edge, or scaffold rail — straight down to the top of the dumpster opening. Add 2 to 3 feet so the chute mouth clears the dumpster edge cleanly. EasyChute offers 10 ft, 25 ft, and 50 ft sections that connect together, so you can build exactly the drop distance you need. When in doubt, go longer — adding a lightweight fabric section costs far less than dealing with a chute that falls short of the box.
Are debris chutes required by OSHA on New Jersey construction sites?
OSHA does not universally mandate debris chutes on all sites, but it does require that all construction debris be handled safely and that workers at six feet or above have fall protection. Using a debris chute is widely recognized as a best practice that reduces manual carrying at height and minimizes falling-object hazards. New Jersey also enforces its own state-level PEOSH construction standards, which align closely with federal OSHA rules. Check with your general contractor about site-specific requirements before your job begins.
Can I use a fabric debris chute for roofing tear-offs in New Jersey?
Yes — EasyChute offers heavy-duty 10 ft sections specifically designed for roofing applications, including asphalt shingle tear-offs, heavy underlayment, and ridge cap debris. The key is using the correct duty rating for your material type and securing both the top anchor at the roof edge and the bottom connection at the dumpster. The roofing trash chute guide covers the full setup process for pitched roof applications.
What materials should never go down a construction debris chute?
Avoid sending oversized rigid pieces wider than the chute opening, very heavy solid concrete chunks over roughly 40 lbs per piece, hazardous materials such as asbestos-containing tile or lead paint debris, and saturated materials that clump together. Hazardous construction debris requires separate EPA-regulated handling and disposal, regardless of chute availability. Brief your entire loading crew on prohibited materials before work begins — this is one of the most common sources of avoidable chute damage and compliance problems.
How do I keep a debris chute compliant with local NJ sidewalk ordinances?
Requirements vary by municipality. Most New Jersey towns require a dumpster placement permit for curbside roll-offs and mandate a minimum clear sidewalk width alongside the dumpster footprint. If your chute extends over public sidewalk, a pedestrian protection barrier or hard-hat exclusion zone may be required. Contact your local building department or check with your general contractor before setup. Fines for right-of-way violations in densely developed NJ towns can rival the cost of the chute itself.
How do I clear a jam in a debris chute without risking injury?
Call a full stop on all debris loading first. Use a long push tool from above — a broom handle is sufficient — to break up the blockage without reaching inside the chute. If the jam is at a section connection point, disconnect the two sections at that joint, clear the material, and reconnect before resuming. After clearing, identify what caused the jam and communicate to the crew so it does not happen again. Never attempt to clear a jam by shaking the assembly or by reaching into the chute from below.
How should I store an EasyChute section between jobs to maximize its lifespan?
Allow each section to air-dry completely before folding and boxing it. Folding a wet fabric section traps moisture that can degrade the coated poly fabric and cause mildew over time. Inspect each section for seam abrasion, loop fraying, and any small tears before storage. Keep sections in a dry location — a job trailer shelf or covered van shelf is ideal. Proper storage and regular inspection can extend the usable life of a fabric chute across dozens of jobs, making it a significantly more cost-effective option than rental alternatives.
Get Started with the Right Chute Setup for Your NJ Job
Every mistake in this guide is avoidable. The right length, the right duty rating, properly secured anchors, a briefed crew, and a compliant ground setup — that combination turns a debris chute from a liability into one of the most productive tools on your site.
EasyChute ships free to job sites across New Jersey and the entire United States. No rental clock, no minimum order, fixed online pricing. If you have questions about configuring a chute for your specific drop height or debris type, reach out through the contact page and a team member will help you get the right sections for your next job.
Ready to see the system in action before you order? The EasyChute videos page shows real crews setting up and striking chutes on live job sites — start there, then come back and configure your order.