
Rhode Island may be the smallest state in the country, but family renovation projects here come with their own brand of complexity. Whether you are stripping a Victorian triple-decker in Providence, gutting a Cape Cod cottage in Warwick, or remodeling a waterfront colonial in Narragansett, one problem always shows up at the same time the debris does: how do you get that material down from the upper floors and into the dumpster without destroying the yard, injuring a crew member, or making the neighbors furious?
The answer, for a growing number of Rhode Island contractors and homeowner-led crews, is a lightweight fabric debris chute. Set up takes minutes. The chute weighs next to nothing. And it makes multi-story debris removal genuinely safe and manageable for a one- or two-person operation. This guide walks through everything you need to know about debris chute setup for family renovations across Rhode Island — from choosing the right chute length to staying on the right side of local safety expectations.
Why Rhode Island Family Renovations Create a Unique Debris Challenge
Rhode Island's housing stock skews old. The Ocean State has a dense concentration of late-19th and early-20th century homes — Federal-style row houses in Providence's College Hill, three-deckers in Central Falls, shingled colonials in Cranston, and waterfront cottages that have been added onto decade after decade. When a family tackles a renovation on any of these structures, debris volumes spike fast.
A single bathroom gut on a second floor generates more weight in tile, drywall, and subfloor than most people expect. A roof tear-off on a 1,500 square-foot cape can dump two or three tons of old shingles. Carrying that material down a flight of stairs, through the living room, out the front door, and across the lawn is not only exhausting — it is a genuine injury risk and a recipe for interior damage.
The Staircase Problem in Older Rhode Island Homes
Older New England homes were built with narrow, steep staircases. A standard 36-inch-wide stair run is tight enough when you are moving furniture. When you are hauling 50-pound bags of old plaster down from a third-floor bedroom, it is genuinely dangerous. OSHA's ergonomics guidelines are clear about the injury risks of repetitive heavy lifting, especially on inclined surfaces.
A debris chute bypasses the staircase entirely. Debris goes out the window, down the chute, and into the dumpster. The crew stays on the floor where the work is happening.
Tight Lots and Neighbor Proximity
Rhode Island neighborhoods are dense. In Providence, Pawtucket, and Woonsocket especially, homes sit close together. Tossing debris out a window without a chute is not just unsafe — it risks damaging adjacent property, triggering complaints, and creating liability. A properly hung chute channels everything directly into the container below, keeping the work zone contained.
What Is a Debris Chute and How Does It Work?
A debris chute is a flexible, sectional tube that attaches to a window opening, roof edge, or scaffold level and funnels construction waste straight down into a dumpster or debris bin. The best versions today are made from woven, coated poly fabric — the same category of durable material used in heavy-duty tarps and industrial bags, but engineered into a tube shape with reinforced hanging loops at regular intervals.
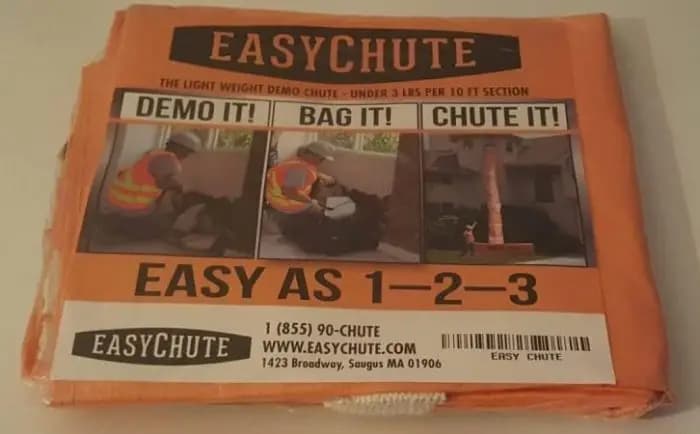
EasyChute sections come in 10-foot, 25-foot, and 50-foot lengths. They connect with a 1.5-foot overlap and hang from four woven loops using standard carabiners or quick-connects. A 10-foot section weighs under 3 pounds and folds into a compact box that fits in a truck cab. One person can carry the whole system to the job, hang it, and have it operational in minutes.
To understand exactly how the hanging and connection process works in practice, see the step-by-step EasyChute installation guide — it covers anchor points, overlap technique, and chute positioning from first hook to last drop.
Choosing the Right Chute Length for Your Rhode Island Renovation
Section length is the first decision you need to make. It is simpler than it sounds: measure the vertical drop from your highest debris source to the dumpster opening, then add a small buffer.
- 10-foot section: Ideal for single-story additions, low-slope roofs on ranch homes, or first-to-ground applications. Great as an add-on when your main chute runs slightly short.
- 25-foot section: Covers most two-story Rhode Island colonials and three-deckers from the top floor. This is the workhorse length for the majority of family renovation projects in the state.
- 50-foot section: Built for taller structures — a four-story Providence triple-decker, a commercial mixed-use building in downtown Pawtucket, or a steeply pitched Victorian with high peak clearance.
Sections connect to each other, so you are not locked into a single length. If your house measures 28 feet to the eave, two 25-foot sections connected with the standard overlap give you more than enough reach, and the extra length in the lower section helps guide debris cleanly into the dumpster even if it is not positioned perfectly beneath the window.
Accounting for Dumpster Clearance
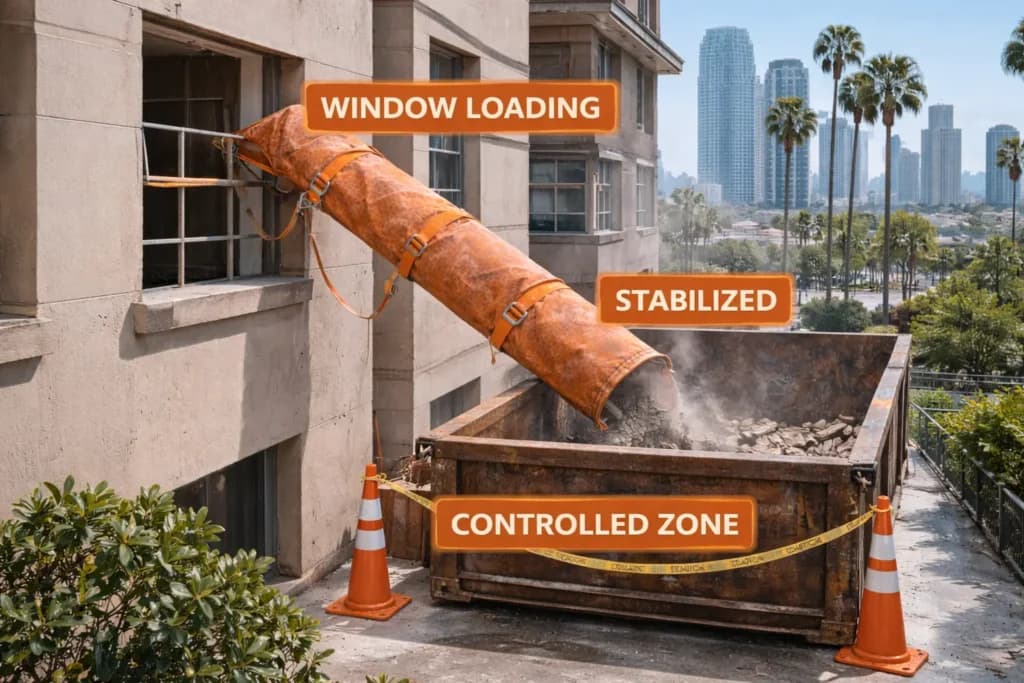
The bottom of your chute should sit inside or just above the dumpster opening — not resting on the rim, which can pinch the fabric over time. If the dumpster is on the driveway and the window you are working from is on the second floor, factor in the dumpster's wall height (typically 4 feet) when calculating your drop distance. The chute needs to extend far enough down that debris lands inside the bin, not on the edge.
Step-by-Step: Setting Up a Debris Chute for a Rhode Island Home Renovation
This is the core of what most crews get wrong — they hang the chute too fast, skip anchor checks, or position the dumpster in a spot that makes the bottom of the chute awkward. Here is a methodical setup sequence that works on the typical Rhode Island renovation site.
Step 1: Position the Dumpster First
Everything else follows the dumpster. Get the bin as close to the foundation as the site allows, ideally directly below the window or roof edge you plan to use as your chute exit point. If the driveway runs perpendicular to the house, angle the dumpster so its long axis runs toward the building — that widens the target zone for falling debris.
Step 2: Identify and Prep Your Anchor Point
The chute hangs from the window opening, a roof edge bracket, or a scaffold rail. For window attachment, the most common approach is to run a short length of rope or strapping across the window frame on the inside, tie it to a stud or header, and clip the chute's top loops to that line with carabiners. Make sure whatever you are attaching to can handle the dynamic load — a full chute moving fast with heavy debris creates more force than the static weight of the material suggests.
Step 3: Deploy and Connect Sections
Start from the top. Unfold your highest section, hang it from the anchor point using all four loops, and let it drop. If you need a second section, overlap the top of the lower section inside the bottom of the upper section by at least 1.5 feet. The overlap keeps debris from catching on a seam and prevents the sections from separating mid-job.
Step 4: Verify the Bottom Position
Walk down to the dumpster and check the chute exit. It should be inside the bin's walls, not resting on the rim. If it is too short, add a 10-foot extension. If it is too long, let it coil slightly inside the bin — that is fine, it just means you have more reach than you need.
Step 5: Run a Test Drop
Before you throw in the first full bag of debris, drop a few loose pieces — a couple of bricks, a handful of shingles — and watch where they land. If they hit the rim, adjust the dumpster position slightly. If they scatter, check that the chute sections are fully overlapped and not letting material escape at the seam. Once the test drop lands clean, you are ready to work.
Safety Considerations That Matter Most on Rhode Island Job Sites
Debris chutes are a safety tool, but they need to be used correctly to deliver their safety benefit. The OSHA Construction Industry standards set the baseline for debris handling on construction sites, and smart Rhode Island crews treat those standards as the floor, not the ceiling.
Establish a Drop Zone Below
Even with a chute, the area around the dumpster needs to be treated as a hazard zone. Debris occasionally bounces out of the bin, especially light material like old insulation or torn drywall. Barrier tape, cones, or simple rope barricades around the dumpster perimeter keep family members, pets, and neighbors out of the fall zone. This matters especially in the tight residential neighborhoods common across Providence, Cranston, and Warwick.
Never Overload a Single Drop
Chutes work best with controlled, consistent drops — bags or small loads, not entire piles dumped at once. Overloading creates dynamic pressure that can stress seams and anchor points. It also creates unpredictable debris behavior at the bottom, increasing the chance that material lands outside the dumpster. Train everyone on the crew to load the chute steadily, not all at once.
Inspect Anchor Points Each Morning
Multi-day renovations are the norm on Rhode Island family projects. Each morning before work begins, check the anchor point for loosening, check the overlap seams for creep, and look for any wear on the chute fabric. Fabric chutes are durable, but repetitive impact from heavy debris will eventually cause wear at the seams if connections are not maintained.
Debris Types Common in Rhode Island Family Renovations
Rhode Island's older housing stock means specific debris types come up again and again. Understanding what you are likely to generate helps you make better decisions about chute selection, dumpster sizing, and load sequencing.
- Old plaster and lathe: Dense, heavy, and abrasive. Plaster-heavy drops from pre-1950s homes are some of the hardest on chute fabric. Use bags rather than loose drops, and consider a heavy-duty 10-foot section at the top where impact is greatest.
- Asphalt shingles: The most common roofing tear-off material in Rhode Island. Shingles slide through a chute cleanly, but they are heavy per square foot and add up fast. See the roofing trash chute guide for shingle-specific setup tips.
- Dimensional lumber and trim: Long pieces need to be cut to manageable lengths before they go into the chute. Full-length 2x4s or baseboard sections can bridge across the chute interior and jam it, especially at the overlap seams.
- Insulation: Lightweight, but it catches air and can billow out of the dumpster. Drop insulation in bags or bundle it tightly. Loose fiberglass insulation is a respiratory hazard for anyone standing near the dumpster, so clear the area before dropping it.
- Tile and ceramic: Dense and sharp-edged. Heavy-duty chute sections are worth the investment for tile-heavy demolitions. Bag the tile before dropping rather than letting loose shards tumble through the chute.
According to the EPA's construction and demolition debris data, C&D waste is one of the largest waste streams in the United States. For Rhode Island family renovation crews, that means intentional debris management — both for efficiency and for responsible disposal — matters more than ever.
Permits, Dumpster Placement, and Local Expectations in Rhode Island
Rhode Island municipalities each handle dumpster and debris management rules a bit differently. Providence has specific right-of-way permit requirements if the dumpster sits in a public street or sidewalk. Warwick, Cranston, and North Kingstown are generally more flexible for driveway placements but may have size restrictions in certain neighborhoods. Newport, with its historic district overlay, can add another layer of requirements for visible scaffolding and debris management equipment.
Before you place a dumpster on a public right-of-way, call your city or town's public works or building department. For entirely on-site placements in a private driveway, most Rhode Island municipalities do not require a separate permit, but it is worth confirming locally. The debris chute itself generally does not require permitting — it is attached to the building structure temporarily, in the same category as scaffolding or equipment rigging.
Communicating with Neighbors Before Setup
Rhode Island neighborhoods are close-knit. A quick knock on the neighbor's door before the dumpster arrives goes a long way. Let them know the duration of the project, where the dumpster will sit, and that you are using a chute to keep debris contained. That five-minute conversation prevents 90 percent of neighbor complaints before they start. It also reflects well on the homeowner family if they are living in the neighborhood long-term.
How a Fabric Chute Compares to Other Debris Removal Methods
Rhode Island crews use several approaches to get debris down from upper floors. Here is how the main options stack up against a fabric debris chute in real-world conditions.
- Carry-down by hand: No equipment cost, but high labor cost and significant injury risk. On a stair-intensive renovation, this approach burns crew time faster than any other method and is the most common cause of overexertion injuries.
- Wheelbarrow relay: Works on single-story or ground-level work but is impractical above the first floor. On multi-story Rhode Island homes, it is not a viable option without a ramp system.
- Rigid steel chutes (rented): Common on commercial sites, but heavy, expensive to rent, and slow to assemble and disassemble. They require more anchor hardware and usually need two people to hang safely. For a family renovation, the logistics are out of proportion to the project.
- Fabric debris chute: Lightweight, fast to set up, reusable, and sized for exactly the kind of one- to four-story residential work that makes up most Rhode Island family renovations. One person can hang and strike the system in minutes. The cost per use drops to nearly zero after the first few jobs.
For a detailed side-by-side look at fabric chutes versus other system types, the debris chute vs. scaffolding chute comparison guide breaks down the differences in cost, setup time, and job-site fit.
Reusability and Cost Efficiency Over Multiple Rhode Island Projects
One of the most practical advantages of a fabric debris chute for Rhode Island families and small contractors is the reuse factor. This is not a single-use product. A well-maintained EasyChute section can survive dozens of jobs — bathroom guts, roof tear-offs, window replacements, full kitchen demolitions — before showing meaningful wear.
Compare that cost across a multi-year renovation program. A Rhode Island family tackling a phased renovation — kitchen this year, roof next year, two bathrooms the year after — can buy the system once and deploy it across every phase of the project. The fabric folds small enough to store in a closet or garage shelf between uses.
Storing the Chute Between Jobs
After each use, shake or hose off any loose debris, let the fabric dry completely, and fold it back into its storage box. Keep it out of prolonged direct sunlight when stored (UV degrades the coating over time, just as it does with any coated poly fabric). Store it somewhere it will not be punctured by sharp tools or sat on by heavy equipment. That basic care routine is all it takes to get maximum life out of each section.
Special Considerations for Coastal and Historic Rhode Island Properties
Rhode Island's geography and architectural history create a few specific setup scenarios worth calling out explicitly.
Coastal Properties with Salt Exposure
Narragansett Bay, the South County coast, and the islands see significant salt air exposure year-round. Metal carabiners and quick-connects used to hang the chute should be stainless steel or corrosion-resistant aluminum — standard zinc-coated hardware degrades faster in salt air. Rinse metal hardware after coastal jobs and inspect it for corrosion before each use.
Historic District Properties in Newport and Providence
Newport's Historic District and Providence's College Hill neighborhood have architectural review standards for work on building exteriors. A debris chute attached to a window opening typically falls within allowable temporary construction equipment, but check with the relevant historic preservation commission if the attachment point is on a character-defining facade element. The last thing a family renovation project needs is a stop-work order from a historic commission.
Elevated Foundations and Crawl Space Clearance
Many older Rhode Island homes sit on elevated stone or masonry foundations, which raises the effective ground level beneath the window. Factor that elevation into your chute length calculation — an extra foot or two of foundation height means the dumpster opening is higher relative to grade, and you may need a shorter combined chute length than you would on a slab-on-grade home.
What Rhode Island Family Renovation Crews Get Wrong About Debris Chutes
Common mistakes show up consistently across first-time chute users. Knowing them in advance saves a wasted half-day on the job.
- Hanging the chute from a single loop: Always use all four loops distributed around the window opening. Single-point attachment creates a torque load that the loop hardware is not designed for, and it causes the chute to swing and drift rather than hang plumb.
- Skipping the overlap: Two sections butted end-to-end without overlap will gap under load. Debris jams at the gap, the sections can separate, and material falls outside the target zone. The 1.5-foot overlap is not optional.
- Placing the dumpster too far from the building: A debris chute needs a relatively plumb hang to work correctly. If the dumpster is 10 feet away from the building instead of 2 feet, the bottom of the chute will hang at an angle, debris will catch on the fabric at the bend, and accuracy into the bin will suffer.
- Using the chute for materials it cannot handle: Rigid conduit, full-length lumber, or any material longer than the chute diameter should be cut down or carried separately. Jamming an oversize piece down the chute can stress the seams and require a mid-job extraction that stops work entirely.
- Not briefing all crew members: On a family renovation, that might mean a spouse, a sibling, or a hired laborer who has never used a chute before. Walk everyone through the load process before work begins. Five minutes of instruction prevents the most common misuse scenarios.
For a broader look at setup errors and how to avoid them, the debris chute setup mistakes guide for contractors covers many of the same pitfalls in a different geographic context — the underlying physics and habits are the same regardless of state.
Renting vs. Buying a Debris Chute for Your Rhode Island Project
Rental options for fabric debris chutes are limited in most Rhode Island markets. Tool rental chains carry scaffolding and dumpsters but typically do not stock fabric chute systems. Rigid steel chutes can sometimes be rented from large construction equipment suppliers, but the logistics and cost are oriented toward commercial-scale projects.
For a family renovation — especially one that will unfold across multiple phases or multiple years — buying makes more financial sense than renting in almost every scenario. The upfront cost of an EasyChute section is a fraction of what you would spend on a single week of steel chute rental, and the fabric system is easier to handle with a small crew or a solo operator.
EasyChute ships free to job sites across the United States, including every Rhode Island zip code, with fixed online pricing. No negotiation, no shipping surprises. You can review all available section options on the services and products page.
Frequently Asked Questions
How long does it take to set up a debris chute for a Rhode Island family renovation?
A single-section EasyChute can be unpacked, hung, and ready to use in under 10 minutes for an experienced person. A two-section setup — covering a typical two- or three-story Rhode Island home — typically takes 15 to 20 minutes from arrival to first drop. The lightweight fabric and simple four-loop hanging system mean one person can do the whole setup without a second person on the ground.
Do I need a permit to use a debris chute in Rhode Island?
In most Rhode Island municipalities, a debris chute attached to a building as temporary construction equipment does not require a separate permit. However, a dumpster placed on a public street or sidewalk typically does require a right-of-way permit from the city or town's public works department. Always confirm with your specific municipality — Providence, Newport, and other cities with active building departments may have additional requirements for construction debris equipment.
Can a homeowner set up a debris chute, or does it require a contractor?
A homeowner can absolutely set up a fabric debris chute. EasyChute was designed with exactly that use case in mind — lightweight enough for one person, simple hanging hardware, and no specialized tools required. The step-by-step installation guide walks through every part of the process. The main prerequisite is a secure anchor point at the top — a window frame tied to a stud or header works well for most residential applications.
What is the maximum height a fabric debris chute can handle?
EasyChute sections connect to any height by linking additional sections together with the standard 1.5-foot overlap. The system does not have a hard upper limit tied to fabric capability — the practical limit is the structural capacity of your anchor point and the weight of the debris load you are dropping. For very tall drops (above four or five stories), it is worth consulting with a structural professional about anchor point loading before setup.
Can the chute handle roofing shingles and heavy demolition debris?
Yes. EasyChute's heavy-duty sections are specifically designed for roofing tear-offs and demolition debris — the coated woven poly fabric resists abrasion from shingles, plaster chunks, and broken tile. Bagging heavy material before dropping it, rather than loose-loading the chute, reduces wear on the fabric and keeps drops cleaner. For roofing-specific setup tips, the roofing trash chute guide goes into detail on shingle drop sequencing.
How do I know what chute length to order for my Rhode Island home?
Measure the vertical distance from the window or roof edge you plan to use as your debris exit point down to the top of the dumpster. Add a couple of feet of buffer so the chute end sits inside the bin rather than on the rim. For most two-story Rhode Island colonials, a 25-foot section covers the drop comfortably. For three-deckers or taller Victorians, two sections connected together — a 25-foot plus a 10-foot — typically covers the full run. When in doubt, order the longer section; it is easier to have extra reach than to run short mid-job.
Is a debris chute safe to use near neighbors and landscaping?
When set up correctly — plumb hang, dumpster positioned directly below the chute exit, and a clear drop zone established around the bin — a debris chute is significantly safer than hand-carrying debris or tossing material from an upper floor. The chute channels debris into the bin rather than allowing it to scatter. Establish a barrier around the dumpster using cones or rope to keep bystanders out of the drop zone, and the system is well-suited even for tight Rhode Island lots with adjacent neighbors and landscaping.
Ready to Set Up a Debris Chute for Your Rhode Island Renovation?
If you have a renovation project coming up anywhere in Rhode Island — a roof tear-off in Warwick, a full gut in Providence, a bathroom remodel in Narragansett — a lightweight fabric debris chute is the most practical way to handle the debris without killing your crew or your schedule. EasyChute ships free to Rhode Island job sites, arrives ready to hang, and lasts job after job after job.
To see the system in action before you order, check out the EasyChute video library — real job-site footage of setup, loading, and strike. When you are ready to order or have questions about which section lengths fit your project, visit the contact page or browse the EasyChute FAQ for answers to the most common pre-purchase questions. You can also read more about how the system was designed and what makes it different on the About EasyChute page.
Demo it. Bag it. Chute it.