

Index
- Nashua, NH Debris Chute Codes & Local Compliance
- Permit Requirements & Application Timeline
- Pre-Installation Site Assessment & Planning
- Chute Sizing & Section Selection for Nashua Projects
- Installation Steps: From Staging to Anchoring
- Safety Setup & Fall Protection
- New England Weather & Winter Readiness
- Dumpster Placement & Ground-Level Logistics
- Contractor & Crew Training Protocol
- Maintenance During Active Projects
- Deinstallation & Site Restoration
- Common Nashua Contractor Mistakes & How to Avoid Them
- Frequently Asked Questions
- Ready to Get Started in Nashua
Nashua, NH Debris Chute Codes & Local Compliance
Nashua falls under New Hampshire’s state building codes and also adheres to the Nashua Municipal Development Code (particularly Title 12 for construction management and site safety). Debris chute systems are classified as temporary construction equipment under NH administrative rules, and they must comply with ANSI A10 standards for mobile ladders and staging.
The key regulatory body is the City of Nashua Planning & Zoning Department, which manages both permit approval and site-safety oversight. Unlike some municipalities that grandfather older chute systems, Nashua requires all debris chutes—whether modular or traditional—to meet current safety certifications as of 2026.
- State-level: NH DES (Department of Environmental Services) regulates demolition debris hauling and disposal destination permits.
- City-level: Nashua building officials review chute anchoring plans, ground-level runoff, and neighbor-impact assessments.
- OSHA overlay: Any project with 4+ workers must follow OSHA Construction Industry standards for fall protection and equipment guarding.
Modular chute systems are preferred in Nashua because they’re easier to inspect at each stage of installation and align with the city’s emphasis on reversible, non-damaging site setup (critical in Nashua’s dense mixed-use neighborhoods).
Permit Requirements & Application Timeline
Nashua requires a Temporary Use Permit for debris chute installations lasting more than 14 days. Shorter projects (under 2 weeks) may fall under a Notice of Construction Activity, but confirming with the Nashua Building Inspector is essential.
Step-by-Step Permit Process
- Application submission (1-2 weeks before install): File a Temporary Use Permit or Notice of Construction Activity with the Nashua Building Department. Include site plan, chute dimensions, anchor points, dumpster location, and traffic control plan.
- Site plan review (3-5 business days): Officials examine your drawing for code compliance, easement clearances, and property-line setbacks.
- Conditions issued (if any): Nashua commonly requires additional signage, ground-level barriers, or neighbor notifications in residential zones.
- Permit issuance (2-3 days): Approval allows installation to begin. Keep the permit on-site and visible.
- Pre-installation inspection (optional but recommended): Request an inspector walk-through before you anchor the chute. This prevents mid-project stoppage.
- Post-installation final inspection: Nashua requires a sign-off within 48 hours of full installation. Schedule this before you load any debris.
Timeline tip: Plan for 2–3 weeks total from initial application to active debris loading. In winter (Nov–Mar), add 1 week for inspector availability.
Pre-Installation Site Assessment & Planning
Nashua’s older commercial zones and residential-adjacent sites require detailed reconnaissance. A poorly sited chute can damage neighboring rooflines, interfere with utilities, or create unplanned runoff hazards.
Critical Assessment Checklist
- Vertical clearance: Confirm at least 2 feet above the highest point of your chute to any overhead wires, tree limbs, or neighboring roof edges.
- Ground footprint: Measure the dumpster placement area. Account for roll-off truck access (typically 35–40 feet of clear, level ground).
- Utilities: Call 811 (Dig Safe) 2–3 days before installation to mark buried gas, electric, water, and sewage lines. This is mandatory in NH.
- Anchoring surfaces: Inspect the building facade where you plan to bolt the chute. Brick, concrete, and steel are ideal; avoid aluminum siding or weak mortar joints.
- Weather exposure: Note prevailing wind direction. Nashua frequently sees northwesterlies in fall/winter and easterlies in summer. Plan guy-wires and tie-offs accordingly.
- Neighbor impact: In mixed-use zones (downtown Nashua, for example), notify adjacent businesses or apartments. Debris chute noise and dust run 6 a.m.–5 p.m. on weekdays.
Document all findings in photos and notes. Share them with the Nashua Building Department as part of your permit application—it accelerates approval.
Chute Sizing & Section Selection for Nashua Projects
Nashua projects vary widely: single-family renovations (1–2 stories), downtown office retrofits (3–6 stories), and industrial demolitions (5+ stories). Your chute height and diameter must match both the building profile and the expected debris volume.
Height Calculation
Measure from the highest debris-disposal point (roof edge, top-floor window opening, or highest work platform) to the dumpster top. Most Nashua renovation sites are 25–75 feet tall; commercial demolitions can exceed 100 feet.
- 25 ft: Single-story to small 2-story renovation. Typical for residential kitchen/bath remodels.
- 50 ft: Mid-rise commercial or 3–4 story residential renovation. Most common Nashua choice.
- 75 ft: Tall commercial retrofit or 5–6 story renovation.
- 100+ ft: High-rise demolition or phased multi-story project.
Consult our sizing and cost comparison by section to cross-reference your height with modular section counts and rental/purchase costs.
Diameter & Flow Rate
Nashua contractors typically use 24-inch or 30-inch-diameter chutes. Larger-diameter systems (30–36 inch) handle higher volumes and reduce jamming on hard debris (roofing shingles, drywall fragments, concrete chips). Smaller diameters (24 inch) work for low-volume or light-debris projects.
Use our capacity sizing tool to estimate debris volume based on your project scope and debris type.
Installation Steps: From Staging to Anchoring
Follow this step-by-step installation process adapted for Nashua’s site conditions and code environment.
Phase 1: Staging & Assembly (Day 1)
- Deliver all chute sections, anchors, and hardware to an on-site staging area (typically a corner of the parking lot or a reserved dumpster zone).
- Count and inspect every section for tears, cracks, or delamination. Nashua’s moisture (especially spring/fall rain) can weaken polyethylene if sections are pre-damaged.
- Lay sections flat and connect them in order using the interlocking collar system. Each connection should be hand-tight first, then torqued per spec (typically 12–15 foot-pounds for bolt-on systems).
- Once assembled, perform a pre-lift pressure test: gently press the assembled column to confirm no separation or leaks.
Phase 2: Positioning & Initial Rigging (Day 1–2)
- Position the staging area chute assembly adjacent to the building, aligned with the dumpster below.
- Attach overhead rigging (usually a cable or strap harness to your building’s roof, upper-floor beam, or external crane if needed).
- Use a certified rigger or equipment operator if hoisting the chute up the building facade. Nashua requires documentation of rigging certification on-site.
- Slowly raise the assembly and position its top anchor point.
Phase 3: Anchoring to Building Facade (Day 2–3)
- Top anchor: Bolt the chute’s top collar to the roof edge or to a building-mounted bracket. Nashua building code requires two independent anchor points for all temporary equipment over 30 feet tall.
- Mid-point braces: If your chute exceeds 50 feet, install lateral bracing every 25 feet using adjustable wall-brackets bolted to the facade.
- Bottom anchor: Secure the chute’s discharge end to the dumpster or to a fixed ground bracket. Prevent lateral sway with guy-wires angled at 45–60 degrees.
- Load test: With the chute now anchored, have your crew carefully drop 10–15 lightweight items (cardboard boxes, plastic bags) down the chute to check for snags, misalignment, or unexpected sway.
Phase 4: Safety Railings & Signage (Day 3)
- Install bright orange or yellow safety tape around the chute top opening at a height of 42 inches (standard guardrail height).
- Post a “Caution: Debris Chute in Use” sign at the top opening and a matching sign at ground level, 10 feet from the dumpster.
- Mark any mid-level work platforms or landings adjacent to the chute with high-visibility tape.
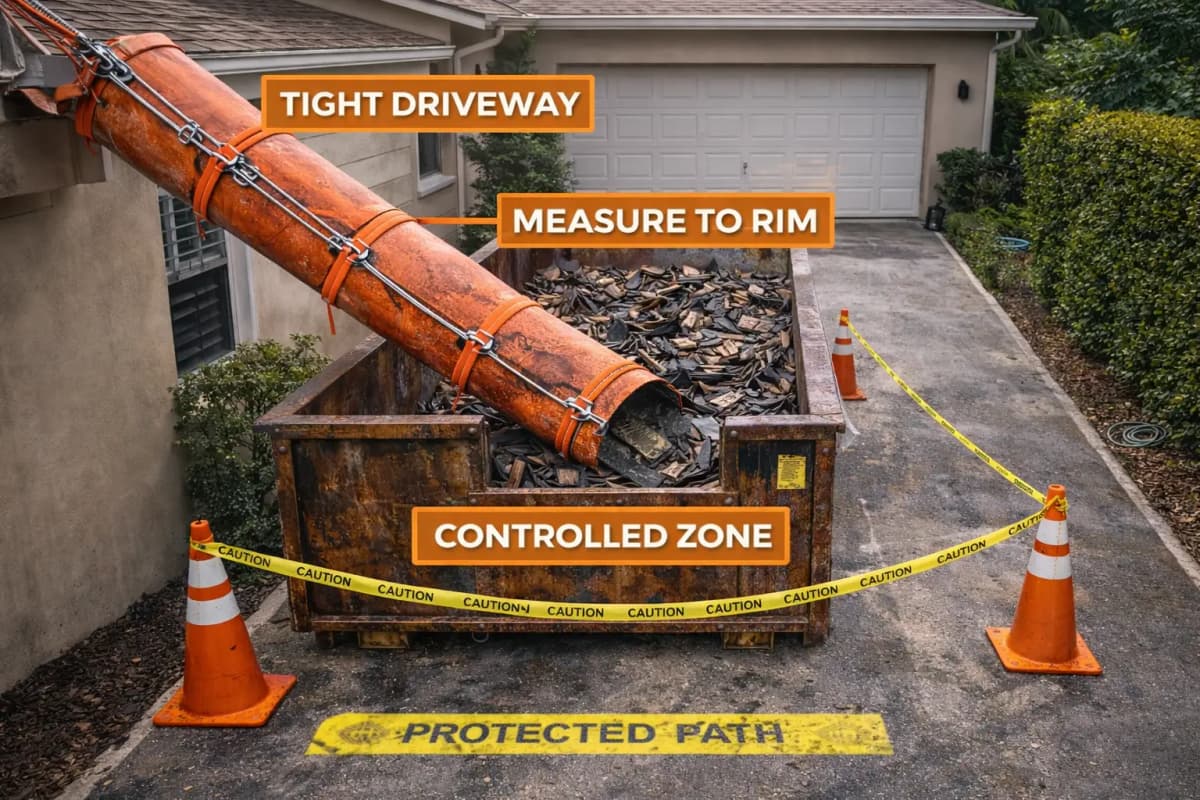
- Confirm that the chute discharge area (dumpster surround) is cordoned off with cones or temporary fencing to prevent foot traffic.
Safety Setup & Fall Protection
Nashua is a high-traffic municipality with dense neighborhoods. Safety compliance is not optional and is frequently spot-checked by building officials.
- Top opening guardrail: Install a collapsible barrier around the chute opening so crew cannot accidentally fall in. It must be removable only by authorized personnel.
- Personal fall arrest: Any worker reaching over or working within 6 feet of the chute opening must wear a harness and lanyard tied to a secure anchor point, per OSHA ergonomic safety for lifting and loading.
- Debris ejection: When dropping debris, direct workers to stay clear of the discharge zone (directly below and in front of the chute exit). Large pieces can ricochet.
- Weather suspension: In Nashua’s winter months (Nov–Mar), high winds (gusts above 25 mph) or ice accumulation on the chute surface may require temporary suspension of use. Check hourly weather and remove any ice buildup before resuming operations.
- Electrical clearance: Maintain at least 10 feet of clearance from electrical lines. In Nashua, most overhead utilities are managed by Eversource Energy; contact them if you’re unsure of line proximity.
Before your first debris drop, conduct a 15-minute safety briefing with all crew covering chute entry prohibition, proper debris placement, and emergency stop procedures.
New England Weather & Winter Readiness
Nashua’s weather presents unique challenges: heavy spring rains, humid summers, autumn nor’easters, and significant winter snow and ice.
Spring (March–May)
Rainfall averages 3.5–4 inches per month. Inspect the chute interior weekly for water pooling or algae growth. A slippery interior can jam debris or cause unsafe discharge. Tilt the chute slightly toward the dumpster (if feasible) to promote drainage.
Summer (June–August)
Heat and UV exposure can weaken polyethylene over a multi-month project. Cover exposed sections with reflective tarps to extend material lifespan. Ensure dumpster areas are regularly watered down to suppress dust (required under Nashua’s air-quality permits for demolition sites).
Fall (September–November)
Nor’easters can bring sustained winds of 30–45 mph and heavy rain. Reinforce all guy-wires and anchors. After any significant storm, perform a full visual inspection of the chute alignment and anchor bolt tightness.
Winter (December–February)
Snow load is the critical factor. Nashua receives 40–50 inches annually, often in 2–3 major events. If your chute sits idle for a week with heavy snow, ice can form inside and on anchor brackets. Either clear the chute regularly or suspend operations and drain it completely. Wind chill can exceed -15°F, making hardware brittle; inspect bolt torque weekly and use a heated wrench if needed.
Consider scheduling Nashua projects for late spring through early fall to minimize winter complications. If winter work is unavoidable, budget extra maintenance time and backup equipment.
Dumpster Placement & Ground-Level Logistics
The dumpster is the hub of your debris-chute workflow. Poor placement invites safety hazards, traffic congestion, and code violations in Nashua’s often-congested neighborhoods.
Optimal Positioning
- Setback from curb: Place the dumpster at least 5 feet from the street curb (Nashua Municipal Code requirement). This prevents traffic obstruction and allows utility trucks to pass.
- Sight-line clearance: Ensure the dumpster isn’t positioned so that it blocks drivers’ views of stop signs, intersections, or driveways.
- Truck access: Confirm that a 35–40 foot roll-off or container truck can approach the dumpster without backing up into other vehicle traffic or pedestrians.
- Debris chute alignment: Position the dumpster directly beneath the chute discharge opening, with at least 2 feet of clearance on either side to prevent spillover.
Ground-Level Safety & Containment
- Containment mat: Lay a 12-foot x 12-foot tarp or containment mat around the dumpster to catch any debris overflow, dust, or liquids. Nashua’s stormwater ordinance prohibits direct debris runoff into storm drains.
- Perimeter fencing: Install temporary 4-foot fencing or rope barriers around the dumpster and discharge zone. This prevents unauthorized access and protects pedestrians.
- Signage: Post “No Entry—Construction Area” signs at each access point, plus one large sign visible from the street stating the contractor’s name, phone, and project end date.
- Daily policing: Each afternoon, sweep or shovel any stray debris from the containment mat back into the dumpster. Nashua building inspectors cite contractors for sloppy sites.
Contractor & Crew Training Protocol
Before your crew begins loading debris, every person on-site must understand safe chute operation. Nashua has seen incidents where improper loading caused jams, spillage, or worker injury.
Pre-Work Briefing (Mandatory, 15 Minutes)
- Chute anatomy: Point out the top opening, the anchor points, and the discharge zone. Explain that the chute is NOT a climbing structure or work platform.
- Debris size limits: Specify maximum piece sizes (typically 3 feet x 2 feet for modular chutes). Larger pieces must be broken down before dropping.
- Loading sequence: Heavy debris (concrete, roofing) first; lighter debris (drywall, cardboard) layered on top to promote flow.
- Jamming protocol: If debris backs up, STOP loading immediately. Never push items down or shake the chute. Call a supervisor to clear the blockage from the top or bottom.
- Fall prevention: Remind crew that working near the chute opening requires harness and lanyard. No leaning over the edge or reaching into the opening.
- Emergency contacts: Post the site supervisor’s cell, the Nashua Building Department, and emergency 911 prominently on the site office board.
Daily Toolbox Talks (5 Minutes)
Before each shift, conduct a brief 5-minute huddle covering that day’s specific hazards (weather, debris type, crew changes, etc.).
Maintenance During Active Projects
A well-maintained chute runs smoothly for weeks. Neglect leads to jams, environmental violations, and safety incidents in Nashua’s scrutinized neighborhoods.
Daily Maintenance
- Visually inspect the chute interior (from top, looking down) for obstructions, tears, or standing water.
- Check anchor bolts for looseness. Wind and vibration can gradually work bolts free; re-torque them weekly.
- Clear the dumpster or roll-off container before it exceeds 80% capacity. An overfull dumpster can cause spillover and is a code violation.
- Sweep ground-level containment mats and dumpster surrounds every afternoon.
Weekly Maintenance
- Wash the interior chute walls with a pressurized rinse (low pressure to avoid damage) to remove caked-on debris and algae.
- Inspect all visible anchor points and guy-wires for corrosion, wear, or displacement.
- Document all maintenance in a log file (required by Nashua for permit compliance audits).
For longer-term maintenance best practices, review our maintenance and cleaning protocols.
Deinstallation & Site Restoration
When your project ends, Nashua code requires full removal and site restoration within 10 business days. Abandoned or partially dismantled chutes invite code enforcement action and fines.
Deinstallation Workflow
- Notify Nashua Building Department: Email the department’s building-permits office stating your project end date and planned removal date. Request a final walk-through inspection.
- Empty the chute: Drop any remaining debris into the dumpster. Do not leave debris in the chute.
- Disconnect at anchors: Unbolt the top and mid-point anchors first, supporting the chute from below with a crane or rigging team.
- Carefully lower the chute: Slowly lower the assembled sections to ground level using proper rigging. Never drop or throw sections.
- Disassemble in reverse: Disconnect sections and stage them for transport. Inspect each for reusable condition.
- Remove ground anchors: Unbolt any permanent brackets or anchor points from the building facade. Fill anchor-bolt holes with caulk or patching compound matching the building exterior.
- Final site cleanup: Remove all signage, fencing, tarps, and debris. Sweep and pressure-wash the ground area. Dispose of all waste in approved dumpsters (do NOT leave any trash on-site).
- Final inspection: Request the Nashua Building Department to sign off on the removal. This releases your permit and clears any outstanding code compliance flags.
Common Nashua Contractor Mistakes & How to Avoid Them
Review common mistakes to avoid and watch for these Nashua-specific pitfalls:
Mistake 1: Inadequate Permit Lead Time
Problem: Contractors submit permits 3–5 days before a planned start and then become frustrated by delays.
Fix: Submit your Temporary Use Permit 2–3 weeks before install. This allows time for city review, any requested revisions, and scheduling of pre-install inspections.
Mistake 2: Underestimating Winter Weather Impact
Problem: A project that runs into November or December experiences ice buildup, wind damage, and frozen bolt seizure.
Fix: Plan to complete outdoor chute use by mid-October in Nashua. If winter work is unavoidable, budget 30% extra time for weather delays and weekly maintenance.
Mistake 3: Poor Neighbor Communication
Problem: No advance notice to neighboring businesses or apartments; complaints to the building department lead to work stoppages.
Fix: Post project notices in adjacent buildings 2 weeks before start. Include your name, project description, expected end date, and contact phone. Many Nashua contractors offer a courtesy letter or door-hanger.
Mistake 4: Improper Dumpster Containment
Problem: Debris spillover onto sidewalks or storm drains triggers a municipal code citation and potential suspension of the permit.
Fix: Always use a full containment mat around the dumpster and police it twice daily (morning and afternoon). Empty the dumpster more frequently than you think necessary.
Mistake 5: Neglecting to Call 811 Before Anchoring
Problem: Bolting into a buried gas line or electrical conduit causes a serious safety incident and legal liability.
Fix: Call Dig Safe (811) in NH at least 3 business days before any ground anchoring or facade bolting. Wait for utility locates to be marked on-site, even if you’re “sure” there are no lines.
Mistake 6: Exceeding Project Permit Duration
Problem: A project runs 2 weeks longer than the approved permit, and the chute is now operating illegally.
Fix: Submit a permit extension request to Nashua 5 business days before your original end date. Extensions are typically approved if conditions haven’t changed, but delaying approval leaves you non-compliant.
Frequently Asked Questions
Do I need a separate environmental permit for demolition debris disposal in Nashua?
New Hampshire’s DES issues an Environmental Permit for all demolition projects generating more than 2 cubic yards of waste. This covers asbestos screening, hazardous material documentation, and approved disposal destinations. Your debris-chute rental company can advise on disposal logistics, but the environmental permitting responsibility is yours. Contact NH DES or work with a licensed waste broker in Nashua to coordinate.
Can I install a debris chute over a public sidewalk in Nashua?
Not without explicit written approval from Nashua’s Public Works and Building Departments. Chutes extending over public right-of-way require a Street Use Permit and may require temporary pedestrian barriers or detour signage. In most Nashua projects, positioning the chute and dumpster on private property (your job site) is simpler and avoids permitting delays.
What is the typical rental cost for a debris chute in Nashua?
Modular chutes typically rent for $150–$400 per week depending on height and diameter, plus delivery and removal fees ($200–$600). See our sizing and cost comparison for detailed pricing by section count. Request quotes from multiple local vendors and factor in Nashua’s permit, inspection, and containment costs.
Are there any Nashua-specific zoning restrictions on debris-chute placement?
Downtown Nashua (Historic District) and residential zones have stricter setback and aesthetic rules. Downtown projects may require chute screening or camouflage. Residential zones enforce strict 6 a.m.–5 p.m. operating hours. Check with the Nashua Planning and Zoning office if your site is near a historic boundary or within a residential overlay district.
What happens if my crew jams debris in the chute?
Stop all loading immediately. Do NOT shake, push, or use tools to force debris down. From the top, attempt to remove the obstruction by hand or with a hook. If that fails, close off the chute and call the rental company or a specialized chute-clearing service. A jam that requires interior access may cost $300–$800 to resolve, so prevention via proper crew training is worth the investment.
Is temporary liability insurance required for debris chutes in Nashua?
Yes. Your general liability policy must cover temporary debris-handling equipment, and we recommend a minimum of $1 million in coverage. Nashua building permits often require proof of insurance before issuing approval. See our insurance and liability coverage requirements for detailed guidance.
What do I do if wind or snow damage occurs to the chute during a project?
Document all damage with photos. Contact your rental company immediately to report the incident and arrange repair or replacement. Do NOT attempt DIY repairs. Notify Nashua Building Department if the chute becomes unsafe or unusable. Weather-related damage is typically covered under the rental agreement, but prompt reporting is essential for claims processing and to maintain regulatory compliance.
Ready to Get Started in Nashua
Debris chute setup in Nashua, NH requires careful planning, permit coordination, and ongoing safety vigilance—but it’s entirely achievable. By following this guide, you’ll sidestep common pitfalls, stay compliant with local code, and maintain a professional, neighbor-friendly site.
Next steps:
- Confirm your project height and debris volume, then use our sizing tool to select the right chute configuration.
- Contact the Nashua Building Department (603-589-4600) or visit nashuanh.gov to download the current Temporary Use Permit form.
- Call 811 (Dig Safe) to schedule utility location marking.
- Request a quote from 2–3 local debris-chute rental vendors and compare pricing, delivery timelines, and insurance terms.
- Submit your permit application 2–3 weeks before your planned start date.
- Schedule a pre-install inspection with the Building Department to catch any issues before you anchor the chute.
For more detailed modular versus traditional comparisons, cost-estimation tools, and safety resources tailored to contractors, explore our full library of setup and installation guides.
Questions specific to your Nashua project? Contact our contractor support team—we’re here to help you navigate local codes and equipment selection for 2026 success.