

Table of Contents
- Why Meriden Contractors Need a Debris Chute System
- Meriden Permit & Compliance Requirements
- Pre-Setup Planning & Site Assessment
- Step-by-Step Installation Workflow
- Safety Protocols & OSHA Compliance
- Debris Chute Costs for Meriden Projects
- Ongoing Maintenance & Cleaning
- Common Meriden-Specific Challenges & Solutions
- Choosing the Right Chute System for Your Project
- Seasonal Considerations in Connecticut
- Local Resources & Government Contacts
- Frequently Asked Questions
- Ready to Get Started?
Why Meriden Contractors Need a Debris Chute System
Meriden, Connecticut, sits at a crossroads of residential neighborhoods, light industrial zones, and downtown commercial corridors. Whether you’re tackling a multi-story renovation in the downtown core, a residential remodel in a tight urban lot, or a light-commercial demolition project, a properly configured debris chute system keeps your job site organized, safe, and compliant with local regulations.
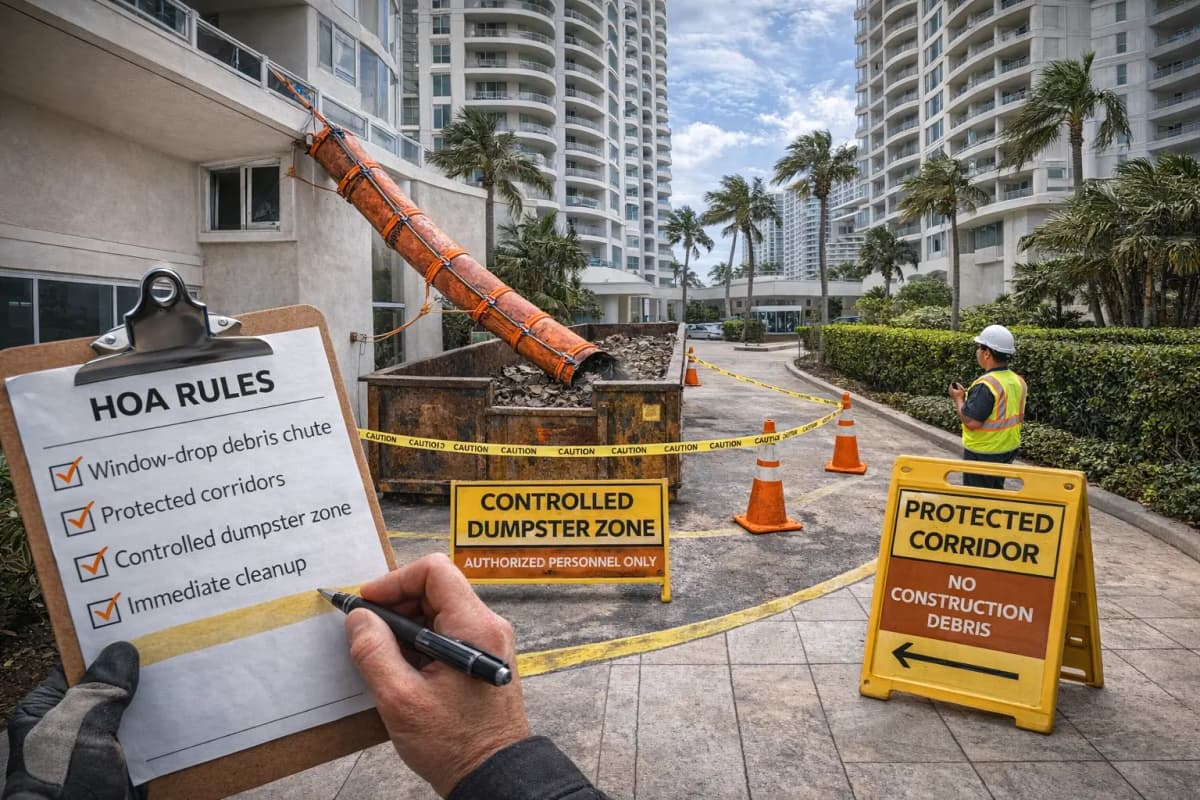
The difference between a chaotic, debris-filled site and a professionally managed project often comes down to your waste-removal infrastructure. A debris chute:
- Minimizes foot traffic to dumpsters, reducing tripping hazards and worker fatigue
- Protects pedestrians and neighboring properties from falling debris
- Speeds up debris removal and keeps the job site cleaner
- Demonstrates safety-first professionalism to clients and inspectors
- Reduces labor costs on larger projects where constant hauling otherwise takes workers off-task
Meriden’s mix of street-level foot traffic, older buildings with limited ground space, and proximity to residential zones means contractors must balance efficiency with neighborhood relations.
Meriden Permit & Compliance Requirements
Connecticut contractors must navigate both state and municipal-level permitting. Meriden follows Connecticut building codes and administers its own local zoning and safety rules.
Connecticut State-Level Requirements
Connecticut has adopted the International Building Code (IBC) with state amendments. Any debris chute that extends beyond your property line or discharges into a public right-of-way requires advance notification and often a temporary permit. The state does not centralize debris chute permitting—each municipality handles it through the local building department.
City of Meriden Building & Safety Department
Meriden’s Building & Safety Office (typically located at City Hall, 142 East Main Street, Meriden, CT 06450) issues temporary structure and debris-removal permits. Requirements usually include:
- Submittal package: Site plan showing chute placement, anchor points, discharge location, and distance from property lines and utilities
- Proof of insurance: General liability covering debris chute use (minimum $1M is standard)
- Temporary structure permit: Most jurisdictions require this if the chute is in place for more than 14 days
- Street or sidewalk permit: If the chute discharges into a public right-of-way or impacts parking
- Processing time: 5–10 business days typical; expedited service may add a fee
Contacting Meriden Building & Safety at least 2 weeks before setup is best practice. A brief phone conversation can clarify exactly which permits apply to your specific project scope.
Meriden Zoning & Neighborhood Considerations
Meriden’s zoning districts vary from downtown commercial (where taller buildings allow chutes extending higher) to residential zones where setback and noise restrictions may apply. Request a zoning verification letter from the Building Department if you’re unsure whether your site requires special variances.
Pre-Setup Planning & Site Assessment
Before ordering or installing a debris chute, walk your Meriden site and gather critical data.
Measure Access & Vertical Clearance
Identify where the chute will hang. Common attachment points on multi-story buildings include floor beams, roof edges, or structural columns. For Meriden’s older brick and stone buildings, confirm the wall can safely support the load (typically 50–100 lbs per foot for a loaded chute). If in doubt, have a structural engineer confirm attachment feasibility.
Measure:
- Height from top attachment point to ground level (determines chute section count)
- Distance from the building face to the property line or street curb
- Width and depth of the ground-level discharge area (where your dumpster will sit)
- Overhead clearance for delivery trucks and equipment access
Identify Utility Conflicts
Call 811 (Connecticut One-Call) at least 2 business days before you attach anything to the building or dig on the site. Meriden has both above-ground (power lines, telephone) and below-ground (gas, water, sewer) utilities that can interfere with chute placement or anchoring.
Assess Neighbor Impact
In Meriden’s residential and mixed-use zones, talk to adjacent property owners early. Debris dust, noise during discharge, and temporary visual impact can generate complaints if not managed. Setting expectations and maintaining a clean, well-maintained chute system earn goodwill and can prevent work stoppages.
Step-by-Step Installation Workflow
A well-executed setup prevents safety issues and delays. Follow this proven workflow:
Phase 1: Pre-Installation Verification (1–2 Days Before)
Review your Debris Chute Setup Checklist and confirm:
- Permit is in hand and site-posted if required by local law
- All chute sections and hardware are on-site and inspected
- Dumpster is positioned and ready
- Safety signage is printed and ready to post
- Weather forecast shows no heavy wind or rain during setup
Phase 2: Anchor & Attachment Setup (Installation Day, Morning)
Begin early to minimize site disruption. Work with at least two trained personnel:
- Inspect and confirm all anchor points are clean and structurally sound.
- Install the top anchor bracket, ensuring it is level and torqued to specification (consult your chute manufacturer’s manual).
- Attach the first section, ensuring the discharge opening faces the dumpster.
- Install safety rings or collars at every connection point to prevent sections from slipping.
- Progressively attach additional sections, checking alignment and tightness after each addition.
- Secure the bottom discharge adapter and any debris-catch flaps.
Phase 3: Safety & Signage (Installation Day, Afternoon)
Post clear signage:
- “Debris Chute in Use—Do Not Stand Beneath”
- Contractor contact and permit number (if required by Meriden)
- High-visibility warning tape around the discharge area
- Traffic cones or barriers if the dumpster blocks any pedestrian path
Conduct a trial run: load small debris pieces and confirm they flow smoothly without jamming. Adjust the angle or discharge position if needed.
Phase 4: Operational Handoff (Day 1 of Use)
Brief all workers on proper loading technique:
- Do not overload individual pieces—feed debris steadily
- Shake or guide long materials (lumber, drywall) to prevent binding
- Keep the chute clear of personal items, tools, and PPE
- Report any leaks, misalignment, or jams immediately to the site supervisor
Reference your step-by-step setup workflow guide and assign one person as the daily chute monitor.
Safety Protocols & OSHA Compliance
Debris chutes involve serious hazards. Full compliance with OSHA construction safety standards is non-negotiable and protects both your crew and your bottom line.
Preventing Falls from Height
Workers installing or maintaining the chute on an upper story must be properly tied off. Connecticut law and OSHA require fall protection at heights of 6 feet or more. Use a certified harness, lanyard, and anchor point rated for the load.
Guarding Against Struck-By Hazards
Debris falling from a chute can strike workers or pedestrians below. Meriden’s downtown areas with foot traffic are particularly sensitive:
- Maintain barriers at least 6 feet from the discharge zone
- Never allow workers or pedestrians beneath a chute during operation
- Use a spotter if visibility to the dumpster is limited
- Post warning signs on all nearby sidewalks and building entrances
Ergonomics & Safe Loading
Loading a chute places strain on workers’ backs and shoulders. Follow OSHA ergonomics and safe lifting practices:
- Limit individual piece weight to 50 lbs or use two-person teams for heavier items
- Keep the chute opening at waist height when possible
- Rotate workers to avoid repetitive stress injury
- Provide step stools or adjustable platforms if the chute is too high or low
Fire & Emergency Planning
In Meriden’s mixed-use zones, ensure the chute does not block emergency exits or fire apparatus access routes. If the chute crosses a public right-of-way or discharges near a building entrance, notify the Meriden Fire Department (non-emergency: 203-630-1003) of the temporary structure’s presence and duration.
Debris Chute Costs for Meriden Projects
Meriden debris chute costs depend on project duration, height, and chute type. Here’s what to budget:
Rental vs. Purchase
Most contractors in Meriden rent rather than buy, since renovation and demolition jobs typically last weeks to a few months:
- Short-term rental (1–4 weeks): $300–$600 per week, plus delivery/pickup
- Longer-term rental (1–3 months): $400–$800 per month with potential volume discount
- Purchase: $2,000–$5,000 for a complete modular system; useful if you run multiple concurrent projects or long-term contracts
See Debris Chute Rental Cost Estimate for Wallingford, CT and our ROI Calculator to model your specific job parameters.
Permit & Insurance Costs
Factor in:
- Temporary structure permit: $100–$250 in Meriden
- Additional insurance endorsement or rider: $50–$150 (verify your policy covers debris chutes; most do, but some require explicit approval)
- Site monitoring (optional): If you hire a dedicated safety monitor, add $150–$300/day
Dumpster Coordination
The chute discharges into a waste dumpster. In Meriden, dumpster rental typically costs $300–$600 per placement, depending on size and haul-away frequency. Coordinate dumpster pickup with your chute usage; a full dumpster that sits for days ties up your chute and may violate Meriden street-use permits.
Ongoing Maintenance & Cleaning
Keep your chute system clean and functional throughout the project to avoid jams, odors, and pest issues—critical in residential and downtown Meriden areas.
Daily Cleaning Protocol
At the end of each workday (or at least 3x per week on slower projects):
- Sweep debris from external sections with a stiff brush
- Clear any jammed material inside the chute by tapping gently or using a wooden rod (never your hands)
- Inspect all connection bolts and safety rings for tightness; tighten if needed
- Wipe discharge points where dust collects
Read our full trash chute cleaning and maintenance guide for detailed procedures.
Weekly Inspection
Once per week, do a full walk-around:
- Check all attachment bolts with a wrench—vibration and wind can loosen them
- Look for cracks, dents, or deformation in the chute sections
- Verify that safety rings are in place and undamaged
- Test the discharge angle; readjust if the chute has shifted
- Document findings in a log (helpful if an inspector visits or a safety incident occurs)
Common Meriden-Specific Challenges & Solutions
Meriden’s urban environment and New England weather bring predictable complications. Anticipate them:
Tight Urban Lot Constraints
Challenge: Downtown Meriden projects often have narrow alleys, shared property lines, and limited dumpster placement options.
Solution: Work with a debris chute provider who can design a custom angle or side-discharge configuration. Modular systems offer flexibility. Early coordination with building neighbors prevents disputes and work stoppages.
Wind & Weather Exposure
Challenge: Connecticut’s nor’easters and spring storms can destabilize a tall chute or scatter light debris across adjacent properties.
Solution: Install redundant guy-lines or cross-bracing if your chute exceeds 40 feet. On windy days, reduce debris loading or pause operations. Use a chute cover or splash guard to contain dust during high wind.
Meriden Historic District Concerns
Challenge: Some Meriden neighborhoods are within or near historic districts (e.g., downtown areas with 19th-century brick buildings). Aesthetic complaints or unexpected historic-preservation reviews can delay work.
Solution: Check the Meriden Historic District regulations early. Opt for a neutral-colored chute cover or positioning that minimizes visual impact. Notify neighbors in writing before setup and describe the temporary duration.
Parking & Street Access Conflicts
Challenge: Discharging a chute into a dumpster on a congested Meriden street may require a temporary parking permit or street closure.
Solution: Contact Meriden’s Public Works Department or Parking Authority before setup. A street-use permit costs $50–$200 but prevents fines and disputes with city enforcement. Plan dumpster positioning to minimize disruption to adjacent businesses.
Choosing the Right Chute System for Your Project
Meriden projects vary widely. Match your chute to the job:
Modular vs. Traditional Chutes
Explore modular vs. traditional chute options to understand the trade-offs:
- Modular (segmented): Lighter, faster to set up and disassemble, easy to reconfigure for different project heights, ideal for Meriden’s varied building heights and frequent job rotations
- Traditional (fixed-length): Heavier, requires permanent or semi-permanent installation, lower cost for very long projects, less flexible for variable sites
Height & Section Count
Meriden’s buildings range from 2-story residential (20–25 feet) to 10+ story downtown structures (100+ feet). A modular system lets you scale: order only the sections you need, saving rental cost and setup time on shorter projects.
Debris Type & Flow Rate
Different projects require different chute bores:
- Mixed renovation debris (drywall, wood, light metals): Standard 18″ or 24″ bore chutes work well
- Heavy demolition (concrete, masonry): Consider larger bore (30″+) or reinforced poly sections to handle edge impact
- Roofing shingles or light material: A tighter bore or flatter angle prevents debris spreading during descent
Ask your debris chute provider which bore size matches your specific project waste stream.
Seasonal Considerations in Connecticut
New England’s four seasons affect chute performance and scheduling:
Spring (March–May)
Warm weather brings a surge in renovation starts. Meriden contractors often begin outdoor projects in late April. Spring rain can make chutes slippery; ensure workers wear slip-resistant footwear and exercise care when positioning debris.
Summer (June–August)
Peak construction season. Heat can cause polyethylene chutes to expand slightly; check bolts and connections more frequently. Ensure proper hydration for workers loading chutes in direct sun.
Fall (September–November)
Mild weather and lower demand make fall ideal for scheduling complex chute setups. Falling leaves may clog discharge areas; increase cleaning frequency in October and November.
Winter (December–February)
Snow, ice, and cold brittle polyethylene. Meriden winters can see 20–30 inches of snow. Secure chutes against winter wind and clear snow from sections. Some contractors pause debris chute use in harsh winter weather and resume in spring.
Local Resources & Government Contacts
Meriden contractors should keep these resources bookmarked:
- City of Meriden Building & Safety Department: 203-630-3090 (Monday–Friday, 8 a.m.–4:30 p.m.) | 142 East Main Street, Meriden, CT 06450 | www.meridencity.org – Permits, temporary structure approvals, zoning verification
- Connecticut Building Code Office (State): portal.ct.gov – DDS Building Code – Official code references and state amendments
- Meriden Public Works Department: 203-630-3030 – Street-use permits, traffic management, dumpster placement on public rights-of-way
- Connecticut One-Call (811): Call 2 business days before any digging or structural attachment. Identifies buried utilities.
- Wallingford Planning & Zoning (Neighboring City Reference): Our guide on Debris Chute Rental Cost Estimate for Wallingford, CT offers adjacent-city context for shared regional planning issues.
Frequently Asked Questions
Do I need a permit to use a debris chute in Meriden?
Yes, in most cases. If your chute is in place for more than 14 days, extends beyond your property line, or impacts a public right-of-way (street or sidewalk), you’ll need a temporary structure permit and possibly a street-use permit from the City of Meriden. Permits cost $100–$250 and take 5–10 business days to process. Contact the Building & Safety Department early to confirm your specific requirements; some very small projects (e.g., 2-story residential interior work with ground-level discharge on private property) may be exempt.
What’s the typical cost of a debris chute rental in Meriden?
Short-term rental rates (1–4 weeks) range from $300–$600 per week, plus delivery and pickup fees ($100–$200 each). Monthly rates offer better value and typically run $400–$800. Longer projects benefit from purchase; a complete modular system costs $2,000–$5,000. Budget also for permit fees, insurance endorsement, and dumpster rental ($300–$600 per placement). Use our ROI calculator to model your exact project timeline and cost.
Can I discharge a debris chute into the street or public sidewalk?
Generally, no. Discharging directly onto a public street violates Connecticut health codes and Meriden ordinances and creates a public safety hazard. You must discharge into a contained dumpster or waste bin on private property. If your project site has no room for a ground-level dumpster, work with Meriden Public Works to apply for a temporary street-use permit and position the dumpster in a marked, barricaded zone. This is common in downtown Meriden; the permit process is routine.
How do I prevent debris dust from affecting neighboring properties?
Use a chute cover or splash guard to contain dust during discharge, especially on windy days. Wet down the discharge area lightly to suppress airborne particles. Maintain the chute and dumpster cleanly throughout the project—debris buildup accelerates dust generation. Notify neighbors in advance and maintain a responsive, professional attitude; these proactive steps prevent complaints and ensure smooth work authorization by local inspectors.
What safety training do my workers need before using a debris chute?
All workers who load or manage the chute should receive a brief site-specific safety orientation covering: (1) proper loading technique and weight limits, (2) hazards of debris falling from height and the no-standing-beneath rule, (3) jamming and how to clear blockages safely, and (4) the location of emergency contacts and first aid supplies. OSHA does not mandate a formal certification for debris chute operation, but written documentation of your on-site training protects you in case of an incident. See our common debris chute mistakes article for a detailed pre-work checklist.
Can I use a debris chute during winter in Meriden?
Yes, but with precautions. Snow and ice make sections slippery, so ensure workers wear slip-resistant footwear and exercise extra care when positioning or loading debris. Cold can make polyethylene slightly brittle; inspect the chute more frequently for cracks or damage. Clear snow from sections regularly to maintain visibility and prevent weight accumulation. If ice buildup blocks the chute interior, use a wooden rod or mallet to gently clear it—never use metal tools that can damage the chute. Many contractors pause chute use during heavy nor’easters or ice storms and resume when conditions improve.
What should I include in my site plan when applying for a debris chute permit in Meriden?
Your site plan submission to the Meriden Building Department should include: (1) a scale drawing showing the building footprint and property lines, (2) the exact location of the chute (with measurements from property lines and adjacent buildings), (3) the chute’s height and attachment points, (4) the ground-level discharge location and dumpster position, (5) distance from utilities (marked “per 811 call”) and pedestrian pathways, (6) a note of the project duration and expected dates, and (7) your contractor license number and proof of general liability insurance. Pre-call or visit the Building Department to ask if they have a specific form or template.
Ready to Get Started?
Setting up a debris chute in Meriden requires careful planning, timely permitting, and strict safety discipline—but the payoff in site efficiency, worker safety, and professional appearance is worth the effort.
Next steps:
- Contact Meriden Building & Safety (203-630-3090) to confirm permit requirements for your specific project scope and site.
- Conduct a site walk with your debris chute provider to document height, attachment points, and ground-level positioning. Request a written proposal that includes setup timeline and cost.
- Order or rent your chute system early—at least 2 weeks before the start date to allow for delivery, permit approval, and installation time.
- Brief your crew on safety protocols and proper loading technique before the first day of operation. Use our step-by-step setup guide to ensure all workers understand the hazards and procedures.
- Schedule weekly inspections and daily cleaning from day one. A well-maintained chute prevents delays, safety incidents, and costly emergency repairs.
For questions about debris chute sizing, rental options, or region-specific guidance, call our team at +1 (855) 902-4883 or visit our full debris chute installation guide for detailed best practices.
Your Meriden project’s success depends on clean, safe, efficient debris removal. A professionally deployed debris chute system is the foundation—and we’re here to help you get it right.