

Table of Contents
- Pre-Delivery Planning & Site Preparation
- Delivery Day Timeline: What Happens When the Truck Arrives
- Site Access & Space Requirements for Wallingford Jobsites
- Safety Protocols During Delivery & Setup
- Anchor Point Installation & Verification
- Discharge Area & Dumpster Positioning
- Crew Coordination & Communication on Delivery Day
- Weather Considerations for Connecticut Deliveries
- Post-Delivery Checklist & Handoff
- Common Delivery Issues & How to Avoid Them
- Frequently Asked Questions
- Local Wallingford, CT Notes
- Ready to Schedule Your Debris Chute Delivery?
Pre-Delivery Planning & Site Preparation
Preparation starts weeks before your delivery truck arrives on your Wallingford jobsite. A smooth delivery begins with clear communication between you, the rental company, and your general contractor or project manager. Confirm the delivery date, time window, and specific site address—street, building number, and access gate code if applicable.
Review your permit paperwork to ensure all requirements are met. The permit process in Connecticut lays the groundwork for safe, legal chute placement, so verify that your site has received final approval before scheduling.
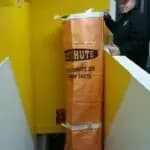
Walk your jobsite two to three days before delivery and identify the following:
- Exact wall section where the chute will be anchored (usually the side of the building with best building-line clearance and fewest obstacles)
- Ground-level discharge area (must be stable, clear of utilities, accessible to the dumpster)
- Parking space for the delivery truck (typically 20–30 feet of clear curb or adjacent lot space)
- Overhead clearance for the crane or hydraulic lift (if applicable to your site layout)
- Power lines, gas lines, or water main locations along the wall where anchors will be set
- Neighbor proximity—especially in Wallingford’s dense residential and commercial zones where adjacent properties are nearby
Document obstacles with photos and measurements. Share these details with your delivery coordinator at least 5 business days before arrival. If your site is tight or non-standard, a site survey call with the rental company’s technical team can save hours on delivery day.
Delivery Day Timeline: What Happens When the Truck Arrives
Delivery day typically unfolds in a predictable sequence. Knowing each phase helps you coordinate crew, equipment, and site traffic efficiently.
6:00–6:30 AM: Pre-Arrival Checklist (Your Crew)
Before the delivery truck rolls onto your Wallingford site, ensure your team has:
- Cleared the parking zone and marked it with cones or tape
- Removed vehicles, equipment, or materials blocking the wall where anchors will be installed
- Ensured ground-level discharge area is clear and level (fill or compact low spots if needed)
- Confirmed dumpster is positioned 4–6 feet from the base of the wall, level with the ground
- Verified power and water lines are marked (call 811 beforehand if you haven’t already)
- Assigned a site safety officer or foreman to oversee the delivery crew
6:30–7:00 AM: Truck Arrival & Visual Site Assessment
The delivery crew arrives with the chute sections, anchoring hardware, and delivery vehicle. The first 15–20 minutes are spent on a visual walk-around. The crew lead will:
- Photograph the wall, ground conditions, and access points
- Confirm the anchor wall is structurally sound (no cracks, spalling, or weak mortar visible)
- Verify parking and crane access match the pre-delivery notes
- Identify any last-minute obstacles or changes from the permit records
If discrepancies arise (e.g., the wall is damaged, or the dumpster is positioned incorrectly), the delivery crew will halt and contact your site coordinator. This is normal and does not reflect poor planning—it’s a safety checkpoint.
7:00–8:00 AM: Anchor Installation & Wall Preparation
The crew begins setting anchors into the wall. This phase involves:
- Marking anchor points at the correct spacing and height (typically 8–12 feet intervals for modular chutes)
- Drilling holes into brick, concrete, or steel studs (depending on your building’s structure)
- Installing concrete anchors, lag bolts, or welded brackets (as specified by your permit and chute model)
- Torquing bolts to the manufacturer’s specification using calibrated wrenches
- Performing a pull test on each anchor to verify load capacity
This is the longest single phase and may take 45–90 minutes depending on wall material, number of anchor points, and site conditions. Concrete walls are faster; masonry or stone walls may require additional time for proper expansion-bolt seating.
Site Access & Space Requirements for Wallingford Jobsites
Wallingford, Connecticut spans both dense residential neighborhoods and light-commercial zones. Site access varies significantly depending on your location within the city.
Parking & Truck Turning Radius
The delivery vehicle is typically 26–32 feet long and requires a clear, level parking area. Wallingford street widths in residential districts (e.g., along North Main Street or Center Street) often limit truck placement. If your jobsite is on a narrow street or cul-de-sac, notify the rental company in advance—they may send a smaller vehicle or schedule delivery during off-peak hours to minimize traffic disruption.
Pedestrian & Neighbor Considerations
Wallingford’s mixed-use zones mean your jobsite may be adjacent to residential properties, sidewalks, or small businesses. Work with your delivery coordinator to:
- Schedule delivery during daylight hours when visibility is best
- Notify immediate neighbors (in writing or verbally) 48 hours in advance
- Set up safety barriers or caution tape at ground level around the discharge zone
- Assign crew to manage pedestrian flow if the jobsite abuts a public sidewalk
Utility Access & Clearance
Wallingford’s infrastructure includes buried utilities (gas, electric, water) that run along most streets and building perimeters. Confirm utility line locations by calling 811 at least 3 business days before delivery. This step is mandatory for permit compliance and prevents costly delays.
Safety Protocols During Delivery & Setup
Debris chute delivery and installation involve machinery, heights, and heavy loads. Adherence to OSHA construction safety guidelines is non-negotiable.
Personal Protective Equipment (PPE) Requirements
Every person on the jobsite during delivery must wear:
- ANSI-compliant hard hat (Type I or Type II)
- High-visibility vest (Class 2 or 3, orange or yellow)
- Steel-toed boots (minimum 6-inch ankle support)
- Safety glasses or face shield if drilling or cutting is underway
- Work gloves rated for the task (heavy-duty for lifting, leather for handling metal)
Your site safety officer should conduct a pre-work safety briefing 30 minutes before the delivery crew begins. Review emergency contact numbers, first-aid station location, and the evacuation route.
Fall Protection & Working at Heights
If anchor installation occurs above 6 feet, the delivery crew must use harnesses and lanyards secured to a fixed point. Your site must have a rescue plan in place in case of a fall. This is often outlined in your permit and should be reviewed during the pre-delivery site walkthrough.
Crane or Lift Operations
If your site uses a mobile crane or hydraulic lift to position chute sections, the operator must be certified (typically through OSHA or a recognized certification body). A ground spotter must be assigned to maintain clear sightlines and prevent bystanders from entering the load path. Radius and load capacity must be verified before any lift begins.
Anchor Point Installation & Verification
Anchor installation is the structural foundation of your chute system. This phase determines whether the chute will remain secure and safe throughout its rental period.
Anchor Spacing & Load Distribution
Modular chute sections are typically 4–6 feet tall and weigh 80–120 pounds each when empty. When fully loaded with construction debris (concrete, wood, metal), a section can weigh 400–600 pounds. Anchors are spaced at fixed intervals to distribute this load evenly across the wall.
For a typical two-story or three-story wall, you’ll have 4–8 anchor points. Each anchor must be capable of supporting a vertical load of 1,000–2,000 pounds, depending on chute diameter and local wind conditions. The delivery crew will install anchors using:
- Concrete walls: Concrete expansion anchors (wedge bolts or screw anchors) rated for the wall’s compressive strength
- Brick/masonry: Lead or plastic anchors with stainless-steel bolts (masonry is softer than concrete and requires larger-diameter anchors)
- Steel-frame buildings: Welded or bolted brackets attached directly to structural steel beams
Torque Specification & Testing
Each anchor bolt is torqued to a specific specification using a calibrated torque wrench. For example, a half-inch bolt in a concrete wall might be torqued to 80–100 foot-pounds, while a three-quarter-inch bolt might reach 150–180 foot-pounds. Under-torqued anchors will loosen over time; over-torqued bolts risk stripping threads or cracking the substrate.
After all anchors are installed, the delivery crew performs a visual inspection and a manual pull test. Each anchor point is yanked downward with 300–500 pounds of force to confirm it does not shift, crack the wall, or show signs of failure. This is your quality assurance step—do not allow the crew to proceed to chute assembly if any anchor fails this test.
Discharge Area & Dumpster Positioning
The discharge area is where debris exits the chute at ground level and falls into the dumpster. Proper positioning prevents damage, safety hazards, and neighbor complaints.
Dumpster Placement & Clearance
The dumpster should be positioned 4–6 feet from the base of the wall, directly under the chute discharge outlet. The ground must be level and compacted (avoid soft soil, gravel, or recently excavated areas). If your site has uneven terrain, use steel shim plates to level the dumpster before debris loading begins.
Ensure the dumpster is not blocking a fire lane, sidewalk, or utility access point. Wallingford’s fire code may require a minimum clearance from building entrances (typically 3–5 feet). Verify this with your local building official if you are uncertain.
Discharge Chute Angle & Debris Flow
The chute’s angle affects how quickly debris falls and how far it travels horizontally. A steeper angle (closer to vertical) produces faster fall speeds and more horizontal throw; a shallower angle slows debris but may cause jams. Most contractors run chutes at a 50–70-degree angle from vertical to balance speed and control.
If debris is leaving the dumpster and landing on the ground, the chute may be too steep or the dumpster may be positioned too far away. Adjust the chute angle or move the dumpster closer. Do not ignore overflow—it creates a tripping hazard and attracts complaints from neighbors.
Noise & Dust Control Measures
Concrete, tile, and heavy metal debris create loud impact noise when they land in the dumpster. If your jobsite is near residences (common in Wallingford), use:
- Rubberized impact pads inside the dumpster to dampen noise
- Plastic sheeting or tarps to contain dust and debris spillage
- Water spray or dust-control equipment to minimize airborne particles
Some Wallingford municipalities have noise ordinances that limit construction activity to specific hours (e.g., 7:00 AM – 5:00 PM weekdays). Check your permit to confirm allowed hours before scheduling intensive debris disposal.
Crew Coordination & Communication on Delivery Day
A successful delivery requires clear roles and real-time communication between your site team and the rental company’s crew.
Roles & Responsibilities
- Site Safety Officer (Your Team): Oversees PPE compliance, manages pedestrian access, approves each phase of installation before proceeding.
- Delivery Crew Lead (Rental Company): Directs installation, verifies anchor integrity, signs off on final positioning.
- General Contractor / Project Manager (Your Team): Coordinates timing with other trades, ensures site access, handles site communication with neighbors and utilities.
- Dumpster Operator / Ground Spotter (Your Team or Rental Company): Positions dumpster, monitors discharge flow, manages debris overflow.
Communication Checkpoints
Establish these communication moments to prevent delays and misunderstandings:
- 30 minutes before delivery: Confirm crew arrival time and site access via phone or text.
- Upon arrival: Walk-through with crew lead to verify wall condition, parking, and utility marks.
- After anchor installation: Inspect each anchor, approve final dumpster position.
- Before first use: Final safety briefing and confirmation that all sections are properly assembled and secured.
Assign one person on your team as the primary contact for the delivery crew. Avoid situations where multiple contractors or crew members give conflicting instructions to the delivery team—it slows progress and creates liability issues.
Weather Considerations for Connecticut Deliveries
Connecticut’s climate presents seasonal challenges for debris chute delivery and installation. Wallingford’s position in central Connecticut means exposure to nor’easters, ice storms, and summer thunderstorms.
Rain & Moisture Concerns
Light rain does not stop delivery, but heavy downpours can. Wet anchor holes in masonry take longer to set properly, and wet concrete may delay cure time for epoxy anchors. If heavy rain is forecasted for your delivery day, contact your rental coordinator 48 hours in advance to discuss a postponement.
After delivery, ensure the chute sections are not left standing in standing water overnight. Water pooling in chute joints can freeze in winter or encourage mold growth in humid conditions.
Wind & Structural Stability
Wallingford’s elevation and proximity to coastal weather systems can produce strong winds, especially in fall and early spring. A fully extended empty chute acts like a sail and can sway in gusts. Delivery crews typically brace chute sections with temporary guy-wires or cross-braces until they are fully seated and loaded.
If wind speed exceeds 25 mph on delivery day, installation may be delayed. Do not allow installation to proceed in dangerous wind conditions—the risk of chute collapse or anchor failure is unacceptable.
Temperature & Material Performance
Polyethylene chute sections (the typical material) remain flexible in cold weather but can become brittle below 20°F. Concrete and epoxy anchors need appropriate cure time; cold temperatures slow this process. If you are scheduling a winter delivery in Wallingford, allow extra time for anchor cure and inspect chute joints for stress cracks before first use.
Post-Delivery Checklist & Handoff
After all chute sections are installed and the delivery crew has left, do not immediately begin loading debris. Conduct a post-delivery walkthrough with your site safety officer and document the system’s condition.
Visual Inspection Checklist
- Wall Condition: No visible cracks, spalling, or movement at anchor points.
- Anchor Bolts: All bolts tight, no rust or corrosion visible, washers seated properly.
- Chute Sections: All sections aligned vertically, no gaps or twists between segments, discharge outlet clean and unobstructed.
- Dumpster: Stable and level, positioned correctly under discharge, no debris or obstacles inside.
- Ground Clearance: No trip hazards around the base, safety barriers in place, warning signage visible.
- Debris Flow Test: Drop a small amount of lightweight material (e.g., cardboard scraps) through the chute and verify it lands in the dumpster without spillage.
Documentation & Signoff
Request a written handoff document from the delivery crew that includes:
- Installation date and time
- Chute model, section count, and serial numbers
- Anchor type, quantity, and torque specification
- Weight capacity and any load restrictions
- Maintenance schedule (e.g., weekly bolt inspection, monthly cleaning)
- Emergency contact for the rental company (in case of malfunction or damage)
Retain this document on your jobsite and share it with your crew and site safety officer. It serves as proof of proper installation and is invaluable if questions arise later.
Common Delivery Issues & How to Avoid Them
Even well-planned deliveries can encounter obstacles. Knowing the most common issues and their solutions prevents costly delays.
Issue: Wall Not Ready or Inaccessible
Problem: The wall has scaffolding, exterior finishes, or other obstructions that prevent anchor installation. This often occurs if other trades (e.g., painters, masons) are still working on the wall.
Solution: Coordinate with all trades 2 weeks before delivery to ensure the wall is clear. If scaffolding is necessary, temporarily remove sections along the anchor line or position scaffolding away from anchor points. Document any modifications with photos and share them with the delivery coordinator.
Issue: Utility Line Conflict
Problem: During the site survey, the crew discovers a power line, gas line, or water main running along the planned anchor line. This forces a redesign or postponement.
Solution: Call 811 at least 3 business days before delivery to have utilities marked. Review the markings yourself and share photos with the rental company. If a conflict exists, work with the rental coordinator to shift the anchor line or use alternative anchor types (e.g., welded brackets on steel instead of bolts in concrete).
Issue: Dumpster Positioning Prevents Discharge Flow
Problem: The dumpster is too far from the chute discharge, or it is positioned under an overhang that blocks falling debris.
Solution: During the pre-delivery walkthrough, simulate the discharge angle by standing at the chute’s anticipated discharge height and looking straight down. Ensure the dumpster opening is directly below. If the geometry is tight, adjust the chute angle (within manufacturer limits) or reposition the dumpster.
Issue: Anchor Pullout or Failure During Testing
Problem: During the anchor pull test, one or more anchors shift or the wall cracks, indicating insufficient substrate strength.
Solution: Do not proceed to chute assembly. Contact the rental company and your structural engineer. Options include: switching to a deeper or larger-diameter anchor, reinforcing the wall with steel plates, or relocating anchors to a stronger section of wall (e.g., above or below a window). This is rare but critical—never compromise on anchor integrity.
Issue: Crew Arrives During Off-Hours or Weather Delays Them
Problem: The delivery truck arrives earlier or later than the scheduled window, catching your crew unprepared. Or weather delays the crew, leaving the truck on your site overnight.
Solution: Establish clear communication with the rental company’s dispatcher. Request a “30-minute window” notification call before arrival. If weather delays are forecast, confirm with the dispatcher whether the delivery will proceed or be rescheduled. Have a backup plan (e.g., assigning an afternoon crew if the morning delivery is delayed) so you are not caught off guard.
Frequently Asked Questions
How long does the entire delivery and installation process take?
Most deliveries take 2–4 hours from truck arrival to final positioning and safety testing. This assumes a straightforward site with accessible walls, pre-marked utilities, and no structural issues. Complex sites (e.g., tight urban lots, damaged walls, or utility conflicts) can extend to 6–8 hours. Your rental coordinator can provide a more accurate estimate during the pre-delivery call.
Do I need to provide labor for the delivery, or is it all included?
The rental company’s delivery crew handles installation and safety verification. However, you must provide site access, parking, and a site safety officer to oversee the work and coordinate with other trades. Your crew should also prepare the discharge area (dumpster placement, ground leveling) before the delivery truck arrives. Some rental companies charge extra for site preparation if the dumpster or ground requires significant work.
What if my building has a listed historic status or unusual architecture?
Historic buildings in Wallingford (e.g., buildings listed on the National Register of Historic Places) may have additional permit requirements and restrictions on anchor installation methods. Your local historic preservation office or building department can advise. Some historic properties require non-invasive anchoring systems (e.g., frame-mounted chutes instead of wall-bolted) that may have a higher rental cost. Discuss this with your rental company early—it affects the permitting timeline and installation design.
Can I move or reposition the chute after delivery?
Minor adjustments to the chute angle or dumpster position can be made without involving the rental company. However, relocating the chute system to a different wall or adding additional sections requires the rental company’s coordination and likely incurs a service call fee. Treat the delivery setup as final and only adjust if debris flow or safety issues arise during the first 24 hours of use.
What happens if the chute or anchors are damaged after delivery?
Report damage to the rental company immediately and do not attempt repairs yourself. The rental agreement typically covers manufacturer defects but may exclude damage caused by misuse (e.g., overloading, improper debris types). Photographic documentation of the damage and its cause is essential for warranty claims. Depending on damage severity, the rental company may dispatch a technician to repair the system or replace damaged sections.
Are there additional costs beyond the rental fee?
Rental fees typically cover the chute system, delivery, installation, and basic maintenance. Potential additional costs include: site preparation (if your site requires grading or utilities work), permits and inspections (your responsibility, though the rental company may assist), dumpster rental (usually a separate vendor), and damage or loss fees (if you damage the chute beyond normal wear). Review your rental agreement for a complete fee structure. For Wallingford-specific pricing, see debris chute rental cost in Wallingford.
How do I know if my site is suitable for a debris chute rental?
Most multi-story residential and commercial sites in Wallingford are suitable. However, very narrow streets, buildings with no exterior wall space (e.g., townhouses in dense rows), or sites with extensive underground utilities may require alternative debris-management solutions. A pre-rental site survey with your rental company’s technical team (usually free) determines feasibility and recommends the best chute type and placement for your specific jobsite.
Local Wallingford, CT Notes
Wallingford’s zoning and building codes have specific implications for debris chute delivery and setup.
City Permit & Inspection Requirements
Wallingford’s Department of Planning and Zoning requires a temporary debris chute permit for any chute installed on a building for more than 14 days. The permit application must include site plans, wall diagrams, and proof of utility marking. Once issued, the permit is valid for up to 180 days and must be displayed on the jobsite.
After installation, the Building Inspector typically performs a site inspection within 5 business days to verify anchor integrity, dumpster positioning, and safety barriers. Plan for this inspection during your first week of chute operation. Review the Town of Wallingford official website for the most current permit forms and fees.
Utility Marking & Call-Before-You-Dig
Connecticut’s Call Before You Dig hotline (811) serves Wallingford and will dispatch a crew to mark underground utilities within 2–3 business days. This is a mandatory step and must be completed before any anchor drilling begins. Utility lines in Wallingford’s older neighborhoods (e.g., downtown and Center Street areas) are often complex due to the city’s 300+ year history. Do not skip this step.
Noise Ordinance & Working Hours
Wallingford’s noise ordinance limits construction-related activity to 7:00 AM – 5:00 PM on weekdays and 8:00 AM – 5:00 PM on Saturdays. Sundays and holidays are prohibited. Debris chute delivery and installation typically fall within these permitted hours, but high-impact debris disposal (e.g., concrete breaking, metal cutting) must also respect these time limits. If your jobsite is near residences, coordinate with neighbors and inform them of your activity schedule.
Neighboring Town Considerations
If your Wallingford project is near the border with Durham, Middletown, or Berlin, verify that your permit is sufficient for all access points. Some Wallingford jobsites have utility or material staging on adjacent municipal property, which requires coordination with those municipalities. For nearby Stamford (Connecticut, to the south) and setup guidance, consult setup guidance for nearby Stamford.
Ready to Schedule Your Debris Chute Delivery?
Your Wallingford jobsite’s success depends on a smooth, safe debris chute delivery. By preparing your site, coordinating with your rental provider, and following the post-delivery checklist, you ensure that your crew can focus on the work ahead without debris-management interruptions.
Start by reviewing your project timeline and identifying the delivery window that aligns with your construction schedule. Contact your debris chute rental provider with your site address, building structure type, and wall dimensions. Request a pre-delivery site survey if your jobsite has unusual features (e.g., historic architecture, tight urban location, or utility concerns).
Once your permit is approved and your site is ready, confirm your delivery date at least 2 weeks in advance. Assign a site safety officer to oversee the installation and document the final handoff. With proper planning, your chute will be operational and ready to improve debris disposal efficiency across your project.
For additional guidance on Wallingford-area chute rentals, pricing, and regional considerations, explore our complete library of family renovation project chute setups and seasonal setup considerations tailored to Connecticut contractors.