

Table of Contents
- What Is a Lite Duty Trash Chute?
- When to Use a Lite Duty Chute vs. Other Options
- Capacity and Weight Limits
- Best Materials for Lite Duty Chutes
- Setup and Installation Essentials
- Safety Practices and Ergonomics
- Maintenance and Cleaning
- Dumpster Positioning and Alignment
- Cost and ROI for Contractors
- Common Mistakes and How to Avoid Them
- Real-World Site Scenarios
- Frequently Asked Questions
- Ready to Get Started
What Is a Lite Duty Trash Chute?
A lite duty trash chute is a modular, reusable debris management system designed for smaller commercial renovation and demolition projects. Unlike heavy duty trash chute systems that handle high-volume, long-duration jobs, lite duty chutes excel at interior remodels, drywall removal, roof tear-offs on low-rise buildings, and light demolition work.
The system typically consists of safety-orange polyethylene tubing in 10-foot or 25-foot configurations, segmented modular trash chute sections that stack and connect easily, and a discharge opening that feeds directly into a standard dumpster or debris receptacle.
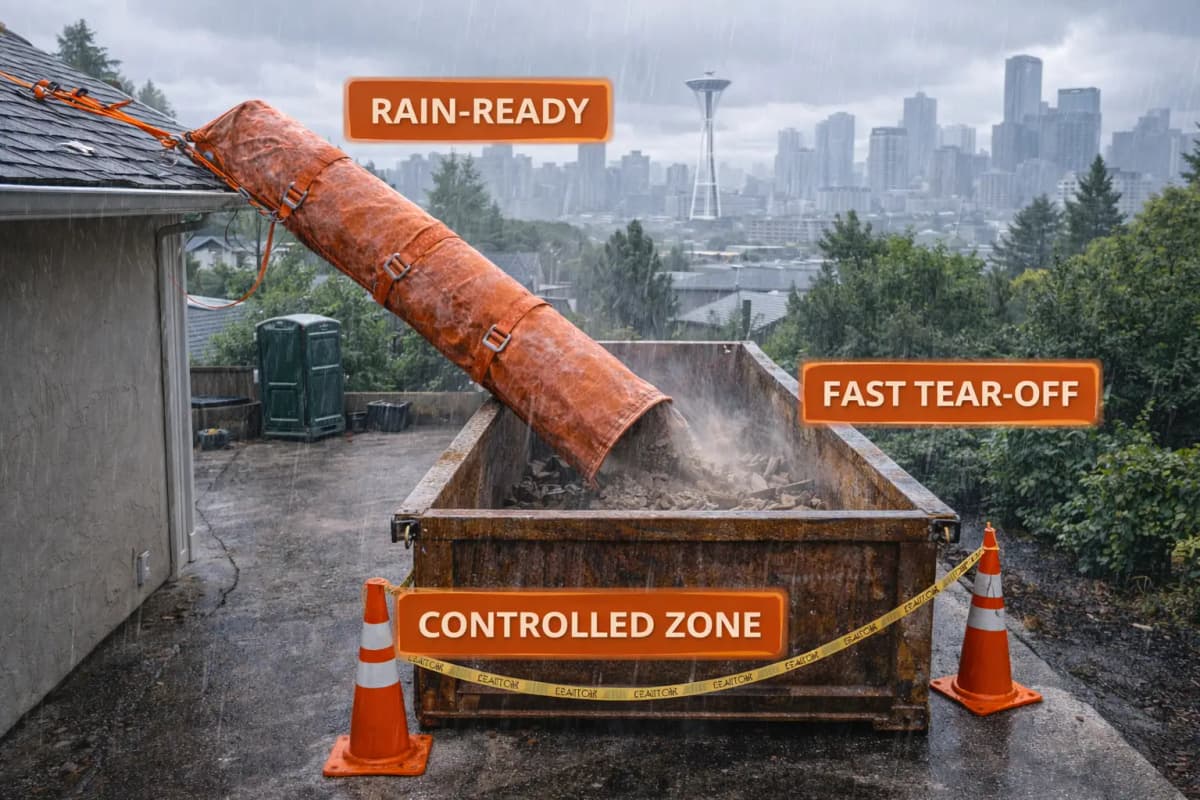
Key characteristics of lite duty systems:
- Lightweight modular sections (easy single-worker setup)
- Suitable for buildings 2–4 stories high
- Designed for materials under 50–75 lbs per load
- Compact footprint when not in use
- Lower rental or purchase cost than heavy-duty alternatives
- Fast deployment and breakdown
Lite duty chutes are not scaled-down versions of industrial systems—they are purpose-built for the specific load, duration, and site constraints of small-to-medium commercial projects.
When to Use a Lite Duty Chute vs. Other Options
Choosing the right debris management tool saves time, money, and worker safety. Lite duty chutes work best in these scenarios:
Interior Renovation and Remodel Projects
When crews are removing drywall, cabinets, fixtures, or flooring from multi-story commercial buildings, a lite duty chute prevents hallway congestion and reduces manual hauling. The chute integrates with a single window or stairwell opening, and debris slides directly to ground level.
Roofing Tear-Offs on Low-Rise Buildings
Residential or small commercial roofing jobs (2–3 stories) generate high volumes of shingles and underlayment. A lite duty chute positioned at roof edge or via a side scaffold controls the flow and minimizes ground-level mess.
Light Demolition and Rough-In Work
Removing non-structural walls, old fixtures, or packaging debris in a 3–4 story commercial space is ideal for lite duty systems. The payload is predictable and the work duration finite.
When NOT to Use Lite Duty
Do not deploy lite duty chutes for concrete demolition, steel or masonry debris, extended multi-month projects, or buildings taller than 5 stories. For those jobs, upgrade to a heavy duty system or a rental dumpster pulled to site.
Capacity and Weight Limits
Understanding weight and volume limits prevents equipment failure, damage to underlying dumpsters, and worker injury. Lite duty chutes are engineered for:
Typical Weight Per Load
Each piece of debris loaded into the chute should weigh under 50 lbs. Aggregate loads (multiple pieces tumbling down together) rarely exceed 75 lbs before the chute reaches equilibrium and material settles. Exceeding this threshold risks jamming, structural strain, or ejection at the discharge.
Daily Volume Capacity
A lite duty system can safely handle 4–8 cubic yards per day, depending on debris type. Drywall and insulation move faster; heavier materials like tile or wood studs require more frequent breaks to let material settle.
Dumpster Capacity and Weight Rating
Confirm your dumpster’s weight limit before starting. A standard 20-yard dumpster holds 8–10 tons of material. Lite duty chute jobs rarely fill beyond this, but tracking daily weight prevents overages and overage fees. Always consult your debris chute weight capacity guide for your specific system.
Material-Specific Limits
- Drywall and insulation: Up to 8–10 cubic yards per day
- Wood trim and framing scraps: 4–6 cubic yards per day
- Roofing shingles and underlayment: 5–7 cubic yards per day
- Flooring (laminate, vinyl): 3–5 cubic yards per day
- Metal or dense materials: NOT recommended for lite duty; use heavy-duty system
Best Materials for Lite Duty Chutes
Lite duty chutes are constructed from durable, UV-resistant polyethylene tubing. This material offers several advantages for smaller projects:
Polyethylene vs. Metal
Polyethylene (standard for lite duty): Lightweight, won’t corrode, easy to stack and transport, absorbs impact from debris, cost-effective. Color-coded in safety orange for visibility at the site.
Metal (heavy-duty only): Used for extreme-duty, long-term, or high-volume jobs. Heavier, requires more equipment to set up, but lasts longer on busy sites.
Segmented Modular Design
Lite duty chutes use interlocking modular trash chute system sections (typically 10 feet each). This design allows you to:
- Add or remove sections based on building height
- Store sections compactly when not in use
- Repair or replace a single section without removing the entire chute
- Deploy the same system across multiple smaller projects
Discharge Hopper and Deflector Options
Lite duty systems come with a standard discharge hopper (4–6 feet from ground) that can be adjusted slightly for dumpster alignment. Optional deflectors prevent side-spray and improve material flow into the receptacle.
Setup and Installation Essentials
Proper setup takes 1–2 hours with two workers and prevents costly mistakes later in the project.
Pre-Setup Site Assessment
Before arriving on site, confirm:
- Building height and available attachment points (window frames, wall studs, scaffolding)
- Dumpster location and ground clearance below discharge point
- Wind exposure (coastal or high-wind areas require tie-offs)
- Local permits or HOA restrictions on chute placement
- Weather forecast (rain can make polyethylene slippery; wind affects angle)
Step-by-Step Installation
1. Position the dumpster first. Place it directly below the planned discharge point. Allow 1–2 feet clearance from the building wall to prevent contact during material flow.
2. Mark and prepare the attachment level. Identify your starting point (usually second floor window or wall opening). Clear any obstacles and ensure a solid attachment surface.
3. Install the first section. Secure the top adapter bracket to the building with lag bolts (or window frame clamps for temporary installations). Use a level to ensure the chute is vertical or angled 5–10 degrees toward the dumpster.
4. Stack and connect sections. Add modular sections one at a time, hand-tightening connection collars. Do not use power tools; hand-tight connections prevent over-stress.
5. Secure the discharge hopper. Position the hopper 4–6 feet above the dumpster top. Adjust the angle so debris flows straight into the receptacle. Tighten all fasteners.
6. Install tie-offs (if windy or required). Attach synthetic rope or cable from the chute side to nearby fixed points (corner posts, scaffolding). This prevents sideways movement under load or wind.
7. Test the flow. Have one worker feed a few pieces of lightweight debris down the chute while another monitors the discharge. Adjust angle or hopper position if material is spilling outside the dumpster.
For a detailed walkthrough, see our guide on how to install a trash chute.
Safety Practices and Ergonomics
Lite duty chute operations are low-risk if workers follow ergonomic and safety protocols. Follow OSHA ergonomics guidelines and OSHA construction safety standards to prevent injury.
Loading Zone Safety
- Never lean into the chute. Feed materials from the side, keeping your body clear of the opening.
- Use handholds and secure footing. If loading from a window or elevated platform, ensure stable footing and grab bars.
- Load one piece at a time. Avoid bundling heavy items; break them into 30–50 lb pieces.
- Wear hard hats and safety glasses. Debris can bounce or splinter as it enters the chute.
Ground-Level Hazards
The worker monitoring the discharge zone faces the highest risk of struck-by incidents. Station one crew member at the dumpster to:
- Watch for spillage and redirect errant material
- Ensure the dumpster is not overfilled
- Signal the loading crew to pause if the dumpster is full
- Stay clear of the discharge opening and chute overhang
Weather and Environmental Conditions
Wet polyethylene becomes slippery. If it rains mid-shift, pause loading and allow the chute to dry, or slow the feed rate and monitor material flow closely. In high winds, add or tighten tie-offs; gusts can shift the chute angle and cause misalignment.
Maintenance and Cleaning
Regular maintenance extends the life of your lite duty chute and prevents clogs or blockages that slow crews.
Daily Cleaning
At the end of each shift, use a garden hose or pressure washer (low setting, under 1500 psi) to rinse the interior and exterior. Pay special attention to:
- Connection collars (where dust and debris accumulate)
- The discharge hopper (fine material like drywall dust can cake up)
- Any visible dents or rough spots (sand them smooth to prevent snagging)
Weekly Inspection
Check for:
- Cracks or punctures in the polyethylene (small holes can be patched; large ones require section replacement)
- Loose fasteners or connection collars
- Bent or damaged discharge hopper
- Rope or tie-off deterioration
Seasonal Storage
When not in use, stack sections in a dry location away from direct sunlight (UV exposure degrades polyethylene over time). Store in a climate-controlled shed or covered area if possible. Avoid stacking sections so heavily that the lower ones deform.
Dumpster Positioning and Alignment
Proper dumpster placement directly beneath the chute discharge is critical for safety and efficiency.
Measuring and Alignment
Before the dumpster arrives, measure the vertical drop from the chute discharge hopper to ground level. Most chutes drop 4–6 feet before discharge. Position the dumpster so its open top is centered 1–2 feet below the hopper.
Why 1–2 feet clearance? This gap allows debris to slow slightly as it exits the chute and prevents excessive impact that can crack lighter receptacles or splash spillage.
Avoiding Damage to the Dumpster
Continuous impact from heavy debris loads can dent or breach a dumpster. Lite duty chutes minimize this risk because the material weight is lighter, but:
- Use a solid dumpster, not a wire-basket recycling bin
- Avoid positioning the discharge directly on the dumpster edge or rim
- Request a reinforced floor dumpster if multiple loads occur daily
- Monitor dumpster integrity weekly and report damage to your rental company
Cost and ROI for Contractors
Lite duty chutes offer compelling economics for small-to-medium projects.
Purchase vs. Rental
Rental (typical): $300–$600 per week, plus delivery and pickup fees ($50–$150 each). Total cost for a 2–3 week interior remodel: $900–$1,500.
Purchase (capital investment): $1,500–$3,000 for a basic 25-foot modular trash chute system. Payback period: 3–5 jobs. After that, your cost per job is zero (maintenance only).
Labor Savings
A lite duty chute reduces manual debris hauling by 60–80%. On a typical 3-week remodel:
- Without chute: 2 workers spend 20 hours per week hauling debris = 40 hours labor cost (~$1,200)
- With chute: 1 worker manages load for 5 hours per week = 5 hours labor cost (~$150)
- Net labor savings: ~$1,050 per job
Project Timeline Impact
Crews work faster when they do not stop to manually remove debris. A typical interior remodel compresses by 2–4 days when a chute is deployed, equivalent to $400–$1,000 in labor overhead savings.
Common Mistakes and How to Avoid Them
Overloading Individual Pieces
Mistake: Jamming a 100-lb wooden door frame or a full sheet of plywood into the chute at once.
Fix: Break large items into 30–50 lb pieces before loading. Precut drywall, rip door frames lengthwise, and stack sheets rather than dropping them whole.
Ignoring Wind and Weather
Mistake: Deploying a chute without tie-offs on a windy day, or continuing operations in rain without checking for slippery buildup.
Fix: Check the weather forecast before install. On windy days, add rope tie-offs. If rain starts, pause and inspect the chute interior for slickness before resuming.
Misaligning the Dumpster
Mistake: Positioning the dumpster off-center or too close to the building, causing spillage or chute contact.
Fix: Measure carefully and mark the dumpster position with chalk or tape. Do a test run with a few pieces before full-load operation.
Skipping Pre-Job Planning
Mistake: Arriving at the site without confirming building access, dumpster location, or permit requirements.
Fix: Schedule a site visit 2–3 days before deployment. Take photos, measure distances, check for overhead lines, and confirm dumpster access with the property manager.
Inadequate Tie-Offs on Tall Installations
Mistake: Running a 4-section chute (40 feet) on a tall building without securing it to the structure, causing swaying or vibration.
Fix: Install tie-offs every 15–20 feet of height. Use synthetic rope rated for 500+ lbs and attach to solid structural points (corner posts, window headers, scaffolding).
Real-World Site Scenarios
Scenario 1: Interior Remodel, 3-Story Commercial Building
Job: Drywall removal and replacement in a 20,000-sq-ft commercial office.
Debris volume: 6–8 cubic yards per week over 3 weeks.
Lite duty chute choice: 25-foot system deployed from the second floor via a large hallway window. Dumpster positioned in the side lot, 30 feet from the building.
Results: Crew time reduced from 18 hours of hauling per week to 3 hours of chute management. Total labor savings: ~$1,500. Project completed on schedule.
Scenario 2: Roofing Tear-Off, 2-Story Residential
Job: Asphalt shingle and underlayment removal on a 3,000-sq-ft roof.
Debris volume: 5–7 cubic yards in a single 2-day push.
Lite duty chute choice: 10-foot system mounted at the roof edge with a scaffold bracket. Discharge angled to a 20-yard dumpster positioned in the driveway.
Results: Material flows continuously, keeping the roof crew moving. Ground worker manages dumpster overflow and signals for breaks. Job completed in 2 days instead of 3–4.
Scenario 3: Kitchen Renovation, Multi-Unit Building
Job: Cabinet removal and flooring tear-out in a 5-unit residential building.
Debris volume: 3–4 cubic yards per unit, spread over 2 weeks.
Lite duty chute challenge: Building has no exterior windows on the renovation floor. Solution: deploy the chute through a main stairwell opening on the first floor, with the discharge aimed at a dumpster in the building’s loading zone.
Results: Chute eliminates hallway congestion and reduces neighbor complaints about noise and dust. Two units can operate simultaneously with separate chute sections.
Frequently Asked Questions
Can a lite duty trash chute be used for heavy materials like concrete or drywall?
Lite duty chutes handle drywall, insulation, trim, and roofing materials up to about 50 lbs per piece. Concrete, brick, and dense masonry debris exceed weight limits and risk jamming or structural damage. For concrete work, use a heavy duty trash chute or a roll-off dumpster pulled directly to the work area. Attempting to force heavy material into a lite duty system can cause equipment failure and worker injury.
How long does it take to set up a lite duty chute?
Installation typically takes 1–2 hours with two workers, depending on building height and attachment method. A single 10-foot section can be mounted in under an hour if the attachment point is easily accessible. Taller installations (40+ feet) may require 2–3 hours and additional planning for tie-offs and wind-bracing. Breakdown takes 30–45 minutes and is faster than setup because you are simply reversing the process.
Do I need a permit to deploy a trash chute on a commercial job?
Permits vary by city and building code. Many jurisdictions require notification or a permit for temporary structures, especially if the chute extends beyond the building face or near property lines. Always check with your local building department or property manager before scheduling deployment. Some HOAs have restrictions on chute placement or hours of operation. Securing permits early prevents job delays and fines.
What is the maximum height I can safely run a lite duty chute?
Lite duty systems are designed for buildings up to 5–6 stories (approximately 50–60 feet). Beyond that height, material acceleration and impact force exceed design limits, and the chute becomes difficult to secure against swaying or wind. For tall buildings, consult a debris chute system for contractors expert to determine whether a heavy-duty system or alternative debris management approach is required.
Can I reuse a lite duty chute across multiple projects?
Yes. Lite duty systems are built for multiple deployments. With proper maintenance (rinsing, inspecting for damage, storing in a dry location), a modular chute can be used on 3–5 jobs per year for 5–10 years. Inspect all sections before each deployment and replace any with visible cracks or deterioration. This reusability is a major advantage over single-use disposal bags or one-time rentals, especially for contractors running 4+ projects annually.
What is the difference between a lite duty and a standard modular chute?
Lite duty chutes are optimized for smaller projects: lower payload per load, shorter deployment windows (1–4 weeks), and buildings under 5 stories. Standard modular trash chute systems handle larger payloads and longer durations, making them suitable for major renovations or demolition spanning weeks or months. The core engineering is similar, but lite duty focuses on speed of deployment and cost efficiency for smaller crews, while standard modular systems prioritize durability and volume for high-traffic sites.
How do I prevent debris from spilling outside the dumpster?
Position the dumpster’s open top centered directly below the chute discharge, 1–2 feet below the hopper. Use a deflector shield on the hopper to guide material straight down. Station a ground worker to monitor flow and rake any spillage back into the receptacle immediately. If spillage is persistent, angle the chute hopper slightly or add a catch tray to the dumpster rim. For chute bag setup options, consider a fabric collection bag to contain fine debris like drywall dust.
Ready to Get Started With a Lite Duty Trash Chute
Lite duty trash chutes are a smart investment for contractors managing small-to-medium renovation and demolition projects. They reduce manual hauling, accelerate project timelines, and improve site safety and cleanliness.
Next steps:
- Assess your upcoming projects: height, debris type, duration, and site constraints.
- Compare rental vs. purchase costs for your annual project volume.
- Contact the EasyChute team at +1 (855) 902-4883 to discuss your specific needs and get a system recommendation.
- Schedule a site walk if you’re considering a larger or custom deployment.
- Review local permit requirements before your first job.
EasyChute lite duty systems are engineered for reliability, ease of use, and contractor productivity. Whether you’re running kitchen remodels, roofing tear-offs, or light demolition, the right chute keeps your crews moving and your sites clean. Let’s find the right setup for your next project.