

Table of Contents
- What Is a Debris Chute and Why Newton Contractors Need One
- Newton, MA Permit Requirements & Local Codes
- Site Assessment & Pre-Setup Planning
- Step-by-Step Debris Chute Installation
- Safety & Compliance During Setup
- Newton-Specific Cost Factors & Budgeting
- Common Setup Mistakes in Massachusetts
- Seasonal Maintenance for Newton Weather
- Rental vs. Purchase: Newton ROI Guidance
- Local Notes: Newton Resources & Inspections
- Frequently Asked Questions
- Get Started with Your Newton Project
What Is a Debris Chute and Why Newton Contractors Need One
A debris chute is a segmented, modular tube system that safely channels construction waste from upper floors directly into a ground-level dumpster or collection bin. For Newton, MA contractors working on residential renovations, townhouse updates, and multi-unit projects, a chute eliminates the hazard and inefficiency of carrying debris down stairs, through occupied hallways, or relying on manual hand-off methods.
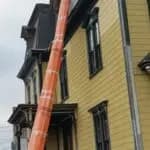
Newton’s compact residential neighborhoods and aging-housing stock mean most renovation sites are tightly integrated with occupied homes, parking constraints, and neighbor concerns. A professional debris chute system reduces dust migration, protects flooring, and demonstrates contractor professionalism—especially important in affluent Newton where project reputation drives future referrals.
Key benefits for Newton projects:
- Faster debris removal = shorter job timelines
- Reduced labor hours and physical strain on crew
- Lower risk of property damage inside the home
- Compliance with Newton Building Department expectations
- Reduced dust and noise complaints from neighbors
Newton, MA Permit Requirements & Local Codes
Newton’s Building Department enforces Massachusetts State Building Code (781 CMR) plus local ordinances. Before you order or install a debris chute, verify permit requirements with the Newton Building Department. Most renovation projects require a construction permit, and debris chutes must be mentioned in the scope of work or equipment list.
What Newton inspectors typically require:
- Valid construction permit showing debris-removal method
- Chute installation plan showing anchor points and support
- Confirmation that the chute does not encroach on public right-of-way or neighbor properties
- Safe discharge point (dumpster must be positioned to prevent spillage onto sidewalks)
- Proof of daily housekeeping and debris containment during operation
Newton’s zoning regulations also restrict construction activity hours (typically 7 AM to 6 PM weekdays, noon–5 PM Saturdays, no Sundays). A debris chute system that operates quietly and contains dust helps you stay compliant with these noise and nuisance rules.
For detailed local code and permitting process expectations, review the permit process requirements guide to understand the inspection timeline and common hold-ups.
Site Assessment & Pre-Setup Planning
A successful debris chute setup begins with a thorough site walk and measurement. Before ordering or renting, assess your Newton project’s specific constraints.
Key measurements and observations:
- Building height: Measure floor-to-floor height and total building elevation. Newton homes are typically 2–3 stories; multi-unit projects may be 4–5 stories. This determines chute length and section count.
- Exterior wall condition: Check for existing structural damage, siding type (vinyl, wood, brick), and attachment points. Older Newton homes often have settled foundations—chute anchors must account for this.
- Ground clearance: Measure distance from the building base to adjacent driveways, utilities, and neighbor properties. Ensure the dumpster can be positioned without blocking access or creating a safety hazard.
- Roof or overhang alignment: Confirm the chute does not interfere with gutters, electrical lines, or HVAC equipment at the roof line.
- Access for installation crew: Plan how workers will transport chute sections to the work area. Narrow Newton side streets may require staged delivery.
Document your site assessment with photos and sketches. This protects you if questions arise during the Newton Building Department inspection and helps the chute supplier confirm the right configuration.
Step-by-Step Debris Chute Installation
Modular debris chute systems are designed for contractor-level installation without specialized heavy equipment. Follow this sequence to ensure a safe, secure setup on Newton projects.
Phase 1: Staging & Delivery (Day 1)
- Coordinate delivery with the rental or equipment company. Confirm access to the site and staging area for chute sections.
- Inspect each section upon arrival: check for dents, cracks, or missing coupling hardware. Damage noted at delivery is not your liability.
- Position sections in a logical order near the work area to minimize re-handling.
- Prepare the work surface where the chute will be assembled (typically scaffolding or the roof line).
Phase 2: Anchor Installation (Day 1–2)
- Identify anchor points on the building facade. Use existing structural members (ledges, roof trusses, rim boards) whenever possible; avoid drilling into brick or stone if the building is historic or protected.
- Mark anchor holes with a marker and verify depth using a stud finder or trial probe to avoid utilities (gas, electric, plumbing).
- Install L-brackets or anchor hardware per the chute system’s instructions. Typical systems use galvanized steel brackets bolted through the building rim or attached to temporary scaffolding.
- Torque all bolts to the manufacturer’s specification. Under-tightening is a leading cause of chute drift or collapse.
- Test anchor stability by applying hand pressure along the chute path.
Phase 3: Section Assembly & Coupling (Day 2–3)
- Begin at the highest section and work downward. This staged approach prevents sections from shifting as weight accumulates.
- Align the first section with the top anchor point and secure it firmly.
- Slide the next section into the coupling ring (the overlap zone at the top of each section). Most chutes use a snap or bolt-lock coupling; confirm it is fully engaged.
- Repeat for each subsequent section, checking alignment after every two sections.
- Inspect the entire chute length for bends, twists, or separation at couplings.
Phase 4: Discharge Setup & Testing (Day 3)
- Position the dumpster directly below the chute outlet. Maintain at least 3–4 feet of clearance from the chute spout to prevent debris splash-out.
- If using a deflector hood, attach it to the chute outlet per manufacturer guidance.
- Conduct a test drop: load a bucket of small debris and drop it through the chute. Observe discharge angle, spillage, and noise.
- Make angle adjustments if the chute outlet directs debris outside the dumpster.
- Verify dumpster gate operation and ensure the chute does not obstruct pickup by the waste hauler.
Phase 5: Safety Signage & Notification (Day 4)
- Post warning signs at the chute entrance on each floor: “AUTHORIZED PERSONNEL ONLY — ACTIVE CHUTE — DO NOT STAND BELOW.”
- Notify neighbors in writing of the chute schedule and expected noise/activity times.
- Brief your crew on safe loading procedures: no large, heavy objects, no standing in the chute’s path, keep fingers clear of coupling zones.
- Contact Newton Building Department if a final inspection is required before use.
Safety & Compliance During Setup
Debris chute safety is non-negotiable. Improper setup or use can result in property damage, worker injury, and permit violations. Newton inspectors and insurance adjusters scrutinize chute practices closely.
Critical safety points:
- Fall protection: Workers installing the chute at height must wear harnesses and lanyards per OSHA construction safety standards. Anchor points for personnel safety lines must be independent of the chute system itself.
- Ergonomics: Train crew on safe loading techniques. Items should be placed into the chute from waist height, not thrown. OSHA ergonomics best practices emphasize controlled hand placement to prevent pinch injuries at couplings.
- Spillage containment: A tarp or debris skirt around the dumpster area prevents debris scatter and complies with Newton’s dust-control expectations.
- Regular inspection: Before each work day, visually inspect the chute for damage, loose couplings, or movement. Do not operate a chute that shows signs of stress.
- Load limits: Modular chutes have weight-per-section limits (typically 500–800 lbs per section). Overloading causes structural failure. Use smaller loads and shorter cycles rather than jamming material.
Document all safety briefings and daily inspections in your site logbook. If a neighbor complaint or Building Department question arises, your records demonstrate due diligence.
Newton-Specific Cost Factors & Budgeting
Newton renovation budgets are typically higher than surrounding towns, but material and labor costs vary based on project specifics. Understanding local cost drivers helps you quote accurately and win bids competitively.
Rental cost factors for Newton:
- Chute length: 2–3 story homes (35–50 feet) = shorter, lower rental. 4–5 story multi-unit projects = longer sections and higher cost. Expect $15–$25 per linear foot per week for modular rental.
- Rental duration: Most Newton residential projects run 4–8 weeks. Weekly rates are cheaper than daily; negotiate a flat monthly rate if the project duration is stable.
- Delivery & setup: Newton’s narrow streets and limited staging areas may incur extra delivery fees ($200–$500). Some suppliers waive this for longer rentals.
- Dumpster coordination: A 20 or 30-yard dumpster rental ($300–$600/week in Newton) is usually required. Coordinate pickup schedule with chute removal to avoid downtime.
For detailed pricing comparison by project type and region, check pricing by region to benchmark against comparable Massachusetts markets.
Purchase vs. rental: Many Newton contractors who do 2–4 projects per year find rental more economical. Ownership makes sense if you manage 10+ projects annually. Review rental vs. purchase decisions to calculate your break-even point.
Common Setup Mistakes in Massachusetts
Massachusetts contractors encounter recurring errors that delay schedules, increase costs, or trigger permit issues. Learning from these mistakes helps you avoid them on your Newton project.
Top five setup mistakes:
- Undersizing the chute length. Contractors measure from ground to the second floor and forget the roofline or parapet height. A chute that falls short of the top floor forces workers to carry debris down manually—defeating the purpose. Always add 2–3 feet for overhang clearance.
- Weak or misaligned anchors. If anchors are not torqued correctly or are installed on damaged masonry, the chute drifts laterally over time, creating rubbing against the building facade and eventual collapse. Inspect anchors weekly.
- Ignoring the building permit requirement. Newton Building Department issues stop-work orders if a chute is observed without a permit. Even minor projects require documentation. Call the permit desk before setup.
- Positioning the dumpster too close. Debris bounces or splashes out of the chute and onto the dumpster lid or adjacent property. Position the dumpster 4+ feet away, and use a deflector hood if available.
- No weather protection plan. Spring rains and winter snow load chutes unevenly. Heavy, wet debris also clogs couplings. Newton projects should include a tarp cover or weather-resistant coupling design.
For in-depth guidance on avoiding these errors, read common setup mistakes in our Massachusetts-specific guide.
Seasonal Maintenance for Newton Weather
Newton experiences all four seasons intensely. Winter snow and ice, spring rain, and summer heat each stress a debris chute system differently. A seasonal maintenance checklist keeps your chute safe and functional year-round.
Spring (March–May):
- Clear debris accumulation from coupling zones and couplers.
- Check anchor bolts for loosening due to freeze-thaw cycles. Re-torque if needed.
- Inspect the building facade around anchor points for water infiltration or damage caused by winter.
- Test discharge flow with a few test loads to confirm the chute is not partially clogged.
Summer (June–August):
- Monitor for UV degradation of chute material (polyethylene can become brittle in direct sun). Rotate or shield highly exposed sections if available.
- Confirm the dumpster remains positioned correctly; settling ground or heavy debris loading may shift it.
- During peak waste-generation periods, daily inspections catch overflow before it becomes a safety hazard or neighbor complaint.
Fall & Winter (September–February):
- Before heavy snow, secure all sections and anchors. Wind and ice load cause lateral stress.
- Clear snow and ice from the chute exterior and coupling zones after storms. Frozen material reduces discharge flow and can trap debris.
- Inspect for salt or deicer corrosion on galvanized hardware. Wipe and apply protective coating if rust appears.
- Keep the dumpster clear of ice to allow the chute to discharge freely.
For seasonal best practices specific to Massachusetts, see seasonal maintenance and plan your setup timing accordingly.
Rental vs. Purchase: Newton ROI Guidance
Many Newton contractors face the decision: rent for each project or buy a chute system? The answer depends on your project frequency, storage capacity, and financing options.
Rental is better if:
- You do 1–3 projects per year.
- You lack warehouse or outdoor storage for chute sections off-season.
- You prefer no maintenance responsibility or capital investment.
- Your projects vary significantly in building height (different section counts each time).
Ownership is better if:
- You run 6+ projects per year consistently.
- You have secure outdoor or warehouse storage.
- Your projects use similar chute configurations (reduces inventory complexity).
- You can finance the system at a reasonable cost (equipment leasing or purchase loans often run 3–5 years at 8–12% interest).
Calculate your specific break-even point by comparing weekly rental costs (e.g., $500/week × 50 weeks/year = $25,000/year) against a purchase price (typically $8,000–$18,000 depending on system length and materials) plus annual maintenance ($1,000–$2,000). If ownership ROI exceeds 3 years, rental remains the safer bet.
Use rental vs. purchase decisions to model scenarios with your actual project pipeline.
Local Notes: Newton Resources & Inspections
Newton, MA is a well-organized municipality with clear building and permitting pathways. Knowing the right contacts and resources speeds approval and reduces disputes.
Key Newton Building Department contacts:
- Permitting office: 617-796-1100 (main number; ask for the Permits & Inspections division). Call before starting any construction requiring debris chute.
- Building Inspector on duty: Schedule inspections 24–48 hours in advance. Newton typically requires a rough-framing or mid-construction inspection before drywall covers chute anchors.
- Zoning appeals (if needed): Newton’s Board of Appeals meets monthly. If your chute placement conflicts with setback or encroachment rules, file an appeal early.
Useful Massachusetts and Newton resources:
- Massachusetts BuildSafe — state-level guidance on construction codes and best practices.
- Newton’s official municipal website (newtonma.gov) includes zoning bylaws and the current Building Code amendments.
- EPA construction and demolition debris guidelines — federally mandated recycling and waste-diversion requirements.
Neighboring towns with similar practices: If you work in nearby towns like Norwood, Waltham, or Brookline, many permitting and safety standards align with Newton’s. Familiarity with one town simplifies multi-town project management.
Frequently Asked Questions
Can I install a debris chute without a Newton Building Permit?
No. Newton requires a construction permit for any renovation project generating construction waste, and the permit application must identify how debris will be managed. Installing a chute without a permit can result in a stop-work order, fines, and delays. The permit process typically takes 1–2 weeks. Apply early to avoid schedule impacts.
How long does a typical debris chute rental last on a Newton renovation?
Most residential renovations in Newton last 4–10 weeks, depending on scope. Small kitchen or bathroom remodels (4–6 weeks) use shorter-term rentals. Whole-home renovations or multi-unit projects (8–14 weeks) benefit from month-to-month rental agreements, which often offer better rates than weekly pricing. Coordinate the rental end date with your final cleanup phase to minimize idle rental costs.
What is the difference between renting and buying a modular trash chute?
Rental shifts the capital and maintenance burden to the equipment company; you pay by the week or month and return the system when the project ends. Ownership requires upfront capital (typically $8,000–$18,000), ongoing maintenance, and storage between projects—but eliminates per-project fees if you run many projects. Modular vs. traditional systems compares both investment models and helps contractors pick the right approach.
Do I need to use a dumpster with the debris chute, or can I use other containers?
A standard 20 or 30-yard dumpster is the safest and most efficient option. Smaller bins or roll-off containers may fit under the chute spout but risk overflow, spillage, and spillage-related liability. Dumpsters are designed to contain debris safely and are accessible to waste haulers. If space is extremely tight, consult the chute supplier about alternative discharge designs or staging areas.
What happens if the chute gets clogged with debris during a Newton project?
Clogs commonly occur with drywall dust, insulation, or oversized plaster chunks. Stop loading immediately; do not force material down. Disassemble the affected section (usually the lowest one near the dumpster) and hand-clear the obstruction. Inspect couplings for damage. If a coupling is bent or cracked, replace it before resuming operations. Regular maintenance—clearing coupling zones and avoiding large, unbroken pieces—prevents most clogs.
Are there height or weight restrictions for debris chutes in Newton?
Newton Building Code does not impose specific height limits, but practical constraints apply: buildings taller than 5 stories may require additional engineering or structural review. Weight-per-section limits vary by system (typically 500–800 lbs per section); exceeding these causes structural failure. Distributed loading (multiple smaller loads rather than one dense load) extends system life and safety margins.
Can I use a debris chute for projects outside Newton, like nearby towns?
Yes. Once your rental or owned chute is set up in Newton, you can move it for neighboring projects (Norwood, Brookline, Waltham, etc.). Newton’s permitting practices align closely with nearby suburbs, so the same safety and installation standards apply. Plan transport logistics in advance; moving a chute system takes 1–2 days and incurs labor or delivery costs.
Ready to Set Up Your Newton Debris Chute?
A well-planned debris chute system is a competitive advantage on every Newton renovation. It protects your crew, keeps neighbors happy, satisfies Building Department inspectors, and accelerates your project timeline.
Next steps:
- Contact Newton Building Department (617-796-1100) to confirm permit requirements for your specific project scope.
- Schedule a site visit with a debris chute rental company to measure building height, assess anchor points, and receive a quote. Most inspections are free and take 30–45 minutes.
- Decide whether to rent or buy based on your project frequency and ROI outlook.
- Schedule delivery 1 week before debris generation begins, allowing time for setup and a final Building Department inspection if required.
- Brief your crew on safe loading and chute operation before the first day of use.
- Conduct daily visual inspections and keep a log of chute condition, maintenance, and any issues.
EasyChute LLC serves contractors across Massachusetts with rental and purchase options tailored to project size and duration. Call +1-855-902-4883 or visit https://easychute.com to get a custom quote for your Newton project. We handle delivery, setup support, and seasonal maintenance guidance to keep your project on schedule and compliant with local codes.