

Index
- Why Debris Chutes Matter for Aging-in-Place Renovations
- Massachusetts Regulations & Permit Requirements
- Safety Considerations for Elderly Residents in the Home
- Pre-Installation Site Assessment & Planning
- Choosing the Right Chute Type for Aging-in-Place Work
- Step-by-Step Installation & Setup Process
- Debris Management & Recycling for Massachusetts Projects
- Protecting the Home Interior During Setup
- Cost Planning & Budgeting for 2026
- Common Setup Mistakes & How to Avoid Them
- Post-Project Cleanup & Chute Removal
- Frequently Asked Questions
- Massachusetts Local Compliance Resources
- Ready to Get Started
Why Debris Chutes Matter for Aging-in-Place Renovations
Aging-in-place renovations transform homes to support independent living for seniors—think accessible bathrooms, grab bars, ramps, accessible kitchens, and wider doorways. These projects generate substantial dust and debris, but the occupants are often the homeowners themselves, many with mobility challenges, respiratory sensitivity, or other health concerns. A well-managed debris chute system keeps dust, noise, and hazards confined and controlled.
In Massachusetts, where many single-family and multi-unit residential buildings cluster in urban and suburban neighborhoods, debris management isn’t just a convenience—it’s often a legal requirement. Uncontained debris can violate local codes, upset neighbors, and create liability for contractors. A professional debris chute setup demonstrates competence, reduces job-site injuries, and speeds project completion.
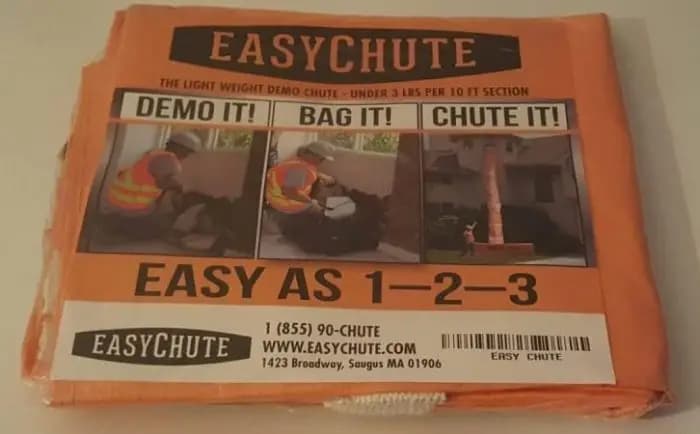
For aging-in-place specifically, the chute system must accommodate both the construction team’s safety and the ongoing presence of elderly or mobility-limited residents who remain in the home during work. This dual concern drives the specialized planning detailed below.
Massachusetts Regulations & Permit Requirements
Massachusetts does not have a single statewide debris-chute code, but municipalities enforce their own building codes, health ordinances, and demolition regulations. Before ordering a chute system, confirm requirements with your local building department.
Key Massachusetts Municipal Concerns
- Building Permit – Most cities require a general building permit for residential renovation. Debris management plans are often part of the permit application.
- Demolition/Alteration Permit – If work involves interior walls, flooring, or structural changes, a demolition or alteration permit is typical. This may require a Site Safety and Erosion Control Plan (SSECPL) in some jurisdictions.
- Occupancy During Construction – Massachusetts residential codes (following the IBC) explicitly allow occupied residential projects, but require dust control, access routes, and utility protection. A debris chute is a code-compliant dust-control measure.
- Neighboring Property Protection – Debris cannot migrate to adjacent properties. Some towns require temporary fencing or barriers; a chute system demonstrates containment compliance.
- Noise Hours – Check municipal ordinances. Most Massachusetts towns restrict construction noise before 7 a.m. or after 6 p.m. weekdays, and weekends. A chute system itself is quieter than open dumping but use it within permitted hours.
For Massachusetts and Rhode Island permit requirements, consult your local compliance checklist and neighboring-state guidance.
Worcester, Boston & Other Major Cities
Cities like Boston, Worcester, Springfield, and Cambridge have specific demolition and construction oversight boards. Contact your city’s Inspectional Services Department (ISD) or Building Department early in your project planning—do not assume permit approval is automatic.
Safety Considerations for Elderly Residents in the Home
The defining challenge of aging-in-place renovation is the presence of the homeowners during work. Elderly residents often have reduced mobility, hearing loss, cognitive considerations, or medical devices that require uninterrupted power. Your debris chute system must safeguard these vulnerable occupants.
Dust & Air Quality Control
Demolition and drywall work generate fine particulate matter, which is hazardous for seniors with COPD, asthma, or heart disease. A chute system confines dust within a focused path (instead of dispersing it throughout the home). Pair the chute with:
- Temporary HEPA filtration or negative-pressure barriers between work zones and living areas.
- Respiratory protection (N95 masks) for workers; provide clear communication to residents about air quality risk.
- Scheduled ventilation periods so residents can leave the premises during the dustiest phases (if possible).
Physical Access & Tripping Hazards
The chute itself and its ground-level apparatus (dumpster, staging area) occupy floor space. Ensure:
- Clear, unobstructed pathways for residents to reach bedrooms, bathrooms, and kitchen.
- No chute components crossing accessible routes; secure cables and bracing to walls or exterior.
- Grab bars and existing accessibility features remain accessible during the project.
Noise & Stress Management
Constant renovation noise can agitate seniors and interfere with medical monitoring or rest. Communicate daily schedules in advance. Consider senior-friendly renovation neighborhoods best-practice guidance on communication and scheduling.
Emergency Egress & Utility Integrity
Do not block or interrupt fire exits, emergency egress routes, or critical utilities (power, water, heat). Verify that chute installation does not compromise electrical systems, plumbing, or HVAC serving the resident areas. In winter, ensure heating capacity; in summer, verify AC remains functional.
Pre-Installation Site Assessment & Planning
Before the chute arrives, conduct a thorough site walk with the homeowner, your crew lead, and (ideally) a representative from the waste-removal provider.
Exterior Footprint & Ground-Level Constraints
- Dumpster placement: Identify a level, stable location at ground level near the building. Note overhead obstacles (power lines, cable, tree branches), underground utilities (gas, sewer, water), and neighbor proximity.
- Building wall selection: Choose a facade that minimizes impact to entry doors, windows, and neighboring properties. Avoid east/west walls in direct sun if the chute will be in place for weeks (material can degrade or become uncomfortable to touch).
- Anchor points: Inspect the exterior wall for existing brackets, balconies, or structural features to which the chute can attach. Older Massachusetts homes may have slate, brick, or wood siding; confirm the contractor has the right fasteners and can patch the wall post-project.
- Roof/upper-story access: If the chute extends above the second or third story, verify safe worker access (scaffolding, ladder safety, tie-off anchors). OSHA construction standards apply.
Interior Staging & Material Flow
- Drop locations: Identify which rooms/stories will feed debris into the chute. Measure doorways and hallways to ensure rubble carts and waste bags fit through access routes.
- Worker staging area: Designate a space where crew can sort recyclable materials (wood, metal, drywall) from general debris before feeding the chute. This improves recycling rates and reduces landfill volume.
- Utility isolations: Confirm the location of HVAC return-air grilles, exhaust dampers, and other building systems that might inadvertently ingest chute dust. Seal or protect them with temporary covers.
Photographic Record
Document the site before work begins: exterior walls, roof condition, neighboring structures, utilities, and landscaping. This protects you if post-project disputes arise about damage.
Choosing the Right Chute Type for Aging-in-Place Work
Not all debris chutes are equal. Aging-in-place renovations often involve moderate debris volume (not full demolition) and require minimal noise and vibration. Consider these options.
Modular Poly Chutes vs. Traditional Canvas
A modular chute vs. traditional chute comparison is essential for this project type:
- Modular poly (EasyChute standard): Lightweight polyethylene segments, stackable, safer for occupied homes (less vibration, quieter operation, easier to disassemble). Ideal for mid-scale renovations (1–4 stories, 500–5000 lbs/day debris).
- Traditional steel-frame canvas: Heavier, more durable for high-volume demolition, but noisier and more cumbersome to install/remove. Better for commercial demolition than residential aging-in-place.
For aging-in-place in Massachusetts residential settings, modular poly is typically the better choice: easier to install, less noise, and quicker to remove post-project.
Chute Section Sizing
Debris chutes come in standard 25-foot, 50-foot, and extended-section configurations. For a typical 2–3 story residential home, one or two 25-foot sections often suffice. If the home is a taller multi-unit building, stack modular sections to reach the top working level. Oversizing wastes cost; undersizing creates bottlenecks and safety risks.
Discharge Options
- Open discharge into dumpster: Standard. Debris falls directly into the bin; allows easy sorting at ground level.
- Bagging chutes: Debris falls into collection bags instead of an open dumpster. Useful if ground-level space is constrained or if you want to sort debris on-site before removal.
For aging-in-place, open discharge is faster and less prone to bag rupture or overflow.
Step-by-Step Installation & Setup Process
Follow a debris chute step-by-step setup workflow to ensure safe, code-compliant installation.
Phase 1: Pre-Delivery Coordination (2–3 Days Before)
- Confirm delivery date and time with the chute supplier. Notify neighbors and, if required by local code, the building department.
- Clear the dumpster location of vehicles, debris, and obstacles. Ensure 24-hour access so the supplier can position the dumpster and attach the chute discharge.
- Brief the homeowner on the installation timeline, noise expectations, and access restrictions during assembly (typically 2–4 hours).
- Verify all scaffolding or ladder tie-off points are in place if chute height exceeds one story.
Phase 2: Delivery & Assembly (Installation Day)
- Inspect delivered sections for damage (cracks, loose connectors, bent edges). Photograph any defects; report to supplier immediately if repairs are needed.
- Position the dumpster on level ground, away from power lines and drains.
- Attach the discharge extension to the dumpster opening, securing it per manufacturer instructions (bolts, pins, or clips).
- Install the first chute section above the dumpster, using temporary guy-wires to steady it while connectors are tightened.
- Stack additional sections vertically, ensuring each joint is fully bolted and sealed with the provided gaskets or tape. Misaligned joints cause debris to lodge and jam the system.
- Secure the top of the chute to wall anchor points or scaffolding with straps or bolts. The chute must not sway or lean more than 15° from vertical.
- Test debris flow with a few sample loads (scrap wood, light drywall pieces) before the team begins full-scale dumping.
Phase 3: Daily Operation & Maintenance
- Empty the dumpster when it reaches 3/4 capacity to prevent overflow.
- Inspect chute connections, gaskets, and anchor straps daily. Tighten any loose bolts before they become dangerous.
- Remove stuck debris promptly. Never reach into the chute; use a long pole or rope to dislodge material from the side.
- Monitor the ground-level area around the dumpster for spillage. Clean up daily to maintain site safety and local code compliance.
- If workers notice unusual noise, vibration, or material bouncing out of the chute sides, stop use immediately and inspect for damage.
Debris Management & Recycling for Massachusetts Projects
Massachusetts has robust waste-diversion goals. The state’s solid-waste regulations (310 CMR 19.000) encourage separation of construction waste for recycling, and many towns have local ordinances that require or incentivize waste diversion.
Recyclable Materials
Separate the following before (or after) chute delivery:
- Wood: Dimensional lumber, framing, trim. Can be reused, chipped, or sent to wood-recycling facilities.
- Metals: Steel, aluminum, copper (from wiring or fixtures). High scrap value; remove before chuting if possible.
- Drywall: In many markets, gypsum recyclers accept clean drywall scraps and process them into new wallboard or agricultural soil amendments.
- Plumbing/electrical components: Copper wire, brass fittings, and plastic piping can be segregated and sold or recycled separately.
Consult EPA construction and demolition debris facts for regional recycling rates and local facility directories.
On-Site Sorting Best Practice
Create a staging area (e.g., a corner of the driveway or garage) where crew can quickly sort recyclables from general debris before chuting. Use labeled bins or tarps:
- Clean wood → Pallet or stack separately.
- Metal scraps → 5-gallon bucket or small bin.
- General debris (mixed, non-recyclable) → Dumpster.
This reduces dumpster volume, lowers hauling costs, and demonstrates environmental responsibility to the homeowner.
Protecting the Home Interior During Setup
Debris chutes are designed to contain material, but dust, vibration, and accidental spillage can still affect the occupied home. Take extra precautions.
Dust Barriers
- Install plastic sheeting and tape around the chute entry point (the opening through which debris is fed). Create a small “airlock” vestibule so workers can enter/exit the work zone without opening the barrier repeatedly.
- Seal any gaps around the chute penetration into the exterior wall. Old mortar, cracks, or gaps allow dust to enter the wall cavity.
- Use portable HEPA air scrubbers in the work zone (not throughout the entire home) to capture airborne dust before it spreads.
Vibration & Noise Management
- Use vibration-isolating pads under the dumpster to dampen shock when heavy debris is dropped into it (especially important if the chute discharges directly into a metal dumpster).
- Inform the crew that ramming or forcing stuck material is unsafe and damaging. Use proper extraction techniques (see Phase 3 above).
- Schedule chute use during permitted daytime hours, not early morning or evening, to minimize noise impact on the elderly homeowner.
Flooring & Wall Protection
- Protect hardwood, tile, and finished flooring in the work zone with plywood or heavy kraft paper to prevent gouges and stains from debris cart wheels.
- Use corner guards and edge tape to protect door frames and hallway corners where carts will pivot.
- If the chute interior wall experiences friction or abrasion from debris, repair any damaged wall covering post-project (patching and paint).
Cost Planning & Budgeting for 2026
Debris chute costs vary by region, project duration, chute type, and debris volume. For aging-in-place renovations in Massachusetts, budget realistically.
Typical Cost Breakdown
- Rental (weekly rate, modular poly chute): $300–$600/week depending on chute height and section count. A 2-story renovation typically requires 1–2 weeks, so $300–$1,200 is common.
- Dumpster rental: $400–$800/week for a 10–20 cubic-yard bin. Most aging-in-place projects require 1–2 dumpsters per project.
- Delivery & pickup: $100–$300 round-trip.
- Disposal/landfill fees: Varies by ton and local landfill; typically $50–$150/ton of debris.
Total estimated cost for a 2–3 week aging-in-place renovation: $1,200–$2,500.
Cost-Saving Strategies
- Maximize recycling. Diverting wood, metal, and drywall to recyclers reduces dumpster volume and landfill costs by 20–40%.
- Right-size the chute. Do not rent a 4-story chute for a single-story bathroom. Choosing the correct height reduces rental cost and simplifies installation.
- Bundle services. Some waste-removal vendors offer combo deals: chute rental + dumpster rental + disposal in one contract, which can reduce total cost by 10–15%.
- Sequence debris removal. If the project extends over multiple months, rent the chute only for the active demolition phase (weeks 1–3), then remove it. Paying for a chute during framing or finishing is waste.
Use a debris chute cost estimate checklist to lock in quotes before signing the renovation contract.
Common Setup Mistakes & How to Avoid Them
Learning from other contractors’ errors saves time, money, and safety incidents. Review the common mistakes to avoid checklist before your project begins.
Mistake 1: Oversized or Undersized Chute
Problem: Renting a 4-story chute for a 2-story home wastes money and complicates assembly. Conversely, a chute that’s too short causes workers to drop debris from height, creating spillage and safety hazards.
Solution: Measure your highest working level (e.g., second-story roof for re-roofing work, or interior ceiling for bathroom demolition) and choose a chute that reaches 5–10 feet above that level. Standard 25-foot sections work for most 2–3 story residential jobs.
Mistake 2: Poor Anchor Points or Unstable Installation
Problem: A chute that sways, leans, or vibrates excessively can fail suddenly. Debris may bounce out sideways, hitting workers or damaging the home. Anchors pulling away from siding cause structural damage.
Solution: Inspect the exterior wall before installation. Use proper lag bolts or structural anchors rated for the anticipated load. If the wall is compromised (soft wood, cracked brick, asbestos siding), reinforce it or choose a different location. Do not rely on a single anchor point; use at least two per section.
Mistake 3: Neglecting Debris Flow Testing
Problem: After assembly, the first full load of debris jams inside the chute. The crew spends hours extracting it, wasting time and risking worker injury.
Solution: Run test debris (scrap wood, light drywall) through the chute before the team begins full-scale dumping. If material sticks, inspect joints for misalignment, debris lodged in connectors, or damaged sections. Replace or adjust before production begins.
Mistake 4: Ignoring Dust Control
Problem: The homeowner complains of excessive dust settling on furniture, electronics, and surfaces throughout the home. This is especially serious in aging-in-place work where respiratory health is a concern.
Solution: Seal the work-zone entry points with plastic and tape, use HEPA air scrubbers, and schedule chute use during times when the homeowner can leave or close themselves in a dust-sealed room. Communicate daily schedules in advance.
Mistake 5: Inadequate Dumpster Positioning
Problem: The dumpster is positioned on soft ground, slopes, or over buried utilities. It settles unevenly, the chute discharge becomes misaligned, and debris misses the bin entirely.
Solution: Ensure the dumpster is on level, compacted soil or asphalt. Call 811 (Massachusetts locating service) to mark underground utilities before dumpster delivery. Use plywood sheets under the dumpster legs if the ground is questionable.
Mistake 6: Skipping Permit & Code Review
Problem: The contractor assumes debris chutes don’t require permits. Later, the local building inspector orders the chute removed and cites the contractor for non-compliance.
Solution: Contact the local building department early. Most jurisdictions do not require a separate permit for a debris chute, but they may require notation in the building permit or construction management plan. Ask explicitly: “Do I need a separate permit or notification for a debris chute system?” Document the answer in writing.
Post-Project Cleanup & Chute Removal
The final phase is often rushed, but skipping thorough cleanup can leave the homeowner with stains, odors, or wall damage—and jeopardizes your professional reputation.
Debris Removal & Site Cleaning
- Ensure the dumpster is fully emptied and all debris is removed from the ground-level area. Sweep or pressure-wash the concrete/asphalt to remove dust and small fragments.
- Remove the chute per the supplier’s instructions (typically the reverse of assembly: unbolt sections from top to bottom, lower them carefully with straps, and stack them for pickup).
- Inspect the exterior wall where the chute was attached. Fill bolt holes with mortar or spackling, repaint if necessary, and remove any temporary bracing or straps.
Interior Cleanup
- Remove plastic sheeting and dust barriers from the work zone and chute penetrations.
- Vacuum all surfaces in the work area and adjacent hallways with a HEPA-filter vacuum to capture residual dust. Empty the vacuum bag outdoors.
- Wipe down light fixtures, walls, and other hard surfaces with a damp cloth.
- If the homeowner’s furniture or belongings were temporarily relocated, help return them to their original positions.
Final Walkthrough & Photographic Record
- Walk through the home with the homeowner, verifying that all debris is gone, walls are repaired, and no damage remains from the chute system.
- Take completion photos of the same areas you documented at the start, proving the site has been properly restored.
- Provide the homeowner with a copy of your waste-management documentation (dumpster receipts, recycling vouchers, disposal records) for their records and potential tax deductions.
Frequently Asked Questions
Do I need a permit for a debris chute in Massachusetts?
Permit requirements vary by municipality. Most Massachusetts towns do not require a separate debris-chute permit, but your building permit for the renovation may require a notation or construction-management plan that includes debris control. Contact your local building department’s Inspectional Services Division (ISD) at least 2 weeks before delivery and ask specifically about chute notification or permit requirements. Some towns (especially Boston and Cambridge) have stricter oversight—ask directly to avoid surprises.
Can the homeowner stay in the house while the chute is installed and in use?
Yes. Massachusetts residential codes allow occupied-home renovations. However, you must provide dust control, maintain emergency egress routes, and protect utilities. Brief the homeowner on the installation timeline and dust-management plan. Provide respiratory protection if needed, and schedule chute use during daytime hours when the homeowner can open windows or leave temporarily. Aging-in-place projects especially require clear communication about access, noise, and timing.
What’s the typical rental cost for a debris chute in Massachusetts?
Modular poly chute rental typically ranges from $300–$600/week, depending on height and section count. Most aging-in-place renovations use the chute for 1–3 weeks. Add dumpster rental ($400–$800/week) and disposal fees ($50–$150/ton). Total project cost is usually $1,200–$2,500. Get detailed quotes from 2–3 local waste-removal vendors to compare pricing and service terms.
Can I use a debris chute for a multi-unit building renovation in Massachusetts?
Yes, but verify code compliance. Multi-unit buildings may have stricter requirements for utility protection, emergency egress, and neighbor notification. Consult your local building department and, if the building is rent-controlled or subsidized, any local housing authority rules. Use a sturdy chute system (modular poly or traditional) appropriate to the debris load and height.
What materials can I recycle instead of throwing in the dumpster?
Wood (framing, trim), metals (copper wire, steel, aluminum), drywall, and many plumbing/electrical components can be recycled. Massachusetts has several construction-debris recycling facilities; consult the EPA website or your local waste-removal vendor for facility locations. Separating recyclables reduces dumpster volume and lowering your total waste-disposal cost by 20–40%, and demonstrates environmental stewardship to the homeowner.
How do I protect an elderly homeowner’s health during debris chute use?
Use dust barriers and HEPA air scrubbers in the work zone, seal the chute entry point, and provide respiratory protection (N95 masks) for workers. Schedule heavy demolition during times when the homeowner can leave or close themselves in a dust-sealed room with their own air scrubber. Communicate the daily schedule in advance. Consider staging work so the noisiest/dustiest phases are concentrated over fewer days, giving the homeowner predictable relief periods. See the senior-friendly renovation neighborhoods guide for additional protective strategies.
What do I do if debris gets stuck in the chute?
Stop work immediately. Do not reach into the chute or force material. Use a long pole or rope to gently dislodge the debris from the exterior chute surface, or disassemble the affected section(s) per manufacturer instructions. Jammed debris often indicates misaligned joints, a damaged section, or inappropriate debris (e.g., large, bulky items that don’t fit). After clearing, inspect the chute for damage and test with light debris before resuming full-scale use. If jams are frequent, the chute may be oversized for your debris type—consult the supplier.
Massachusetts Local Compliance Resources
Before your project begins, contact your town’s building department using the resources below:
- Massachusetts State Building Code: The state adopts the International Building Code (IBC) with amendments. Your local AHJ (Authority Having Jurisdiction) enforces it, so local codes may be stricter. Visit your town/city website and search “Building Department” or “Inspectional Services.”
- Massachusetts Environmental Policy Act (MEPA): Large demolition or commercial projects may require environmental review. Check if your project triggers MEPA thresholds at Mass.gov MEPA guidance.
- Recycling & Waste Disposal: Massachusetts Department of Environmental Protection (MassDEP) maintains a list of licensed waste handlers and recycling facilities. Visit MassDEP solid-waste facilities.
- Local Historic District or Architectural Review: If the home is in a historic district, your renovation (including exterior chute attachment) may require Architectural Review Board (ARB) approval. Check town zoning or historic-district ordinances.
- Utility Locating (811): Always call 811 (or contact Mass One-Call at 1-800-922-2111) at least 3 business days before dumpster delivery to mark underground gas, electric, water, and sewer lines. Free service; protects you from liability and accidental utility damage.
Ready to Get Started with Your Aging-in-Place Debris Chute Setup?
Aging-in-place renovations require careful attention to safety, compliance, and the comfort of your homeowner-occupants. A well-planned debris chute system—right-sized, properly anchored, and managed with dust and noise control in mind—is the foundation of a professional, code-compliant project.
Start with these steps:
- Contact your local building department (Inspectional Services Division) and confirm permit and notification requirements for debris chutes.
- Schedule a site visit with your debris chute supplier to assess exterior wall condition, dumpster placement, and anchor point integrity.
- Get cost quotes from 2–3 waste-removal vendors, comparing chute rental, dumpster rental, and disposal fees. Use a cost estimate checklist to lock in pricing.
- Develop a dust and noise management plan with the homeowner before work begins. Communicate daily schedules and protective measures.
- Review debris chute insurance requirements and confirm your general liability coverage includes debris management liability.
- Inspect the chute on delivery day and run test debris through it before the team begins full-scale dumping.
- Maintain the chute daily: empty the dumpster, tighten loose bolts, clear jams promptly, and monitor for signs of wear or misalignment.
- Plan post-project cleanup with the same rigor you applied to setup. Remove the chute, patch the wall, vacuum the home, and document completion with photos.
Aging-in-place renovations elevate quality of life for seniors; your professional debris-management system reinforces that mission and protects your reputation. For detailed product specifications, regional pricing, and scheduling, contact EasyChute directly at +1-855-902-4883 or visit our regional setup guides for neighboring-state insights.